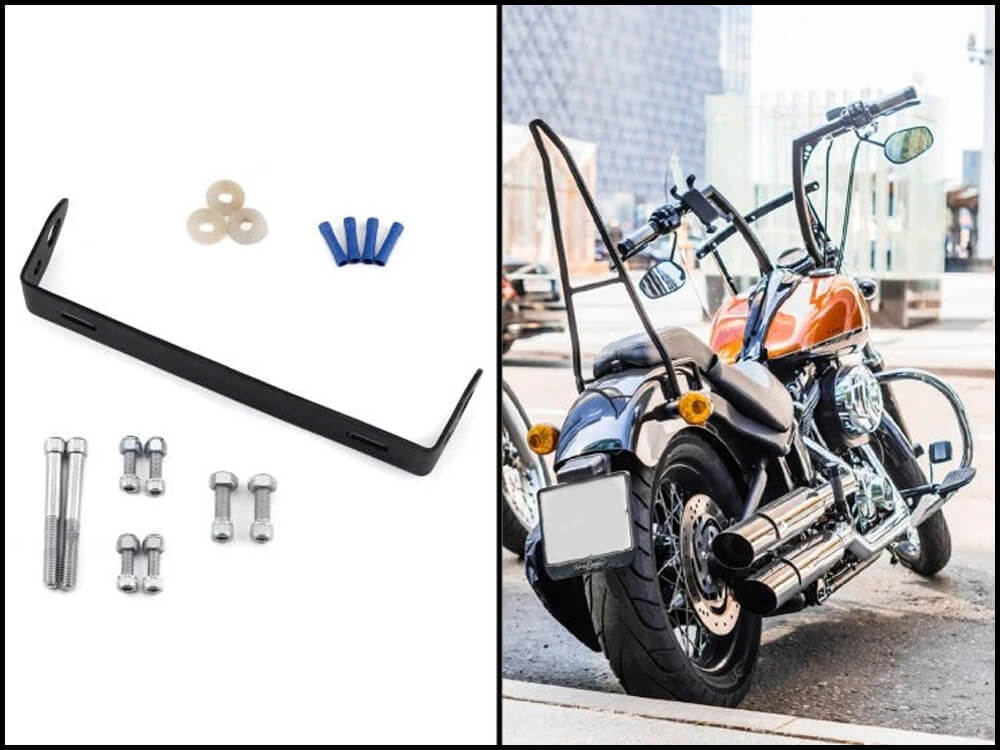
Many Harley owners enjoy customizing their motorcycles with aftermarket parts, such as sissy bars, crashbars, handlebars, and fairings. Motorcycle sissy bars help improve pillion comfort, provide back support, and complement your motorbike’s aesthetic appeal.
Many Harley riders also love to participate in Harley Owners Group events, motorcycle rallies, tours, and camping trips. Whether riding solo or with a passenger, Harley owners can use sissy bars to increase storage space and make their cruisers travel-ready.
Harley motorcycle sissy bars come with hardware kits to help with installation. However, the turn signal brackets mounted on fender supports often get in the way of installation, especially if you are mounting a detachable sissy bar. Riders have to relocate the turn signals before mounting sissy bars on Harley Davidson motorcycles.
If you need to purchase a rear turn signal relocation kit, you can get one online or go to a dealership.
This article will help riders looking to install a quick-release sissy bar on their Harley Davidson motorcycles without relocating the turn signals.
Table of Content
1. What is Harley Davidson Rear Turn Signal Relocation Kit?

On Harley Davidson models, the rear turn signals are mounted to the sides, usually on the rear fender strut. Since the rear fender strut is the best place to mount rigid or detachable Harley sissy bars and saddlebags, riders may need to relocate the turn signals to the license plate bracket.
To help with installing sissy bars and motorcycle luggage, Harley Davidson sells rear turn signal relocation kits that allow you to mount the turn signals on the license plate bracket. However, this process requires getting professional help or visiting a mechanic.
2. Why is it Necessary to Remove Turn Signals During Sissy Bar Installation?
The turn signal mount has a widened design that gives it a distinct style. Despite its aesthetic appeal, the turn signal mount keeps the quick disconnect system from fitting on the docking points. The turn signal relocation kit helps free up space on the fender supports, making it possible to reliably secure a sissy bar.
3. Benefits of Installing a Sissy Bar Without Relocating the Turn Signals
Removing and relocating the rear turn signals can be a nuisance for riders planning to customize their Harley Davidson cruiser. However, the bracket grinding trick has the following benefits:
- Can conduct the installation by yourself
- Do not need to visit a mechanic
- Do not need to remove the rear fender when relocating the rear turn signals
- Do not need to buy a Harley Davidson rear turn signal relocation kit
4. Tools Required to Install Quick-Release Sissy Bars Without Relocating the Turn Signals
| Tools | Purpose |
|---|---|
| Star Socket Wrench | Loosen the Turn Signal Docking Hardware |
| Sissy Bar Docking Kit | Bolts and Washers Used to Mount the Sissy Bars on the Docking Points |
| Loctite Bolt Thread Locker | Tighten and Secure the Sissy Bar Mounting Bolts |
| Rotary Grinder Tool | Preferably Dremel 4000 Multi-Tool Kit to Handle Heavy-Duty Work |
| Small Metal Cutting Disc | Can Be Used on Rotary Grinder Machine Offers an Accurate Cut Finish |
| Electric Power Supply | Power Rotary Grinder |
| Safety Gear | Protect Face Eyes, & Hands When Grinding |
5. Step-By-Step Installation Guide
Caution Note: Before using this installation guide, check whether the sissy bar has an extended plate that may prevent it from sliding over the rear docking point(s) near the turn signals. Using this installation guide for detachable sissy bars designed to fit right on may cause the sissy bars to become damaged.
Check the Shape of the Turn Signal Docking Bolt

Harley Davidson uses star bolts or button head Torx bolts. Make sure to check the bolt heads on your Harley Davidson motorcycle before purchasing wrenches. Usually, Torx star wrenches work best to remove Harley’s fender mounting bolts and the docking hardware supplied with the quick release detachable sissy bars.
Locate the Docking Points on Rear Fender Strut

Locate the mounting bolts on the rear fender strut and remove them using a star socket wrench. You need four docking points in front of the turn signal bracket on the rear fender strut to install the detachable sissy bar.
Replace Turn Signal Mounting Hardware with Sissy Bar Mounting Kit

Once you remove the fender mounting bolts, install the sissy bar’s docking hardware by fitting them into the holes on the fender strut.
Next, remove the reflector badge from the fender using a heated gun and a microfilament wire. Clean off any sticky residue with an adhesive remover. It is best to remove reflectors to create a clean base. However, you can also install the quick-release sissy bar with the reflectors intact.
Apply Loctite Thread Locker on Bolts

Before inserting the bolts, check for a loctite thread locker on the bolts. If you have purchased your sissy bar from a Harley dealership or a reliable motorcycle parts brand like Viking Bags, then the hardware will include loctite threads. If the sissy bar mounting hardware is lacking in loctite, simply apply a few drops from the bottle of medium strength loctite. You can also check for instructions on the installation guide to get the right type and amount of loctite thread locker.


Check the Size and Placement of Washers
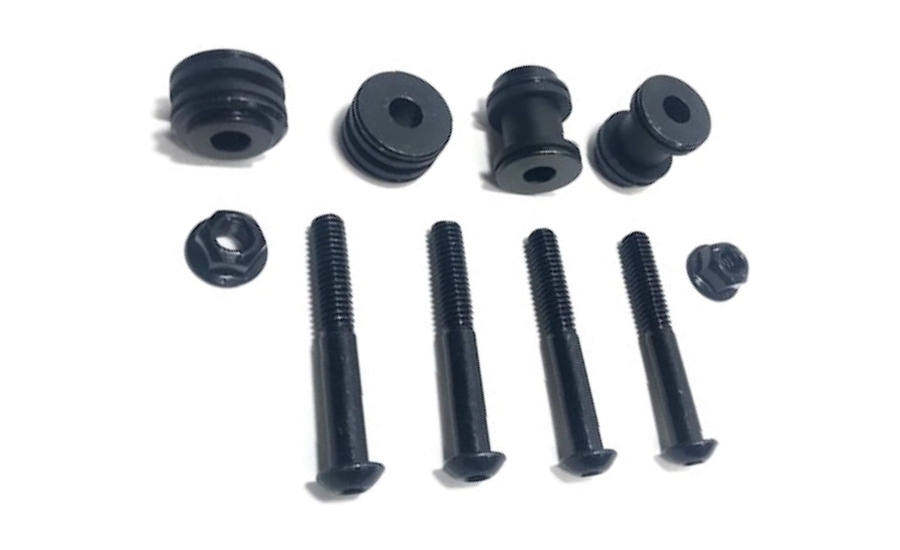
The smaller and wider washers are fitted at the front, while the larger docking washers are placed along the rear.
Torque the Bolt
Follow the instructions in the installation manual as you torque the bolt. One of the most common bolt docking mistakes is to over-torque a bolt. Over-torquing wears out a bolt faster, causing stripped threads, and can result in the sissy bars becoming loose during motorcycle rides. The recommended torque to apply when fastening bolts should be between 21-27 ft-lbs or 28-37 Nm, but check the instruction manual for reference to avoid exceeding the torque limit.
Mark the Removable Areas on the Sissy Bar’s Detachable Plates

Once the docking hardware is in place, take the quick-release sissy bars and mark the extra piece on the back of the detachable plates as shown in the image. Do not grind the locking cams as any damage to them could result in a faulty sissy bar installation. The removable piece should be about 0.4 in or 9.5 mm in length. Start small and check for the fit in between the cutting sessions.
Start the Grinding Process
Use a small cutting disc and a rotary grinder tool to slice the marked removable piece. Make sure you have a heavy-duty rotary grinder capable of cutting metal with precision. The cutting process will be slow, so take your time and the cutting disc will eventually cut through the metal plate.
Safety Reminder
Before operating this machinery, put on your safety glasses, a face shield, and gloves.
Do Not Cut the Locking Cams

Be careful as you use the rotary grinder. Only cut the metal sheet behind the locking cams on the detachable plates, not the locking cams themselves.
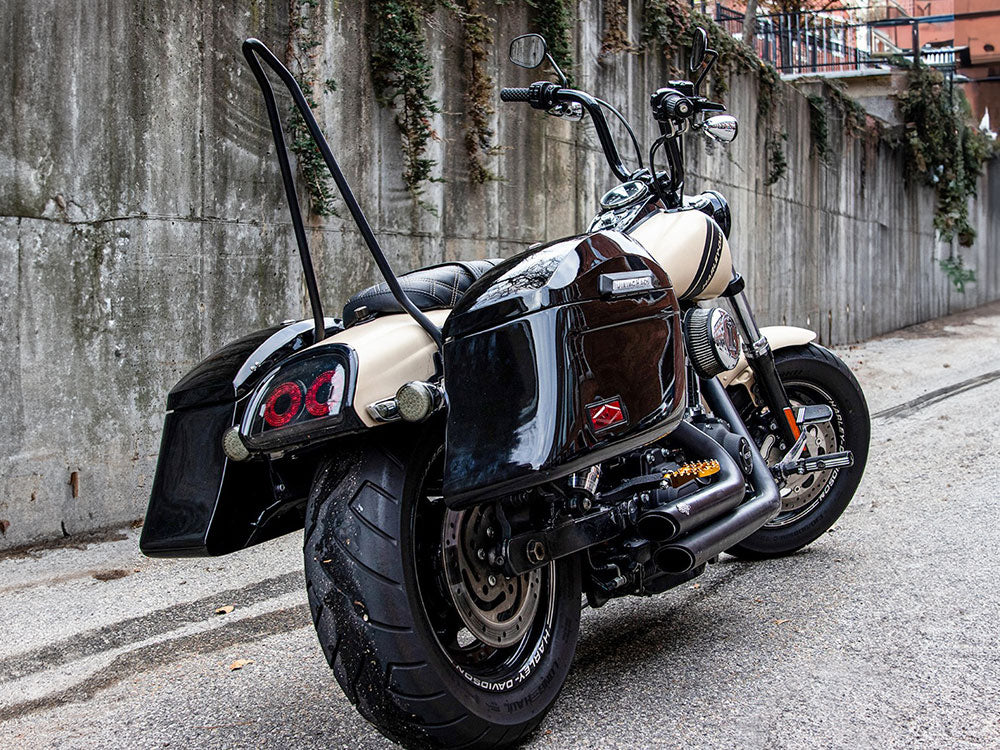
Mount the Quick-Release Detachable Sissy Bars
Take your sissy bar and place it on the docking points. First, slide the front end of the latch system, then slowly slide the rear end over to the rear docking point. Press lightly till you hear a click; the click will indicate the bar is secure.
Paint the Damaged Area on the Turn Signals for a Clean Finish
Once your sissy bar is secure, you can apply a few coats of paint over the chipped paint or scratches on the fender strut and rear turn signal brackets if you wish to hide them.
Mount the Sissy Bar Backrest
To mount the sissy bar pad or backest, mount the docking hardware on the docking points and the backrest support plate.
6. Safety Tips
- Before installing, make sure you are in a clean and open space with nothing on the floor.
- Put flammable materials away in a safe place that is out of the way. When you use a grinder to cut the sissy bar’s detachable plates, small metal particles and hot sparks may be ejected that could cause severe injury, damage the goods stored in the garage, and cause flammable substances like gasoline, brake fluids, motor oil, etc. combusting.
- When using the grinder, wear safety gear like goggles, face shields, gloves, boots, and hearing protection.
- If you feel unsafe using the rotary grinder yourself, seek professional help to avoid damaging yourself or your detachable Harley sissy bars.
7. List of Harley Davidson Motorcycles Compatible with the Cutting Technique
Riders can use this sissy bar installation method on almost all Harley Davidson Softail models. This method can also be used for a couple of Harley Dynas. However, none of the Harley Davidson Sportsters feature two docking points on the rear fender strut to support this sissy bar installation. Luckily, Harley Sportster features a sissy bar docking point behind the rear turn signals, allowing the installation without any relocation.
| Harley Softail | Harley Dyna |
|---|---|
| Harley Softail Fat Boy 114 | Harley Dyna Fat Bob |
| Harley Fat Boy Lo (Older Models) | Harley Dyna Switchback |
| Harley Softail Deluxe | |
| Harley Softail Slim | |
| Harley Softail Standard | |
| Harley Softail Street Bob | |
| Harley Softail Low Rider S | |
| Harley Softail Fat Bob 114 | |
| Harley Softail Sport Glide | |
| Harley Softail Springer |
8. List of Harley Davidson Motorcycles Not Compatible with the Cutting Technique
The cutting technique will not work on Harley motorcycles that only feature a single docking point on the rear fender. It is also not needed in most cases. Listed below are the Harley Davidson models not compatible with this cutting technique:
| Harley Davidson Softail | Harley Davidson Dyna | Harley Davidson Sportster |
|---|---|---|
| Harley Softail Breakout | Harley Dyna Street Bob | Harley Sportster Forty Eight |
| Harley Softail FXDR 114 | Harley Dyna Low Rider | Harley Sportster Super Low |
| Harley Davidson Softail Fat Boy Lo (Latest Models) | Harley Dyna Wide Glide | Harley Sportster Iron 883 |
| Harley Softail Custom | Harley Dyna Super Glide | Harley Sportster Iron 1200 |
| Harley Softail Night Train | Harley Sportster Seventy Two | |
| Harley Heritage Softail Heritage Classic | Harley Roadster | |
| Harley Sportster 1200 Nightster | ||
| Harley Sportster 1200 Custom |
9. Takeaway
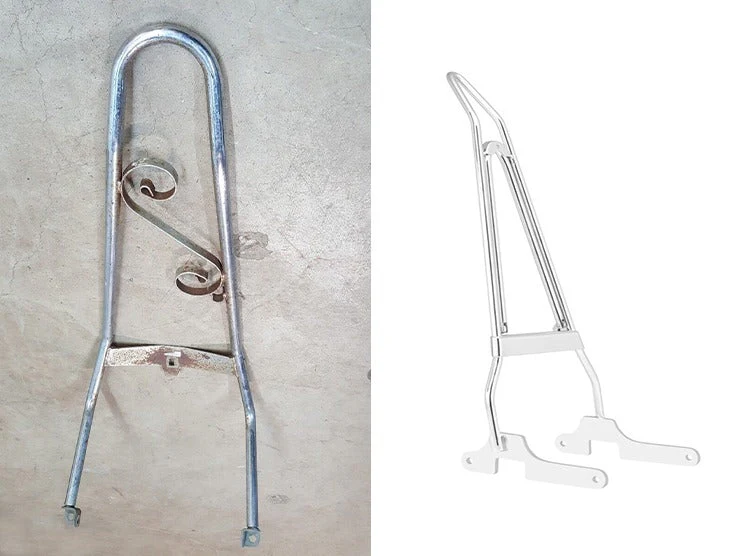
Sissy bars can increase a motorcycle’s versatility, including Harley Davidson models. The only problem with installing detachable sissy bars on Harley motorcycles is the position of their rear turn signals.
The installation method covered in this article works best with Harley Davidson Softail models, having saved many Harley owners a trip to a dealership or a mechanic. Before you cut the removable piece on the detachable plates, check to see whether the rear fender strut has two docking points on either side and if the turn signals obstruct the installation. Alternatively, you can install a rigid mount Harley sissy bar on your motorcycle.
Popular Collections


Leave a comment
All comments are moderated before being published.
This site is protected by hCaptcha and the hCaptcha Privacy Policy and Terms of Service apply.