Table of Content
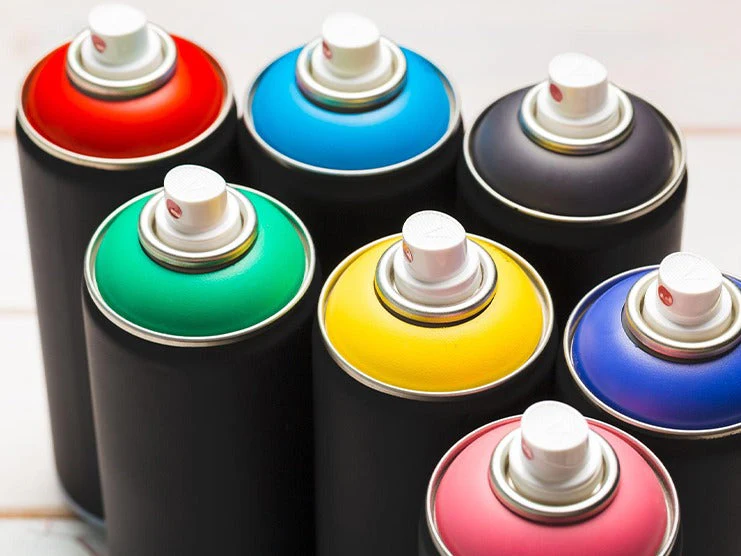
If you are not a professional painter and do not own a spray gun and air compressor, do not worry. You can still paint your motorcycle with spray cans. Spray cans are best if you want to learn how to paint a motorcycle. The instructions on how to use a spray can is listed on the sides of spray cans, making them beginner-friendly. Read this article to learn how to paint a motorcycle with spray cans.
Also Read: HOW TO PAINT A MOTORCYCLE FRAME
1. How to Paint a Motorcycle with Spray Cans
Before learning how to paint a motorcycle with spray cans, you must first learn about primer and clear glamour:
1.1 Primer
The primer is a chemical applied to surfaces before the coat of paint. It causes the surface to become more adhesive to ensure the paint sticks better. If you are painting metal motorcycle parts, etch primer offers a better finish. Meanwhile, to paint plastic motorcycle parts, you will need plastic primer. Primers are also available in spray cans.
1.2 Clear Glamor
The clear glamor is a mixture of two chemicals that create a glossy finish. The clear coats are applied after the coats of paint to ensure a smooth finish. The clear glamor is also available in spray cans.
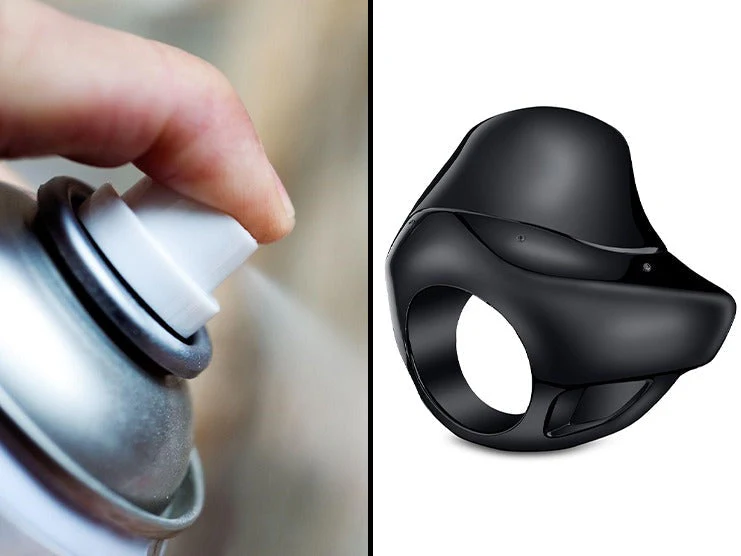
How to Activate the Clear Glamor Spray Can
If you are using a clear glamor spray can, you will need to activate and mix the chemicals inside. The clear glamor spray can contains two chemicals that are separated. However, you can activate the spray can by removing the red button on the cap and installing it at the bottom of the can. Press the button and shake the can well for two minutes. The shelf life of clear glamor tends to decrease by about 24 hours after it is activated.
Note: The clear glamor contains isocyanate, a harmful chemical that can damage your skin. Make sure to cover your skin by wearing long-sleeved clothes, gloves, a respirator, and a cap to avoid contact with the chemical. When you finish painting, dump the equipment in a safe place and don’t reuse it until properly washed.
Also Read: HOW TO PAINT PLASTIC MOTORCYCLE PARTS
1.3 Equipment Required to Paint a Motorcycle with Spray Cans
- Spray paint cans
- Etch primer (to paint metal parts)
- Plastic primer (to paint plastic parts)
- Clear coat
- Sandpaper
- Glazing and spot putty
- Plastic blade scrapper
- Plastic plate
- Masking tape
- Sanding block
- Sanding machine
- Microfiber cloth
- Tack cloth
- Air blower
1.4 Personal Protective Equipment (PPE)
Spray paints contain harmful chemicals that must not be inhaled or come in contact with your skin. To be safe while painting, wear the following:
- Respirator
- Gloves
- Mask
- Long-sleeved clothes
- Cap
- Goggles


1.5 Prepare the Motorcycle for Painting with Spray Cans
Disassemble the Motorcycle Parts
You must remove certain motorcycle parts to ensure better coverage and a smooth finish when painting the surface. Make sure to remove them safely without scratching them.
Remove the Current Paint
To ensure a better finish, remove the current paint on the motorcycle parts you want to customize. You can remove paint by using a paint stripper. When purchasing a paint stripper, make sure it is compatible with the type of model you own. Make sure to read the instructions listed on a paint stripper can before using it. Keep in mind that removing paint differs between metal and plastic parts.
Spray paint stripper on the motorcycle parts and wait at least 15-20 minutes to dry. If It reacts with the paint and results in bubbles being created, they can be easily removed by scrubbing the surface with sandpaper.
If you want to learn how to remove paint and prepare a motorcycle gas tank for painting, click the link to the article below.
Also Read: HOW TO PAINT A MOTORCYCLE GAS TANK
Fix Any Damage on the Motorcycle Parts
If there are scratches, dents, welding marks, and pinholes on the motorcycle parts, you must fix them before painting to ensure a clean look. Before applying the glazing and spot putty, sand down the motorcycle parts and clean them using a microfiber cloth.
Take a plastic plate and pour some glazing and spot putty on it. Mix it well using a plastic blade scraper. Apply the spot putty on the imperfections using the blade scraper until the surface is smooth. It should harden after 30 minutes.
Sand the Motorcycle Parts
Sand the motorcycle parts using 150-grit sandpaper. Keep sanding the spot putty until the surface of the parts becomes smooth and level. You can also use a sanding machine to save time and effort.
To sand the curves and high spots on the surface, use sanding blocks of different shapes. After sanding the motorcycle parts, use an air blower to remove any sand dust.
Cover Remaining Parts with Masking Tape
The parts that do not require painting must be covered with masking tape.
1.6 Prepare a Work Area
If you are painting your motorcycle at home, make sure to prepare a separate work area to restrict the chemicals from your paint products from traveling. Take four plastic sheets and hang them from the ceiling to cover the space. You can also install a railing to hang your motorcycle parts with chains.
1.7 Spray on the Primer Coat
After removing the dust from the motorcycle parts, apply two coats of primer. Wait at least 5-10 minutes between applying coats. The primer can take at least 45-60 minutes to dry depending on the temperature. Read the instructions on the primer spray can for better results.
1.8 Spray on the Paint
Using the spray cans, apply 3-4 coats of paint to ensure better coverage. Wait at least 10-15 minutes between applying coats. You can use a fan to accelerate drying. While painting, move your arm uniformly in one direction to avoid double layers or uneven spots.
1.9 Spray on the Clear Coat
Before you apply the clear coat, wipe down the motorcycle parts using a tack cloth to remove any remaining dust. Apply at least three clear coats to ensure a fine glossy finish. Wait between applying each coat to ensure they all dry first. Read the instructions on the clear glamor spray can to confirm how long it takes to dry. When the clear coat dries, remove the masking tape and reassemble the motorcycle parts.
Also Read: HOW MUCH DOES A MOTORCYCLE PAINT JOB COST?
2. Final Words
Painting a motorcycle with spray cans is an easy way to customize it. If you are new to motorcycling, you can paint your motorcycle with spray cans by following the step-by-step procedure mentioned in this article. Make sure to wear personal protective equipment (PPE) before you start painting as spray cans can be volatile and include hazardous chemicals. Read the instructions on the spray cans for better results as products from different brands may work differently. If you want to further improve your motorcycle’s look, you can install sissy bars, fairings, crash bars, sissy bar pads, and saddlebags available at Viking Bags.
Popular Collections


Leave a comment
All comments are moderated before being published.
This site is protected by hCaptcha and the hCaptcha Privacy Policy and Terms of Service apply.