Table of Content
A fuel tank is the most important part of a motorcycle. If you are looking to restore or customize an old motorcycle, repainting the gas tank can give it a completely new look. It is difficult to paint a motorcycle gas tank if you are new to customizing motorcycles since it requires procedures with multiple steps and a high level of expertise. If you cannot afford to hire a professional motorcycle painter, read this article to learn how to paint a motorcycle gas tank.
1. How to Paint a Motorcycle Gas Tank

1.1 Equipment Required To Paint a Motorcycle Gas Tank
You will need the following equipment to paint a motorcycle gas tank:
- Rubber gloves
- Respirator
- Paint brushes with nylon bristles
- Paint scrapers
- Metal container
- Degreaser
- Microfiber cloth
- Sanding papers of different grits
- Sanding blocks
- Glazing and spot putty
- Plastic scraper
- Plastic plate or plexiglass
- Masking tape
- Paint remover/thinner
- Etch primer
- Tack cloth
- Paint
- Clear coat
- Dual-action polisher
- Compound
- Microfiber pad
- Polish
- Foam pad
1.2 How to Remove Paint from a Motorcycle Gas Tank
Equipment Required to Remove Paint from a Motorcycle Gas Tank
To remove paint from a motorcycle gas tank, you will need the following:
- Rubber gloves
- Paint remover
- Paint brushes
- Scrappers
- Metal container
- Degreaser
- Microfiber cloth
Procedure
To remove paint from a motorcycle gas tank, you will first need to remove the gas tank from the motorcycle, drain all the fuel in the tank, and safely remove all the badges, decals, and warning stickers pasted on it. If you are unsure about how to safely remove the warning stickers on the motorcycle gas tank without scratching it, read the article below.
- Take the paint remover, open it, and pour it into a metal container.
- Using a nylon bristle paintbrush, start applying the paint remover onto the gas tank.
- Make sure to apply a thick coat of paint remover.
- After applying a thick coat of paint remover, wait at least half an hour.
- It can take longer to apply depending on how many previous coats of paint were on your motorcycle gas tank.
- After half an hour, you will notice bubbles forming on the gas tank.
- Remove the paint off a gas tank by using the paint scrapper
- The paint will start to come off more easily. However, to ensure complete paint removal from the edges, corners, and underneath the gas tank cap, you will have to repeat this process a few times.
- After the paint is completely removed from the gas tank, apply the degreaser and wipe the paint stains off with a microfiber cloth
- Then use a clean and dry microfiber cloth to clean the gas tank.
1.3 How to Prep a Motorcycle Gas Tank for Paint

After removing the previous coat of paint from the motorcycle gas tank, prepare it for a new coat of paint. Remove the dents and rust from the gas tank to ensure a better finish and look. To remove any imperfections on the gas tank, including scratches, welding marks, and pinholes, use glazing and spot putty. Before applying the spot putty, make sure to sand the gas tank down to remove any dust and debris. Use 80-grit sandpaper to ensure better adhesion between the spot putty and the metal surface.
You can also use 220-grit sandpaper to ensure a better finish for the gas tank. It will give the gas tank a consistent surface finish to ensure the paint is applied evenly. After sanding the gas tank, wipe it off using a microfiber cloth to remove any remaining dust.
Also Read: HOW TO PREVENT RUST BUILDUP IN A FUEL TANK
1.4 Fixing the Imperfections on the Motorcycle Gas Tank with Spot Putty
Take a plastic plate or plexiglass and pour some spot putty on it to ensure it mixes properly. Do not use a piece of cardboard to mix the spot putty since it could result in poor adhesion and the cardboard could soak the solvents in the spot putty, causing it to harden.
Apply the spot putty onto any imperfections on the gas tank using a plastic scraper. Make sure any pinholes and small dents are filled with spot putty, then wait for at least half an hour for it to dry.
Use 150-grit sandpaper to sand the spot putty. Do not hold the sandpaper in your hands as it will cause tiny dents and waves due to the force applied by your fingers. Instead, use a sanding block to hold the sandpaper and ensure the surface is smoothed evenly. Then use 400-grit sandpaper to create a smooth and flat metal surface. After sanding the spot putty, make sure to wipe the dust off the gas tank.
1.5 Prepare the Paint Booth
If you are painting your motorcycle gas tank at home or in your garage, cover the space with plastic sheets from the ceiling to the floor. Wear a respirator and gloves, and hang the gas tank from the ceiling using a rail or a clamp.
1.6 Using the Etch Primer
Before spraying on the etch primer, make sure to cover all the parts and surfaces that do not require painting with masking tape, especially the area around the gas tank cap. Then spray the etch primer all over the gas tank. An etch primer is an acidic chemical that reacts to the metal and gives it a rough surface to improve adhesion between the metal surfaces and paint.
1.7 Wipe the Dust Off the Motorcycle Gas Tank
Blow the dust off the motorcycle gas tank using an air blower, then clean the gas tank with a tack cloth before painting the gas tank.
Also Read: HOW TO CLEAN A MOTORCYCLE GAS TANK
1.8 Using the Filling Primer
Apply at least two thin coats of filling primer to ensure there are no tiny pinholes or imperfections left on the gas tank. After the filling primer dries, use 600-grit sandpaper to sand the gas tank to give it a smoother surface for a better finish.
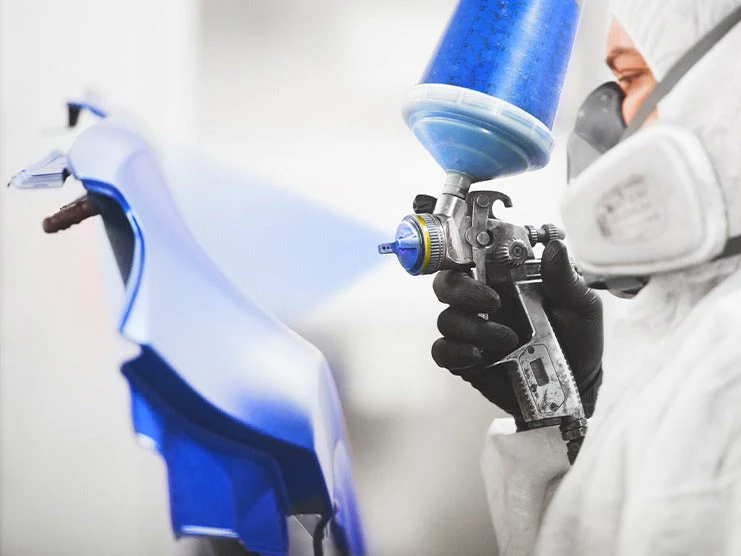
1.9 Paint the Motorcycle Gas Tank
Apply the base coat using spray paint. Apply at least three to four coats of paint before applying the clear coat for a better finish. To remove any blushing effect on the gas tank, soak a 1500-grit sandpaper. Take the sandpaper out and put it under the sand block to sand the gas tank before applying the clear coat.
1.10 Apply the Clear Coat

To apply the clear coat, make sure to wipe off any dust and moisture on the gas tank with a tack cloth. The clear coat spray adds the final glossy touch and includes the chemical isocyanate, which can damage your skin. Make sure to cover your face and hands by wearing long-sleeve clothes, gloves, a mask, and a respirator. After applying the clear coat spray on the gas tank, wait for at least seven minutes for it dry before moving on to the next step.
1.11 Polishing the Gas Tank for a Glass-Like Finish
Take 1500-grit sandpaper and soak it in water. Use wet sandpaper to sand the gas tank. Afterward, take the dual-action polisher, fix the microfiber pad, and pour some compound on the pad.
Polishing the surface with a microfiber pad soaked in the compound will help remove extra paint or run-on layers due to being coarser. Afterward, remove the microfiber pad and affix the foam pad onto the dual-action polisher. Put some polisher on the pad and polish the gas tank. The polisher helps give the gas tank a clear and glass-like finish by removing all micro scratches.
Also Read: HOW TO PAINT A MOTORCYCLE FRAME
Note: Make sure to check all over the gas tank from different angles with lighting in case you missed any imperfections.
2. Takeaway
Painting a motorcycle gas tank requires skill and effort. It is not as simple as painting other motorcycle parts as it requires following several steps and applying several coats of primer and paints. To paint a motorcycle gas tank, you will have to remove the previous coat of paint first for a fresh start. If your motorcycle gas tank is covered in scratches and dents, it will take longer to prep the gas tank for paint. If you are willing to paint your motorcycle gas tank by yourself, follow the steps above while taking the necessary precautions to stay safe.
Painting a motorcycle gas tank can completely transform the look of your motorcycle. If you want to customize your motorcycle, there are several aftermarket parts available at Viking Bags, including sissy bars, crash bars, fairings, handlebars, and sissy bar pads to improve comfort, safety, and performance. You can also make your motorcycle ideal for touring by installing saddlebags, motorcycle trunks, backpacks, and tank bags available at Viking Bags.


Leave a comment
All comments are moderated before being published.
This site is protected by hCaptcha and the hCaptcha Privacy Policy and Terms of Service apply.