Motorcycling without wearing a helmet can be dangerous. In the majority of motorcycle crashes, riders who weren’t wearing helmets sustained severe head injuries that caused brain trauma and/or death. In some U.S. states, it is mandatory to wear a helmet, while in other states, motorcyclists can choose whether they want to wear one or not. Frankly, no one wants to wear a helmet, but the trend of customizing a helmet has changed how many riders feel about wearing helmets. This is especially true for riders who cannot afford to customize their bikes with expensive paint jobs and aftermarket motorcycle parts.
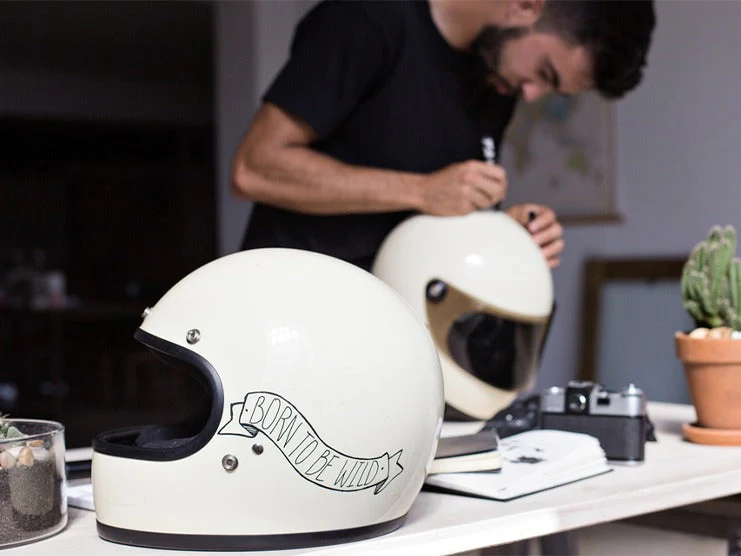
At first, many riders saw motorcycle helmets as hot and heavy nuisances. But over the years, custom helmets have become a new type of motorcycle style. To stand out in the crowd, riders often hire artists to paint their helmets. Those who cannot afford a professional painter spend hours in the market and online shops to find unique helmets that best suit their personalities. Those who like to show off their creativity tend to collect supplies and paint their motorcycle helmets at home.
In this article, you will learn to create a high-quality and stylish motorcycle helmet.
Also Read: 20 Custom Painted Motorcycle Helmet Ideas
Table of Content
1. Motorcycle Helmet Painting Methods
There are four ways to paint a motorcycle helmet using spray paint:
1.1 Method 1 - Less Detailed Paint Job
One of the easiest motorcycle helmet painting methods is to apply spray paint on a scuffed yet clean helmet.
| What You’ll Need |
|---|
| Masking Tape |
| screwdriver |
| Heat Gun |
| Adhesive Remover Spray |
| Scouring Pad |
| Denatured Alcohol |
| Clean Rags |
| Paper |
| Masking Tape |
| Razor Blade |
| Spray Paint |
Step 1 - Strip the Helmet
Remove the face shield, helmet straps, and vents. Unfasten the screws using a screwdriver. Use a heat gun to remove stickers from the helmet shell. Once the stickers come off, use an adhesive remover spray to clean the sticky residue from the helmet surface.
Step 2- Scuff the Surface
With a scouring pad, scuff the helmet until the entire surface loses its clear coat varnish and looks dull. Take your time performing this step as the paint will bond better with a well-scuffed surface and won’t peel off easily.
Step 3 - Clean the Helmet
Clean the dust or grime from the surface with a clean rag and a mild solvent. A denatured alcohol are best for cleaning.
Also Read: How to Clean Your Motorcycle Helmet
Step 4 - Cover the Face Shield Area
Use paper or plastic sheet and masking tape to cover the face shield area, bottom of the helmet, vents, and other sections you don’t want painted. Use a razor blade to trim the masking tape around the edges of the face shield area.
Step 5 - Begin Painting
Once your helmet is clean and masked, you can start painting it. The old paint will be the base coat for the new paint. Use spray paint to apply even coats on the helmet. Start spraying from the top of the helmet and move toward the bottom in a sweeping motion. Apply light coats of paint to keep it from dripping off the helmet. Runny paint layers dry to form thick irregular patches that do not look attractive at all. Try keeping the spray nozzle 7-10 inches from the helmet, so the paint air dries slightly before making contact with the surface.
Step 6 - Clear Coat & Assemble
If you want to give the helmet a new paint job, apply 2-3 layers of clear coat, let it dry, and then reassemble the helmet.
Step 7 - Add Design
Alternatively, you can also add a design or create a multi-color scheme by skipping Step 6 and applying masking tape, stickers, and stencils once the paint is dry.
Step 8 - Spray the Second Color & Clear Coat
Spray the second color on the helmet as in Step 5. Once the paint is adequately dry, remove the masking tape and stencils to reveal the design and the base color. Now apply the clear coat to protect the paint and design.
Step 9 - Unwrap the Helmet
Remove the masking tape and paper before reattaching the face shield, straps, and vents.
Quick Tip: Use different color combinations and stencil to come with personalized helmet design ideas.
1.2 Method 2 - Detailed Paint Job with Graphics
For this painting method, your motorcycle helmet should be already painted. Whether you want to change the paint job or keep the original paint job , scuff only the clear varnish over the paint to create custom artwork.
| What You’ll Need |
|---|
| Airbrush Paint |
| Airbrush/Spray Gun |
| SandPaper - 400 & 600 Grit |
| Clear Coat |
| Flexible Stencils (Paper or Plastic) |
| Painter’s Tape |
| Newspaper |
| Paper Towels |


Step 1 - Remove Accessories & Apply Painter’s Tape
Unfasten the screws to remove the padding, visor, and other accessories on the helmet. Apply tape over the parts of the helmet you don’t want painted. Also, cover the front area of the helmet with a cloth and put tape over it to prevent paint from getting inside the helmet.
Step 2 - Remove the Clear Coat
Spread a large plastic sheet on the table or the floor. Place the helmet on a stand. Wet sand the area that you want to paint with 400 grit sandpaper to remove the clear coat. Make sure you don’t cut through the clear coat or remove the color coat. After sanding with 400 grit sandpaper, use 600 grit sandpaper to get a smooth finish.
Step 3 - Cover the Sanded Area with a Newspaper
After sanding the clear coat, place a newspaper or paper towel over the sanded area to clean the mess.
Step 4 - Apply the Airbrush Paint
Use an airbrush or spray gun to paint the clean sanded surface, then leave it to dry for 10-15 minutes. Using the airbrush, create shapes, graphics, or scripts. If you are using multiple colors, airbrush one color at a time to avoid mixing them. Use paper stencils or plastic cutouts to get the intended design. Also, use a paper tape to affix the stencil in place before painting.
Step 5 - Apply Clear Coat
Once your design is complete, leave it to dry for 3-6 hours. If you want to draw another design, repeat the process. Once done, apply 2-3 thin layers of clever coat to finish the design and achieve a high glossy finish.
Step 6 - Put Your Helmet Together
Remove the tape from the helmet and reinstall all the attachments you removed earlier.
1.3 Method 3 - Color Shift Paint Job
Another great way to create a personalized helmet is by spray painting a color shift pattern, also referred to as chameleon paint.
| What You’ll Need |
|---|
| Color Shift Spray Paint |
| Rotating Spray Paint Stand |
| Adhesion Boosting Epoxy Bonding Primer |
| Black Base Color |
| Sanding Machine |
| Scouring Pad |
| Clear Coat |
| Mild Cleaner |
| Microfiber Cloth |
| Masking Tape |
| Newspaper |
| 400 Grit Sandpaper |
| Spot Putty |
Step 1 - Strip & Sand the Helmet
Remove the face shield, padding, straps, and vents from your helmet. With an electric sander, scuff the surface of the helmet to remove the clear coat. This step will also soften the pigments of the old paint. Cover the helmet’s inteior and face shield area with masking tape and paper. Place the helmet on a rotatable stand to start painting.
Step 2 - Apply Epoxy Primer
It is not necessary to apply epoxy primer; however, it will improve adhesion and ensure the paint bonds quickly with the surface. Hence, epoxy primer can improve the effect of chameleon paint. Spray a light coat of primer on the helmet using a sweeping motion, slowly working your way from side to side. Lastly, apply the primer at the back of the helmet. Leave the primer to dry for 2-3 hours.
Step 3 - Apply Spot Putty & Sand the Helmet
Apply spot putty to repair scratches, minor dents, and other damage. Next, dip 400 grit sandpaper in a cleaning solution and sand the helmet to remove excess body filler and create a smooth surface. Clean the mess with a damp cloth.
Step 4 - Apply the Black Coat
For color shift paint, it is best to apply a black coat. If applied directly on the primer or a lighter base coat, you will not get the desired chameleon color effect. Apply 1-2 coats of black spray paint in an even sweeping motion and leave it to dry for at least 3 hours.
Step 5 - Apply Color Shift Spray Paint
Apply 2-3 coats of color shift paint on your helmet. Thin coats will mix well and create an even layer of paint.
Step 6 - Apply Clear Coat
Complete the DIY paint project by spraying a clear coat and leaving the helmet to dry. Remove the masking tape and paper from the helmet and reattach all its accessories.
1.4 Method 4 - Two-Tone or Three-Tone Spray Paint
| What You’ll Need |
|---|
| Electric Sander |
| 400 Grit Sandpaper |
| Spray Paint - 2-3 Different Colors |
| Primer |
| Spot Putty |
| Masking Tape |
| Painter’s Tape |
| Paper |
| Filler/Spot Putty |
Step 1 - Clean and Sand the Helmet
Remove the shield, padding, and other accessories from the helmet. Clean off any dirt and use an electric sander to sand the surface.
Step 2 - Primer, Body Filler & More Sanding
Cover the areas you don’t want to be painted with masking tape. Next, spray a light even coat of bonding primer and leave it to dry. Once dry, apply body filler to cover the scratches. Wet 400 grit sandpaper and sand the helmet again to create a smooth surface.
Step 3 - Apply the Color Coat
Apply one coat of red spray paint (you can use your preferred color instead of red) from the front to the back of the helmet. Let it dry, then, apply painter’s tape on the helmet to create sections for other colors. If the red paint patch is wider than you prefer, then cover the colored patch you want to keep with paper and masking tape and apply the second color (metallic silver in this case) on either side to create a two-tone paint job. If you want a three-tone paint job, follow the same steps but use different colors for each side. For example, apply white paint on the right side, red paint in the middle, and blue paint on the left side of the helmet.
Step 4 - Apply Clear Coat
Once the paint is dry, spray the clear coat to seal the paint job and finish. Once dry, reattach all the accessories you removed from your helmet earlier.
| Caution |
|---|
| Always work in an open well-ventilated area to avoid getting paint dust in your respiratory system. Also, protect your eyes and hands by wearing goggles and gloves. Make sure that there are no children in your workspace. |
| Always store the leftover paint away from heat sources, electric sparks, and open flames. Lock the spray cans in a cool, dry cabinet away from direct sunlight. |
| Avoid painting in the sun or late in the evening. To achieve the best results, your workspace must have a certain level of humidity and temperature as specified in the instruction manual. |
2. Takeaway
Everyone who rides a motorcycle owns a helmet. If you never saw your motorcycle helmet as a way to express your creativity, try creating a custom design by using budget-friendly and time-efficient spray painting techniques. After you paint your helmet, you will never want to ride without it.
You can also share your artwork with other motorcycle enthusiasts on social media platforms. If your work receives recognition, you can start painting motorcycle helmets for some extra cash.
After you finish a paint job, your helmet will be exposed to the sun, rain, and dust. All of these elements will cause the paint to fade quickly if you don’t regularly maintain your helmet. Make sure you clean the helmet every week to prevent dirt build-up and micro scratches. Cleaning your helmet with wax every week can help maintain its shine and finish.
Also Read: Motorcycle Helmet Care Guide
Popular Collections


Leave a comment
All comments are moderated before being published.
This site is protected by hCaptcha and the hCaptcha Privacy Policy and Terms of Service apply.