A motorcycle fairing is a protective plastic cover mounted on the front forks, handlebars, or frame. Made of fiberglass or ABS plastic, a motorcycle fairing can improve a bike’s aerodynamics, engine efficiency, and mileage. Due to the unique style of motorcycle fairings, many riders get fairings for their sports bikes to improve their aesthetics only. While fairing is a popular accessory used to customize bikes, it can be customized itself. Whether your motorcycle comes with a stock fairing or you buy an aftermarket one, you can personalize it by painting it. To get the same finish as the original equipment manufacturer (OEM) fairing, it is best to paint your motorcycle fairing with a spray gun. This article focuses on ways you can paint a motorcycle fairing with a spray gun.
Table of Content
1. Preparing the Fairings for Paint Jobs
1.1 Tools Required
- Cleaning Brush
- Clean Rags
- Citrus-Based Cleaner
- Water Bucket
1.2 Procedure
To get a meticulous paint job, you first need to properly clean the fairings. Dirty fairings will prevent paint from staying on the plastic.
Small handlebars and quarter fairings are the easiest and take less time to clean. To clean full fairings, you would have to disassemble all the parts first. You should start cleaning from the least to most dirty parts to prevent grease from building up in the cleaning solution.
A non-toxic citrus-based cleaner and a regular brush are all you need to clean. The ratio of the cleaner and water mixture should be a 3:1 ratio. While cleaning, make sure you wear gloves to avoid skin irritation and rashes. With your gloves on, dip the brush in the cleaning solution and thoroughly clean all the parts of the fairing to remove grime or debris. After cleaning, dry the parts with a rag and check for leftover grease or dirt that still needs to be cleaned. You can also put the cleaned fairing in direct sunlight to ensure it dries completely.
2. Sand the Surface of the Fairing
2.1 Tools Required
- Electric Dual Action Sander
- 180-Grit Sandpaper
- 400-Grit Sandpaper
- Body Filler
2.2 Procedure
To create a smooth surface to apply the paint, sand the fairing with an electric dual action sander for 2-3 minutes. If you don’t have this machine, then take a 180-grit sandpaper and dip it in soapy water to smooth any deep cuts and scratches. The detergent will act as a lubricant between the sandpaper and the fairing, breaking down any buildup on the surface and making it easier to remove grime.
Whether you are using an electric sander or sanding by hand, apply very light pressure on the curves and ridges of the fairing to create a uniform surface. Afterward, sand the fairing with a 400-grit sandpaper to smooth any areas that were missed. Use your fingertips to trace the shape of the fairing and smooth the areas that are difficult to reach. It is worth mentioning that a 400-grit sandpaper can also help remove excess filler applied to repair the fairings. Apply the filler as many times as you want but always rub it down with sandpaper to even out any rough patches and bumps.
3. Seal the Imperfections
3.1 Tools Required
- 400- to 600-Grit Sandpaper
- Air Hose
- Lint-Free Cloth
3.2 Procedure
Once you finish sanding the fairing, wash it with water and let it dry. Then rub the 400- to 600-grit sandpaper against the surface to expose any shiny glossy spots and prepare the fairing for the base coat. If you skip this step, you will not be able to achieve the desired finish. Wipe the fairing with a clean, lint-free cloth and then leave it to dry. You can speed up the drying process by using a hair dryer.
4. Apply the Base Layer (Undercoat)
4.1 Tools Required
- 600-Grit Sandpaper
- Epoxy Primer
- Wax & Grease Remover
- Thinner
- Spray Gun with a 1.4 mm Nozzle
4.2 Procedure
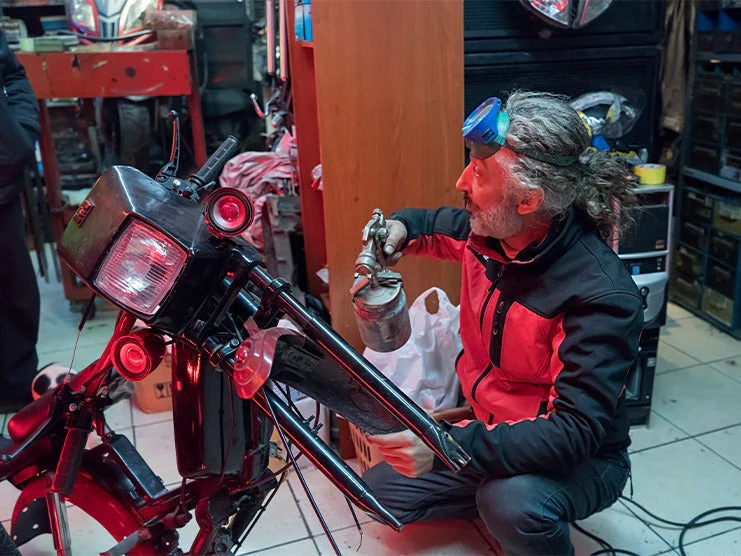
Immediately after the fairing is dry, mix the epoxy primer with the hardener, pour it into the spray gun, and apply the undercoat. This layer acts as a seal and removes dust particles that may have settled on the fairings while drying. Before applying a base coat, make sure you cover the walls of your work area. The base coat can be applied with an aerosol can or a spray gun. When painting with an aerosal can, it is best to hang the fairing parts with metal hangers and chains. If you are using a spray gun, place your fairing on a metal platform. Start by spraying the base paint underneath, then go around to cover all the edges.
Use a spray gun with a 1.4 mm thick nozzle to apply two coats with 15-minute flash gaps in between. These breaks will allow the primer to harden enough so the next coat will settle over it. If you leave it for less than 15 minutes, the second coat will run over the first layer and create uneven thick patches. If you wait longer than 15 minutes to apply the second coat, then the two layers of undercoat won’t combine properly and ensure an even look.
Once both coats are applied, leave the second coat of primer to dry before rubbing the fairing lightly with a 600-grit paper or a Scotch Brite. You can also spray on waxing grease remover to get a smooth and clean finish. During this step, wear gloves to avoid transferring dirt through your fingertips. With a clean cloth, rub thinner over the primer with a cloth and leave it to dry for 3-6 hours before applying the coat of paint.
5. Apply the Paint (Color Coat)
- Spray Gun with a 1.4 mm Nozzle
- Fairing Paint
- Thinner
- 600-Grit Sandpaper
Read the instructions and mix the paint with the thinner to create the correct consistency. With a spray gun with a 1.4 mm nozzle, apply two to three coats of paint over the undercoat. Make sure you have a spare spray gun for this process; otherwise, the primer will mix with the paint and ruin the texture and color. Once again, take 2-3 hour breaks between applying coats to get an even layer. The final coat will take 3-6 hours to dry. Afterward, clean the surface with wax and grease remover before spraying the coat of paint.
6. Apply the Paint Flakes
6.1 Tools Required
- Spray Gun with a 2 mm Nozzle
- Paint Flakes
- Wax & Grease Remover
6.2 Procedure
Once the color coat is dry, apply two to three coats of clear paint fleck with a spray gun with a 2 mm nozzle. The paint fleck acts as a protective layer and gives the matte paint finish a glossy shine. However, do not apply more than three coats or it will make the surface rougher and require more sanding.
Moreover, choose the fleck that is lighter in color than your base coat. For example, if you are painting your fairing white, then choose silver or gold paint flakes for depth and coverage.
Spray the clear coat in a to-and-fro uni-directional pattern to cover the entire fairing in a single pass. If you apply the paint fleck in different directions, you will get patches of paint that look bad and chip off easily. Take 15- to 30-minute flash gaps in between applying the three coats, leave the fairing to dry for two hours, and clean it with wax and grease remover to create a spotless finish.
7. Apply Lacquer (Clear Coat)
In place of paint fleck, you can apply two coats of lacquer once the paint is dry. Spray the lacquer on the fairings and rub it evenly with a cloth. Leave it to dry for two hours before repeating the process.
8. Mount the Fairings
Once you have applied the paint fleck or lacquer, leave the fairing for 24-36 hours before installing it on your motorcycle.
9. Takeaway
Painting a motorcycle fairing may seem challenging, but with a little trial and error, you can customize and enjoy new looks for your motorcycle. Many riders use paint to express their creativity and riding style. Depending on the type of paint you buy, your custom fairing can cost between $150-$500 if done at home. The costs can increase to $800 if you ask for professional help.


Leave a comment
All comments are moderated before being published.
This site is protected by hCaptcha and the hCaptcha Privacy Policy and Terms of Service apply.