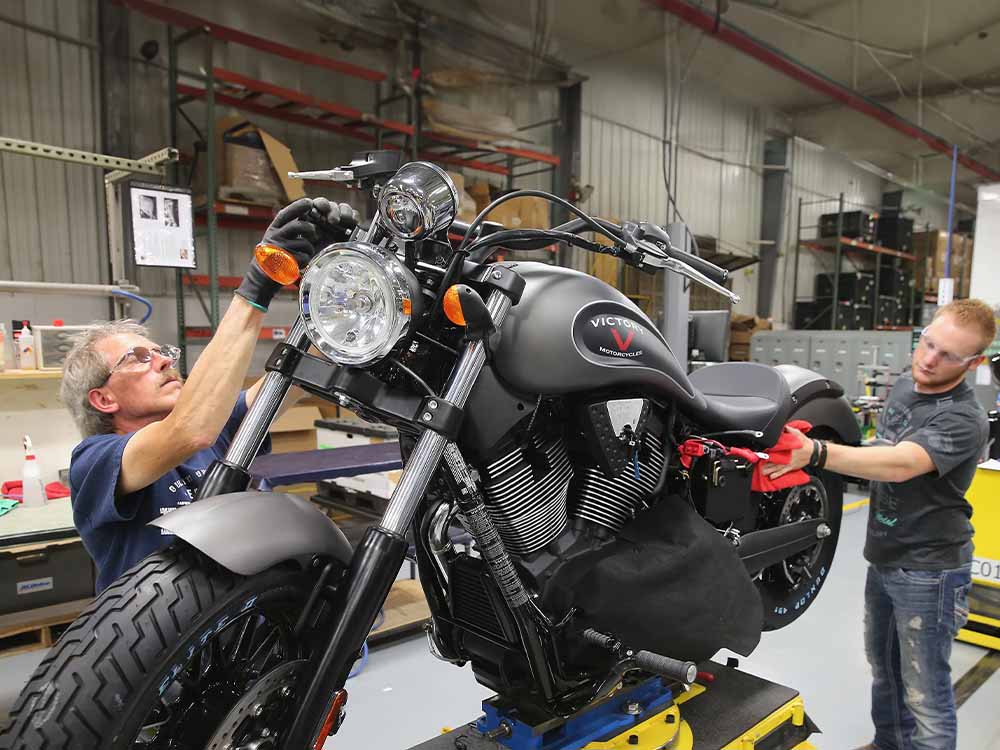
For Victory motorcycles, reliability and longevity are not an issue. However, these bikes must be maintained regularly to ensure consistent performance. Whether you bought one when it was still in production or from a second-hand market, you need to maintain your Victory model if you want to ride it for years. Following the Victory motorcycle maintenance schedule is essential to extend your motorcycle’s lifespan. This article provides a guide on how to provide maintenance for Victory motorcycles.
Also Read: Best Motorcycle Maintenance Apps
Table of Content
1. Victory Motorcycle Maintenance Phases
Victory motorcycle maintenance is divided into four phases:
Initial Maintenance
Initial maintenance ensures optimal efficiency and performance and also increases engine lifespan. A technician will change engine oil, inspect fluid levels, check for working engine parts, and ensure all fasteners are fastened at the correct torque.
Major Maintenance
Major maintenance includes large-scale damage repair and replacements. This maintenance requires special skills and tools. Emission system service is also considered a major maintenance due to requiring specialized training. When choosing a mechanic to work on your Victory motorcycle, make sure you inquire about their training and experience to evaluate their level of expertise.
Periodic Maintenance
Periodic maintenance is performed annually or at specific mileage intervals depending on which comes first. Periodic maintenance involves inspection, lubrication, adjustments, cleaning sessions, replacements, and fluid changes. It is recommended that you record when you conduct maintenance checks. A maintenance history can come in handy if you decide to sell your bike. It is recommended that you perform periodic maintenance frequently if:
- You ride at high speeds for extended periods.
- You ride at low speeds for extended periods.
- Ride in dusty, moist, or rough environments.
When checking or changing automotive fluids, read the warnings on the packaging and follow the guidelines. Some products are highly toxic and can cause skin damage, especially battery acid and brake fluid.
*The complete periodic maintenance table is provided below.
Road Test
After each maintenance check, take your motorcycle for a road test in a safe area. Make necessary adjustments if you notice any loose or damaged parts. Try to perform a road test with a mechanic so you can get a professional evaluation of your motorcycle’s performance post-maintenance.
Also Read: 15 Tips to Extend Your Motorcycle's Lifespan
2. Victory Motorcycle Pre-Ride Safety Checks
To ensure your Victory motorcycle operates correctly, always perform the recommended pre-ride safety checks every day, especially after a long trip or using your bike after a long period of inactivity.
Failure to perform pre-ride safety checks can result in mechanical failures that can increase maintenance costs and the risk of injury or death. You can perform certain pre-ride safety checks on your own since they do not require specialized tools. You may want to have a tire pressure gauge, a torque measuring tool, and a small spanner during inspections. For other tasks, it is best to visit a qualified mechanic.
Electrical Parts
To inspect electrical parts, turn on the ignition. Make sure you switch it off once you finish checking the electrical parts.
- Check the brightness of the headlight, taillight, brake light, and license plate light.
- Check the high beam indicator.
- Check whether the brake light becomes brighter when the brakes are applied.
- Move the turn signal switch to the left to see if the left turn signals on the front and rear are properly flashing. Engage the switch by moving it inward to turn them off. Repeat the same inspection procedure for the turn signals on the right of the motorcycle.
- Move the emergency flash switch to the left to see whether all the motorcycle turn signals are working. Then move the flash switch to the right to make sure that none of the turn signals are faulty or out of order.
- Engage the horn by pressing its button and check the sound.
- Check whether the engine oil pressure indicator is working. Power up the engine and see if the oil pressure drop warning turns on the display.
- With the engine running, shift the gear into neutral and check if the indicator displays neutral.
- Power up the engine for the inspection of the engine switch function. See if the engine stops and runs according to the movement of the switch. At times the motor stops when the switch is moved to start it and vice versa. Open and close the switch multiple times to ensure that the engine follows the command.
Fuel Level Check
- Get on the motorcycle and start the engine to check the fuel level. The low fuel light should stay on if the fuel tank level is below one gallon. If the fuel is below the recommended level, refill with the necessary amount.
Fuel Hose, Rail, and Connections
- Check the fuel hoses for cracks or other signs of damage. Also, check the length of the fuel hose connected to the fuel tank and rail for signs of fuel leakage. If there are no damp spots, check for fuel stains to confirm whether there are any leaks.
Engine Oil Check
An engine with excess or low oil levels can cause significant damage, such as engine seizure that could lead to a motorcycle spinning out of control, increasing risk of fatal accidents. Never ride your motorcycle if the oil gauge reading is above the maximal mark or below the minimal mark.
The Victory motorcycle manufacturer recommends using semi-synthetic 20W-40 motor oil or a similar motor oil that can be used with wet clutches. To check the oil level, you would need the oil fill cap or dipstick located on the right side of the motorcycle.
- When ensuring that your motorcycle has an adequate amount of oil in the reservoir, make sure the engine is at normal temperature.
- Shift the gear into neutral before activating the engine. Allow the motor to run idle for a few minutes. Then bring engine operation to a halt and check the oil after 3-5 minutes.
- Take out the fluid indicator, commonly called dipstick and cleanse it thoroughly with a lint-free dry cloth.
- Put back the fluid level indicator and secure the cap in place.
- Take out the indicator stick again and record the reading.
- Fill in or drain excessive motor oil to bring it within safe range, i-e between the maximal and minimal marks on the indicator.
Tire Pressure
- Verify the pressure range in both tires with a pressure gauge when the entire motorcycle is cool to touch, including tires. When the tires are still warm, the tire pressure increases and the pressure gauge does not always provide an accurate reading.
- Change the tire pressure until it is at the recommended tire pressure stated in the owner’s manual.
Tire Condition
- Check the tire walls, contact patch, and base to evaluate tread damage. If you find cuts, cracks, puncture holes, irregular damage wear patterns, and bulges, then install a new tire.
- Check the owner’s manual to learn about tires size and brand approved by the manufacturer for much-needed replacement.
Depth of Tread
Tire wear indicator bars are small tread marks at the base of the tire tread to measure how much it has become worn down. If the wear and tear in the tire tread reaches beyond what is considered safe by the manufacturer, replace the tire immediately. It is advisable to refer to the owner manual for this purpose.
Motorcycle Luggage Inspection
Victory motorcycles can be transformed into tourers through customization. If your bike is equipped with a luggage system or has aftermarket saddlebags installed, check the mounts and straps to prevent your luggage from falling off.
Forward Brake Control
To check whether the forward brake control is operating properly, pull it towards the handlebars, then leave it free. Functional control returns to its original position smoothly. During the first 19 mm the lever travels, check for some slight opposing force in the process. If the lever does not perform correctly, get it checked before riding.
Rear Brake Control
- Press the rear brake pedal, hold it in place, and release to see if it returns to its original position smoothly.
- You should feel resistance in the brake pedal in the initial 8 mm the pedal travels.
- Get the rear brake pedal checked if the pedal moves too slowly, jerky, or quickly.
Brake Control Range
Brake lever range is the distance between the lever and the handlebar. For Victory motorcycles, this distance can be adjusted.
- Pull the lever in the opposite direction of the handlebar and hold it in place.
- Move the regulator to scale down the reading to increase brake lever reach.
- To decrease the distance, turn the regulator to scale up the reading on the lever.
Brake Hydraulic Solution Amount
Sit on the bike to steady it. Position the handlebars so that the hydraulic brake solution in the container is uniform.
- Check the solution amount through the visual gauge. Make sure the hydraulic solution is clear. Replace milky or contaminated brake fluid.
- The fluid level should be between the maximum and minimum marks on the sight glass.
- Add or remove hydraulic solution as per the requirement.
Brake Lines
- Check all connections and hoses of the braking system for any brake fluid leaks.
- Tighten the connections if possible and replace damaged components.
Brake Pads
- Check the thickness of the front and rear brake pads. Replace the brake pads if they are less than 1.5 mm thick.
Clearance in the Lower Brake Control
The lower brake control should be in a relaxed position with the pressure piston resting against the inner endpoint. Once the two components are positioned properly, measure the distance between the foot peg mount and the lower control stop. Make sure the clearance is between 2-5 mm by making adjustments if necessary.
- Hold the rear brake hydraulic pin and unfasten the brake joining shaft fastener to prevent bending.
- Rotate the joining shaft in both directions to check its operation. Then hold the rear hydraulic pin and torque the fastener to prevent it from getting lost.
- Check that the clearance is up to 5 mm.
- Check whether the back rim spins freely the full circumference around the foot-controls.
- Release the pedal to check for drag.
- If you feel resistance, get the pedal checked.
*This pre-ride check is not applicable for Victory Judge motorcycles.
Throttle
- Check the throttle by grasping its control.
- The control bar should move smoothly from rest to open position, then quickly return to its original position once released.
- Check the acceleration cords for damaged ends by removing the access cover on the right side.
- Get the throttle checked if the throttle does not operate smoothly or if cord terminals are worn out.


Clutch
- Pull the control in the direction of the handlebars and then let it go. The movement should be smooth with no jerks. Plus, it should quickly return to its original position. If the clutch lever does not move freely, get it checked.
- Clutch free play is the measure of the lever’s movement from rest before going taut. Clutch free play should be up to 1.5 mm.
- Record the clearance between the clutch and its housing in case you need to adjust the free play.
Suspension
- Check the front suspension for damage and hydraulic oil discharge.
- Adjust the rear suspension to ensure better comfort.
- Inspect the entire rear suspension setup to confirm that adequate wheel travel is present. This inspection will also tell you whether the motorcycle sits safely above the ground.
High ground clearance will keep parts from scraping against the ground, preventing damage and reducing the risk of accidents.
Drive or Serpentine Belt
- Check and adjust tension in the automotive belt.
- Check for cracks, worn edges, broken belt teeth, and other damage.
- Replace the automotive belt if needed.
- For accurate measurements, make sure the serpentine belt is clean, cool, and dry.
- Never tighten your motorcycle’s belt right after washing or riding it.
Steering
- Check the steering by turning the handlebars side-to-side.
- The handlebars should turn smoothly, but must not feel loose.
- Make sure the wires, cables, and hoses do not get in the way.
Side Stand
- Move the side stand upward in a closed position and then downward in an extended position. Repeat several times.
- The side stand must function steadily without making any squeaking noises.
- Make sure the stand does not fall back down after it is closed.
- If the side stand is bent, replace it immediately.
- Check the side stand fastener for wear and tear. Tighten it if needed or replace the worn bolt.
- Check the side stand rubber pad. Inspect the damage scale on the end of the rubber pad. Replace it if it is impaired and has crossed the recommended wear limit.
Fasteners
- Check the frame for any loose screws.
- Tighten any loose fasteners and use a torque measuring tool to ensure they are tightened with the correct amount of torque. Refer to the owner's manual for the recommended torque.
- Replace worn, stripped, and broken fasteners.
- Always use original Victory fasteners for compatibility, strength, and security.
2.1 Post-Ride Checks
Post-ride checks are just as important, if not more, in ensuring your motorcycle performs at peak capacity. Listed below are are examples of post-ride checks:
- Check the frame and engine again to ensure there are no loose fasteners, fluid leaks, damaged reservoirs, or broken components.
- After riding, you should give a better understanding of whether there is more free play or resistance in the clutch and throttle.
- While the bike is still warm after riding, apply grease where needed. However, it is best to consult the owner’s manual for any model specific instructions regarding lubrication. Also, check the tension in the belt drive.
- Once the engine has cooled, wash your bike to prevent grime build-up.
- After washing, make sure the motorcycle is completely dry before applying sealant or polish. Removing dirt will also help prevent paint damage and corrosion.
3. Complete Victory Motorcycle Maintenance Schedule
| Victory Motorcycle Periodic Maintenance Table | |||||||||||
|---|---|---|---|---|---|---|---|---|---|---|---|
| Maintenance Tasks Description | Maintenance Intervals Odometer Reading in Miles |
||||||||||
| 500 Miles | 5,000 Miles | 10,000 Miles | 15,000 Miles | 20,000 Miles | 25,000 Miles | 30,000 Miles | 35,000 Miles | 40,000 Miles | 45,000 Miles | 50,000 Miles | |
| Spark Plugs | |||||||||||
| Inspect spark plugs | ✔️ | ✔️ | ✔️ | ✔️ | ✔️ | ✔️ | ❌ | ✔️ | ✔️ | ✔️ | ✔️ |
| Replace spark plugs | ❌ | ❌ | ❌ | ❌ | ❌ | ❌ | ✔️ | ❌ | ❌ | ❌ | ❌ |
| Battery | |||||||||||
| Inspect battery fluid levels and terminals for corrosion | ✔️ | ✔️ | ✔️ | ✔️ | ✔️ | ✔️ | ✔️ | ✔️ | ✔️ | ✔️ | ✔️ |
| Air Filter | |||||||||||
| Inspect air filter | ✔️ | ✔️ | ❌ | ✔️ | ❌ | ✔️ | ❌ | ✔️ | ❌ | ✔️ | ❌ |
| Replace air filter | ❌ | ❌ | ✔️ | ❌ | ✔️ | ❌ | ✔️ | ❌ | ✔️ | ❌ | ✔️ |
| Brakes | |||||||||||
| Inspect brake pads | ✔️ | ✔️ | ✔️ | ✔️ | ✔️ | ✔️ | ✔️ | ✔️ | ✔️ | ✔️ | ✔️ |
| Inspect brake fluids | ✔️ | ✔️ | ✔️ | ✔️ | ✔️ | ✔️ | ❌ | ✔️ | ✔️ | ✔️ | ✔️ |
| Replace brake fluid | ❌ | ❌ | ❌ | ❌ | ❌ | ❌ | ✔️ | ❌ | ❌ | ❌ | ❌ |
| Lubricate front brake lever | ✔️ | ✔️ | ✔️ | ✔️ | ✔️ | ✔️ | ✔️ | ✔️ | ✔️ | ✔️ | ✔️ |
| Inspect rear brake pedal | ✔️ | ✔️ | ❌ | ✔️ | ❌ | ✔️ | ❌ | ✔️ | ❌ | ✔️ | ❌ |
| Lubricate rear brake pedal | ❌ | ❌ | ✔️ | ❌ | ✔️ | ❌ | ✔️ | ❌ | ✔️ | ❌ | ✔️ |
| Mechanical Clutch Cable | |||||||||||
| Inspect mechanical clutch cable | ✔️ | ✔️ | ❌ | ✔️ | ❌ | ✔️ | ❌ | ✔️ | ❌ | ✔️ | ❌ |
| Lubricate mechanical clutch cable | ❌ | ❌ | ✔️ | ❌ | ✔️ | ❌ | ✔️ | ❌ | ✔️ | ❌ | ✔️ |
| Clutch Lever | |||||||||||
| Inspect clutch lever | ❌ | ✔️ | ❌ | ✔️ | ❌ | ✔️ | ❌ | ✔️ | ❌ | ✔️ | ❌ |
| Lubricate clutch lever | ✔️ | ❌ | ✔️ | ❌ | ✔️ | ❌ | ✔️ | ❌ | ✔️ | ❌ | ✔️ |
| Crankcase Ventilation System | |||||||||||
| Inspect crankcase ventilation system | ✔️ | ✔️ | ✔️ | ✔️ | ✔️ | ✔️ | ✔️ | ✔️ | ✔️ | ✔️ | ✔️ |
| Drive Belt | |||||||||||
| Inspect drive belt | ✔️ | ✔️ | ✔️ | ✔️ | ✔️ | ✔️ | ❌ | ✔️ | ✔️ | ✔️ | ✔️ |
| Replace drive belt | ❌ | ❌ | ❌ | ❌ | ❌ | ❌ | ✔️ | ❌ | ❌ | ❌ | ❌ |
| Engine & Throttle System | |||||||||||
| Inspect throttle system | ✔️ | ✔️ | ❌ | ✔️ | ❌ | ✔️ | ❌ | ✔️ | ❌ | ✔️ | ❌ |
| Lubricate throttle system | ❌ | ❌ | ✔️ | ❌ | ✔️ | ❌ | ✔️ | ❌ | ✔️ | ❌ | ✔️ |
| Inspect engine compression | ✔️ | ❌ | ✔️ | ❌ | ✔️ | ❌ | ✔️ | ❌ | ✔️ | ❌ | ✔️ |
| Replace engine oil | ✔️ | ✔️ | ✔️ | ✔️ | ✔️ | ✔️ | ✔️ | ✔️ | ✔️ | ✔️ | ✔️ |
| Replace oil filter | ✔️ | ✔️ | ✔️ | ✔️ | ✔️ | ✔️ | ✔️ | ✔️ | ✔️ | ✔️ | ✔️ |
| Exhaust System | |||||||||||
| Inspect exhaust system | ✔️ | ✔️ | ✔️ | ✔️ | ✔️ | ✔️ | ✔️ | ✔️ | ✔️ | ✔️ | ✔️ |
| Fasteners | |||||||||||
| Inspect fasteners | ✔️ | ✔️ | ❌ | ✔️ | ❌ | ✔️ | ❌ | ✔️ | ❌ | ✔️ | ❌ |
| Lubricate fasteners | ❌ | ❌ | ✔️ | ❌ | ✔️ | ❌ | ✔️ | ❌ | ✔️ | ❌ | ✔️ |
| Suspension | |||||||||||
| Inspect front axle/fork | ✔️ | ✔️ | ✔️ | ✔️ | ✔️ | ✔️ | ✔️ | ✔️ | ✔️ | ✔️ | ✔️ |
| Inspect swingarm/rear axle | ✔️ | ✔️ | ✔️ | ✔️ | ✔️ | ✔️ | ✔️ | ✔️ | ✔️ | ✔️ | ✔️ |
| Inspect front fork oil | ✔️ | ✔️ | ✔️ | ❌ | ✔️ | ✔️ | ❌ | ✔️ | ✔️ | ❌ | ✔️ |
| Replace front fork oil | ❌ | ❌ | ❌ | ✔️ | ❌ | ❌ | ✔️ | ❌ | ❌ | ✔️ | ❌ |
| Inspect rear suspension (shock absorber) | ❌ | ❌ | ❌ | ✔️ | ❌ | ❌ | ✔️ | ❌ | ❌ | ✔️ | ❌ |
| Replace rear suspension (shock absorber) | ❌ | ❌ | ❌ | ❌ | ❌ | ❌ | ❌ | ❌ | ❌ | ❌ | ✔️ |
| Fuel System | |||||||||||
| Inspect fuel system | ✔️ | ✔️ | ✔️ | ✔️ | ✔️ | ✔️ | ✔️ | ✔️ | ✔️ | ✔️ | ✔️ |
| Replace fuel filter | ❌ | ❌ | ❌ | ❌ | ❌ | ✔️ | ❌ | ❌ | ❌ | ❌ | ✔️ |
| Gear Shift Pedal | |||||||||||
| Inspect gear shift pedal | ✔️ | ✔️ | ❌ | ✔️ | ❌ | ✔️ | ❌ | ✔️ | ❌ | ✔️ | ❌ |
| Lubricate gear shift pedal | ❌ | ❌ | ✔️ | ❌ | ✔️ | ❌ | ✔️ | ❌ | ✔️ | ❌ | ✔️ |
| General | |||||||||||
| Inspect headlamp | ✔️ | ❌ | ✔️ | ❌ | ✔️ | ❌ | ✔️ | ❌ | ✔️ | ❌ | ✔️ |
| Inspect side stand | ✔️ | ✔️ | ❌ | ✔️ | ❌ | ✔️ | ❌ | ✔️ | ❌ | ✔️ | ❌ |
| Lubricate side stand | ❌ | ❌ | ✔️ | ❌ | ✔️ | ❌ | ✔️ | ❌ | ✔️ | ❌ | ✔️ |
| Inspect side stand rubber pad | ✔️ | ✔️ | ✔️ | ✔️ | ✔️ | ✔️ | ✔️ | ✔️ | ✔️ | ✔️ | ✔️ |
| Inspect steering head bearings | ✔️ | ✔️ | ✔️ | ❌ | ✔️ | ✔️ | ❌ | ✔️ | ✔️ | ❌ | ✔️ |
| Lubricate steering head bearings | ❌ | ❌ | ❌ | ✔️ | ❌ | ❌ | ✔️ | ❌ | ❌ | ✔️ | ❌ |
| Wheels & Tires | |||||||||||
| Inspect wheel condition | ✔️ | ✔️ | ✔️ | ✔️ | ✔️ | ✔️ | ✔️ | ✔️ | ✔️ | ✔️ | ✔️ |
| Inspect rear wheel alignment | ✔️ | ✔️ | ✔️ | ✔️ | ✔️ | ✔️ | ✔️ | ✔️ | ✔️ | ✔️ | ✔️ |
| Inspect wheel spokes | ✔️ | ✔️ | ✔️ | ✔️ | ✔️ | ✔️ | ✔️ | ✔️ | ✔️ | ✔️ | ✔️ |
| Inspect tires | ✔️ | ✔️ | ✔️ | ✔️ | ✔️ | ✔️ | ✔️ | ✔️ | ✔️ | ✔️ | ✔️ |
| Road Test | |||||||||||
| Perform road test | ✔️ | ✔️ | ✔️ | ✔️ | ✔️ | ✔️ | ✔️ | ✔️ | ✔️ | ✔️ | ✔️ |
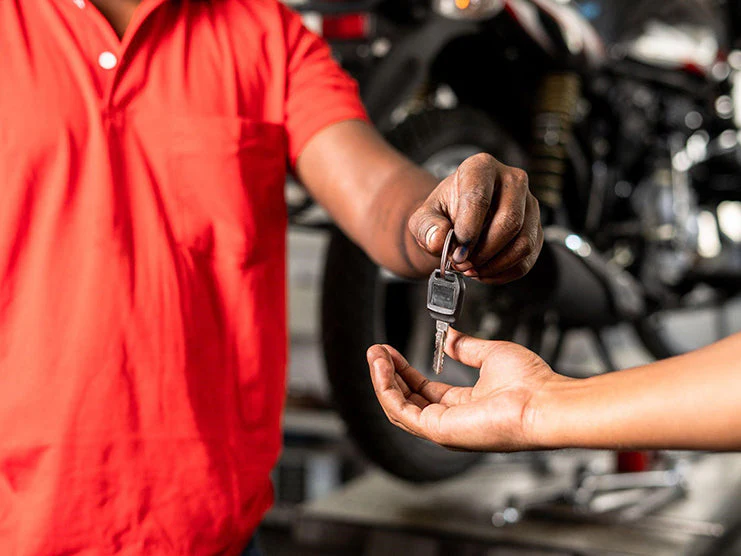
4. Where to Get Victory Motorcycles Maintained?
After Victory motorcycles were discontinued in 2017, there are only a limited number of Victory dealerships that still offer motorcycle maintenance services in the United States. Riders can find a Victory dealership in their area using the dealer locator tool available on the official Victory Motorcycles website. Otherwise, they can choose from any of the following options:
Authorized Indian Motorcycle Dealerships
Just like Victory, Indian motorcycles is a brand under Polaris Industries. You can contact an Indian dealership to see if they have trained technicians with experience working with Victory motorcycles.
Polaris Support
You can reach out to Polaris industries service centers for technical assistance and original spare parts.
Multi-Brand Dealerships
Reach out to multi-brand motorcycle dealerships that offer maintenance services for discontinued motorcycles, including Victory bikes.
Local Motorcycle Repair Shops
Many independent motorcycle maintenance shops offer services for various types of motorcycles, including Victory motorcycles. To find a reputable repair shop, look for suggestions on social media pages and online Victory motorcycle forums. You can also join local motorcycle clubs to meet Victory motorcycle owners. Networking is the best way to get reliable recommendations to motorcycle repair shops that offer Victory motorcycle maintenance service.
5. Average Maintenance Cost of Victory Motorcycles
The average maintenance cost of Victory motorcycles depends on the type of service you use. If you are getting small regular checks done, then expect to pay between $50-$300. For more extensive repair work, you might have to pay between $500-$2,000. Replacement and custom aftermarket parts may cost you several hundred to thousands of dollars, especially if you get original Victory parts.
6. Takeaway
Following the Victory motorcycle maintenance schedule and operation guidelines in the owner’s manual can help you spot issues before they become major problems. Regular maintenance, oil checks, fluid changes, and filter replacements will preserve your bike’s riding capabilities. For advice on how to provide maintenance for specific models, always consult the service manual. Since Victory motorcycles were discontinued back in 2017, there are a limited number of authorized dealerships that offer maintenance. This can make it a challenge to find a trustworthy mechanic with experience working on Victory motorcycles. Use online Victory motorcycle forums to find motorcycle technicians who specialize in maintaining and repairing Victory line-ups. Local motorcycle clubs may also help you find a good motorcycle shop that offers quality service.
Popular Collections


Leave a comment
All comments are moderated before being published.
This site is protected by hCaptcha and the hCaptcha Privacy Policy and Terms of Service apply.