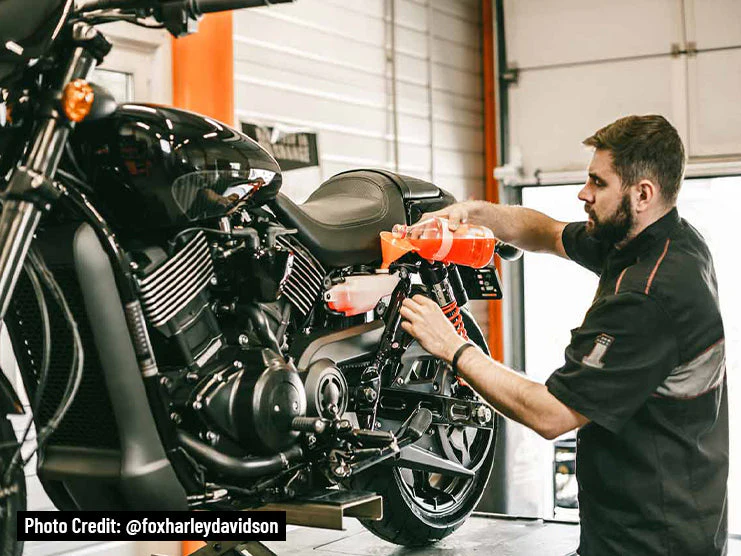
For many riders, motorcycle service is not a priority. They do not visit a motorcycle maintenance shop unless their bikes suddenly stop running properly. But other Harley owners consider their bikes as lifetime investments and do not forget to provide maintenance. Unfortunately, some Harley owners become overwhelmed by complicated maintenance schedules. Remembering every upcoming service interval and keeping track of all maintenance tasks can be a lot of work. Using maintenance tracking apps and setting reminders can make it easier to tackle the list of Harley maintenance tasks. But first, you need to know what a Harley Davidson motorcycle maintenance schedule entails.
A Harley maintenance schedule will help you create a monthly maintenance checklist and calendar. It will also help you determine which tasks you can perform by yourself and which ones require hiring a professional. This article brings you detailed schedules that apply to all Harley Davidson motorcycle lineups, including Dyna, Sportster, Softail, Harley tourers, and street bikes.
Table of Content
1. Why Maintain Your Harley Davidson Motorcycle?
Since many Harley bikes are expensive, it is essential to keep up with maintenance. If you neglect your bike and a part becomes severely damaged, it can cost a lot of money to replace it. Timely service also contributes to safety, reliability, and affordability.
Moreover, maintenance can also help your motorcycle retain its resale value. A well-maintained older bike with a high odometer reading and mileage sells better than a poorly maintained newer Harley model with a low odometer reading and mileage.
2. Harley Davidson Maintenance Schedules
Maintenance or service intervals for Harley motorcycles are calculated based on distance covered or mileage. The major service checkpoints are at 1,000, 5,000, 10,000, and 20,000 miles. Some maintenance tasks are scheduled at least once per year even if you do not reach a mileage interval. If you are an aggressive rider or your bike is exposed to harsh riding conditions, then service intervals may need to be performed more frequently. Regular maintenance must be performed at recommended intervals so your Harley retains optimal performance. This will also help keep your limited mileage warranty valid longer. Below is a table outlining all of the service intervals for every Harley lineup.
| Harley Davidson Maintenance Schedule | |
|---|---|
| Motorcycle Parts | Mileage Interval in Miles |
| Battery | Clean connections, check torque at terminals, and evaluate battery performance every year |
| Engine Oil | Replace after 1,000 miles and then after every 5,000 miles |
| Engine at Idle | Check idle engine speed after 1,000 miles and then every 5,000 miles |
| Filter | Replace after 1,000 miles and then after every 5,000 miles |
| Air Cleaner | Inspect every 5,000 miles |
| Fuel Filter | Replace after every 100,000 miles |
| Engine Mount & Stabilizer | Inspect after 1,000 and then every 10,000 miles |
| Transmission | Replace transmission lubricant after 1,000 miles, then 20,000 miles, and at 2,500 miles Clean the magnetic drain plug after 1,000 miles and then every 5,000 miles |
| Drive Belt | Inspect and adjust after 1,000 miles, then after every 5,000 miles Inspect sprockets after 1,000 miles, then every 5,000 miles |
| Electrical Switches & Other Equipment | Check after 1,000 miles, then check after every 5,000 miles |
| Switch Housing | Check torque at upper and lower screws after 1,000 miles and then every 10,000 miles |
| Spark Plugs | Replace every 30,000 miles or two years |
| Front Tire | Check front tire pressure after 1000 miles and then every 5,000 miles Inspect tire tread after 1,000 miles, then after every 5,000 miles |
| Front Wheel (if spoked) | Check the torque of the front spokes and tighten after 1,000, 5,000, 15,000, and 20,000 miles |
| Rear Tire | Check rear tire pressure after 1000 miles Inspect tire tread after 1,000 miles, then after every 5,000 miles |
| Rear Wheel (if spoked) | Check the torque of the rear spokes and tighten them after 1,000, 5,000, and 20,000 miles |
| Front Brake | Inspect front brake fluid level after 1,000 miles and then every 5,000 miles Check the front brake fluid for moisture after 1,000 miles and then every 5,000 miles Check the condition of front brake fluid reservoir after 1,000 miles and then every 5,000 miles |
| Rear Brake | Inspect the rear brake fluid level after 1,000 miles and then every 5,000 miles Check the rear brake fluid for moisture after 1,000 miles and then every 10,000 miles Check the condition of the rear brake fluid reservoir after 1,000 miles and then every 5,000 miles |
| Brake Discs and Pads | Check for wear after 1,000 miles and then every 5,000 miles |
| Brake Master Cylinder | Check after 1,000 miles and then every 10,000 miles |
| ABS System | Check (EHCU) ABS module after 1,000 miles and then every 10,000 miles Inspect torque of ABS brake line and flare nuts under lower fork bracket after 1,000 miles and then every 10,000 miles |
| Complete Brake System | Flush and replace the hydraulic brake fluid every two years. If moisture content in the brake fluid is higher than 3%, perform this task sooner Check for leaks and damage after 1,000 miles and then every 5,000 miles Check, adjust, and lubricate brake controls after 1,000 miles and then every 5,000 miles |
| Steering Head Bearings | Adjust after 1,000 miles and then every 10,000 miles Lubricate after every 30,000 miles |
| Front Fork | Check the torque of the lower bracket bolts after 1,000 miles and then every 10,000 miles Check the torque of the upper bracket bolts after 1,000 miles and then every 10,000 miles Rebuild the front fork if required; can be done after 50,000 miles or annually Change the front fork oil at the 20,000-mile interval |
| Rear Fork | Check, inspect, and lubricate rear fork bearings after every 30,000 miles Check the tightness of the pivot nut after 1,000 miles |
| Throttle | Check, lubricate, and adjust throttle controls after 1,000 miles and then every 5,000 miles |
| Handlebar Clamp, Clutch Lever, and Master Cylinder | Check the torque of the screws after 1,00 miles and then every 10,000 miles |
| Clutch | Check clutch adjustment after 1,000 miles and then after every 5,000 miles Check, lubricate, and adjust clutch controls after 1,000 miles and then every 5,000 miles. |
| Chaincase | Replace lubricant after 1,000 miles and then every 10,000 miles Clean the magnetic drain plug after 1,000, and then every 5,000 miles Inspect and adjust the primary chain |
| Primary Chain | Inspect and adjust after 1,000, 5,000, and 10,000 miles |
| Fuel Lines and Fittings | Inspect for leaks and damage after 1,000 miles and then every 5,000 miles |
| Front Axle | Check the torque of the axle cap fastener after 1,000 miles and then every 10,000 miles Check the torque of the axle nut after 1,000 miles and then every 10,000 miles |
| Rear Axle | Check the torque of the axle nut after 1,000 miles and then every 10,000 miles |
| Harley Jiffy Stand | Inspect and lubricate after 1,000 miles and then every 5,000 miles |
| Exhaust System | Inspect for leaks, loose heat shields and fasteners, missing bolts, and cracks after 1,000 miles and then every 5,000 miles Check the torque of the rear exhaust bracket bolt and lock nut at the transmission after 1,000 miles and then every 10,000 miles |
| Speedometer | Lube the cable after 5,000 miles and then 10,000 miles. Perform other services as required afterwards |
| Fasteners | Check the fasteners on the handlebars, risers, axle nuts, hand controls, brake system, and front suspension after 1,000 and then every 10,000 miles |
| Ignition | Check ignition timing after every 5,000 miles |
2.1 Maintenance of Discontinued Harley Davidson Models
Harley Davidson Dyna motorcycles are still some of the most popular rides that have remained relevant years after production was discontinued. Since these bikes are in high-demand, they are readily available on the secondhand market. To keep these high-performance motorcycles in good condition, make sure you follow the same maintenance schedule as the latest Harley models.
2.2 Important Tips
- Perform maintenance tasks annually or at the recommended service intervals. If you do not use your motorcycle regularly or reach the 5,000-mileage interval within a year, then you should maintain your bike annually.
- Maintenance checks should be done by a Harley-certified technician, especially if you have reached the 5,000-mile interval.
- In harsh riding conditions, such as dusty environments, rainy weather, mountainous or off-road terrain, and extreme temperatures, it is recommended that you conduct maintenance frequently. The same principle applies after finishing a long-distance round trip.
- Avoid crowded roads as stop-and-go traffic can cause your bike to wear out faster than going on a long-distance trip.
- Always check the torque of different parts at the 1,000, 5,000, 15,000, and 20,000-mile intervals.
- Check for leaking fluid on your own. Get your bike checked immediately if you find dripping oil, fuel, or transmission fluids.


3. Average Maintenance Cost of Harley Davidson Motorcycles
The average maintenance costs of a Harley Davidson motorcycle depend on many factors, such as frequency of use, mileage, riding style, riding conditions, and location. Harley touring and Softail models may cost more than lightweight Harley cruisers. Whether you take your Harley to a dealership, local mechanic, or perform small DIYs will also affect average maintenance costs. To give you a rough estimate, here are some figures based on mile intervals:
| Harley Davidson Maintenance Costs | |
|---|---|
| Service Interval/Mileage | Average Cost |
| 1,000-Mile Interval | $200-$350 |
| 5,000-Mile Interval | $350-$500 |
| 10,000-Mile Interval | $200-$400 |
| 20,000-Mile Interval | $500-$700 |
4. Advantages of Taking Your Harley Davidson to a Dealership
Getting a Harley Davidson motorcycle serviced by a local mechanic may cost less, but visiting an H-D dealership has certain advantages.
Harley-Certified Technicians
Unlike local motorcycle repair shops, Harley Davidson dealerships have H-D certified technicians trained to meet Harley’s maintenance standards. The technicians take courses that teach them skills necessary to maintain the latest, expensive models. Harley Davidson dealerships often have a team of trained, advanced, and master technicians. They can provide advice to help you stay on top of your bike’s service schedule and avoid causing damage through preventive maintenance.
Accessible Quality Maintenance
When traveling to other states, one of the most challenging tasks is finding a trustworthy mechanic who can help with motorcycle maintenance and breakdowns. As of 2023, Harley Davidson has over 676 dealerships in the United States alone. The only regions with no Harley Davidson dealerships are Puerto Rico, U.S Virgin Islands, District of Columbia, Northern Mariana Islands, Guam, and American Samoa. If you are a H.O.G. member, you can also apply for the H.O.G Assist Program if you want access to timely roadside assistance. Find out more about this program at Harley’s official website.
Certified Equipment
Harley Davidson dealerships use certified equipment and computers to provide accurate diagnostics and locate any damaged parts that need to be repaired or replaced. Certain features introduced with recent Harley models, including the electronic fuel injectors, engine control module, radio systems of high-tech touring models, stereo system, and electrical system, require Digital Technician II for updates. Digital Technician II is a diagnostic tool that only authorized Harley technicians can use.
Maintenance History
If you make a habit of visiting a Harley dealership for maintenance checks, the technicians will create a maintenance record for you. This service history helps technicians keep track of follow-up maintenance, warranties, and safety recalls to ensure all your motorcycle’s parts get checked.
5. DIY Harley Davidson Motorcycle Maintenance
Performing maintenance checks is the best way to familiarize yourself with your Harley motorcycle’s anatomy and functions. Small DIY maintenance projects can help keep your Harley in top condition in between scheduled service intervals. Harley Davidson owners can safely perform the following tasks at home:
- Inspect front fork seals for failure and fluid leaks
- Regularly clean the battery terminals and apply a coat of dielectric grease to prevent rust and corrosion
- Check the standing voltage of battery terminals using a multimeter
- Check the oil levels
- Check moving parts and pivot points for wear
- Check for a blown fuse and replace it with a spare
6. Takeaway
Just like any machine, Harley Davidson bikes require timely maintenance to ensure good performance. Do not wait for your motorcycle to start showing signs of wear and tear. Delaying service intervals will increase damage and maintenance costs. Even small issues such as dirty or clogged filters can cause increased fuel consumption, higher fuel costs, and reduced engine performance and power.
Popular Collections


Leave a comment
All comments are moderated before being published.
This site is protected by hCaptcha and the hCaptcha Privacy Policy and Terms of Service apply.