Honda motorcycles are famed for their high-quality, robust frames, comfortable ergonomics, and powerful, performance-oriented engines. Versatile and reliable, Honda motorcycles are some of the best two-wheelers on the market. Whether you enjoy riding a Honda dirt bike, cruiser, tourer, adventure motorcycle, or lightweight scooter, Honda excels in providing motorcycles for riders of different sizes, riding styles, and skill levels.
Over the years, Honda motorcycles were built with high durability and longevity. Now, these motorcycles have a reputation for being low-maintenance. However, motorcyclists are still required to maintain their Honda motorcycles based on a recommended service schedule. This will ensure your bike’s handling, performance, style, and road safety. This article focuses on the Honda motorcycle maintenance schedule to help you enjoy your two-wheeler longer.
Also Read: 6 Best Motorcycle Maintenance Apps
Table of Content
1. Do Honda Motorcycles Require Less Maintenance Than Other Bikes?
Honda motorcycles are often regarded as highly reliable and durable motorcycles, requiring less maintenance than motorcycles from other brands. Due to their heavy-duty build, simple design, engineering, user-friendly owner’s manuals, robust parts, and well-tuned engines, Honda motorcycles are not as easily damaged if you miss a maintenance check. However, proper maintenance is still essential for optimal performance. Neglecting maintenance tasks can be dangerous and may lead to extensive damage over time. Make sure you follow the recommended maintenance schedule to keep your Honda motorcycle in top-notch condition.
2. Why Maintain Your Honda Motorcycle?
Honda motorcycle maintenance has many advantages besides longevity, safety, comfort, performance, and appearance. Here are some of the reasons why you should maintain your Honda motorcycle:
Economical
A Honda motorcycle maintenance schedule can help reduce overall motorcycle costs. Consistently following the maintenance schedule will help you spot any mechanical issues early and get them fixed before they become worse. Preemptively fixing these issues will help you avoid having to get expensive replacements and repairs. Furthermore, a well-maintained bike is fuel efficient, reducing your annual fuel costs. You can use the money you save to buy high-quality Honda luggage and stylish aftermarket Honda parts.
Warranty
Newer Honda motorcycles come with warranties that require strictly following motorcycle maintenance schedules in the owner’s manuals to remain valid.
Rental Income
Honda motorcycle rentals are popular among riders who love touring or camping due to their reliability, engine performance, and riding comfort. If you maintain your Honda motorcycle properly, you can earn income from renting out your vehicle.
Recreation
A well-maintained Honda motorcycle is your ticket to rallies and motorcycle-only resorts. A poorly-maintained motorcycle, even if it does not break down en route, can be a cause of stress and danger on the road. If you want to use your bike for peaceful weekend getaways and visit motorcycle events, make sure to keep up with your Honda motorcycle’s maintenance.
Resale Value
A well-maintained Honda motorcycle has a higher chance of retaining its resale value. In fact, many riders prefer Honda motorcycles for their longevity and resale value. By maintaining it according to the manufacturer’s guidelines, you further enhance your chances of striking a good deal with a potential buyer.
3. Honda Motorcycle Maintenance Schedule
For all Honda models, you have to fulfill certain maintenance tasks daily, weekly, monthly, and annually. Annual maintenance intervals are calculated based on the number of miles covered. Try to get your motorcycle checked at least once per year even if your motorcycle does not reach the required mileage. If you ride your Honda model frequently, you may have to take it in for maintenance more than once before the year ends. Honda also recommends shorter service intervals for parts prone to damage, such as the brake pads, engine coolant, clutch system, and tires. If you take your Honda model to a dealership, make sure the technician performing maintenance provides a complete maintenance record. Make sure to request for and hold onto copies of all service documents your mechanic has for future reference.
Below is a chart providing a list of all the required tasks in a Honda motorcycle maintenance schedule that must be done at different service intervals.
| Honda Motorcycle Maintenance Schedule | |
|---|---|
| Maintenance Items | Maintenance Frequency |
| Air Cleaner | Replace every 12,000 miles |
| Engine Oil | Replace after 600 miles and then after every 8,000 miles Replace once every year |
| Engine Oil Filter | Replace after 600 miles and then after 16,000 miles. |
| Engine Idle Speed | Inspect every 8,000 miles |
| Fuel Line | Inspect every 8,000 miles |
| Radiator Coolant | Inspect every 8,000 miles Replace every three years |
| Cooling System | Inspect every 8,000 miles |
| Valve Clearance | Inspect every 16,000 miles |
| Crankcase Breather | Clean every 4,000 miles |
| Clutch Oil Filter | Replace after 600 miles and then after 16,000 miles. |
| Clutch System | Inspect every 4,000 miles |
| Throttle Operation | Inspect every 8,000 miles |
| Spark Plug | Inspect every 16,000 miles Replace every 32,000 miles |
| Evaporative Emission Control System | Inspect every 16,000 miles |
| Secondary Air Supply System | Inspect every 16,000 miles |
| Drive Chain | Inspect and lubricate every 600 miles |
| Brake System | Inspect every 8,000 miles |
| Brake Fluid | Inspect every 4,000 miles Replace every two years |
| Brake Light Switch | Inspect every 8,000 miles |
| Brake Pads Wear | Inspect every 4,000 miles |
| Brake Lock Operation | Inspect every 4,000 miles |
| Side Stand | Inspect every 8,000 miles |
| Headlight | Inspect every 8,000 miles |
| Steering Head Bearings | Inspect every 8,000 miles |
| Nuts, Fasteners, Bolts | Inspect every 8,000 miles |
| Wheels & Tires | Inspect every 8,000 miles |
| Suspension | Inspect every 8,000 miles |
4. Average Maintenance Cost of Honda Motorcycles
The average maintenance cost of Honda motorcycles depends on your motorcycle’s model, required maintenance tasks, mileage/service interval, and location. Also, if you make sure to get your bike maintained at the appointed service intervals, this can also lower your Honda model’s maintenance cost.
For routine tasks, such as cleaning the air filter, fitting replacement parts, changing engine oil, and inspecting the tire and chain, the average cost is between $100-$300. However, extensive maintenance can cost several hundred to thousands of dollars. To get exact amounts, it is best to reach out to Honda dealerships. Knowing how much a maintenance task at authorized service centers can help you negotiate reasonable prices with independent motorcycle repair shops, mobile mechanics, and small garage owners.
5. Where to Get Honda Motorcycle Maintenance?
Listed below are places where you can get Honda motorcycle maintenance:
Authorized Honda Motorcycle Dealerships
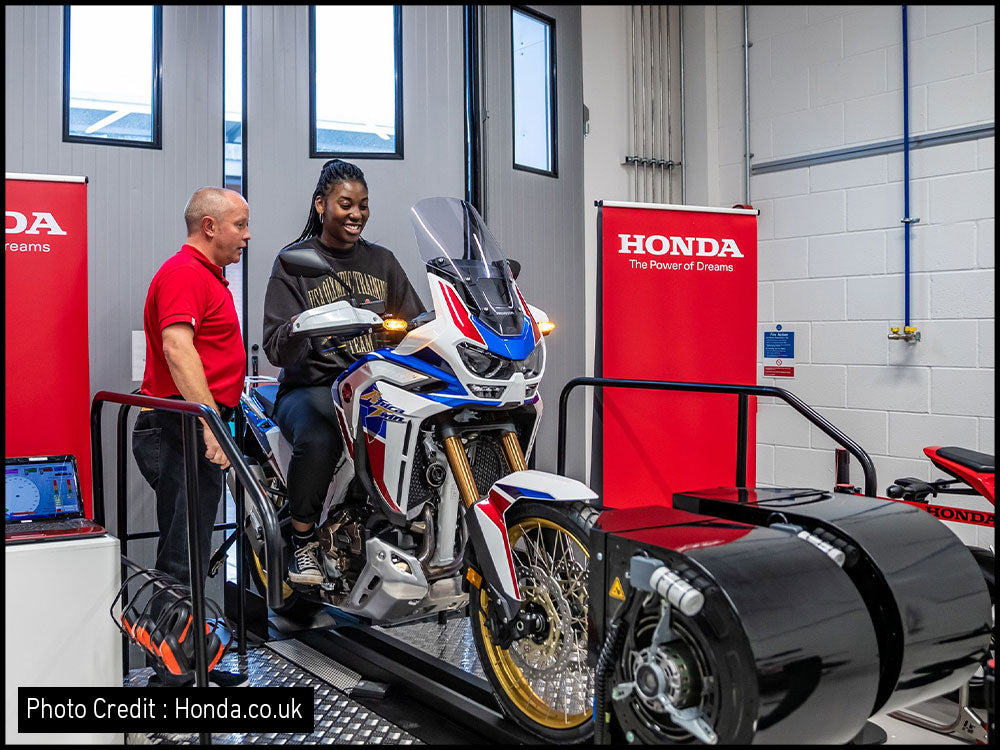
Authorized Honda motorcycle dealerships are the best places to get your Honda motorcycle checked. With over 950 Honda Powersports dealerships across the United States, you can easily find one in your city or state. The only territories with no Honda motorcycle dealerships include the District of Columbia, U.S. Virgin Islands, Northern Mariana Islands, American Samoa, Puerto Rico, and Guam.
Honda motorcycle dealerships have qualified technicians who know how to work on old and new Honda models. They also have access to original Honda parts that can be used to replace your ride’s worn or broken ones. You can book an appointment with any Honda dealership online.
Independent Motorcycle Repair Shops
You can easily find an independent motorcycle repair shop in your area that can service your Honda motorcycle. These shops have mechanics who specialize in providing maintenance for motorcycles from every brand, including Honda. Independent motorcycle repair shops provide quality service at affordable rates.
Small Local Garages
Some small local garages can also service your Honda motorcycle. These garages are usually located in small towns or villages near highways and primarily provide services for tourists. These garages can be of great help during en-route motorcycle emergencies, such as battery problems, engine overheating, brake failure, flat tire, wheel bearing failure, etc. Mechanics from small local garages can come to your location and provide repairs if nearby. When looking for a small local garage, make sure that the mechanic has experience working with Honda motorcycles and can complete the requested maintenance tasks.
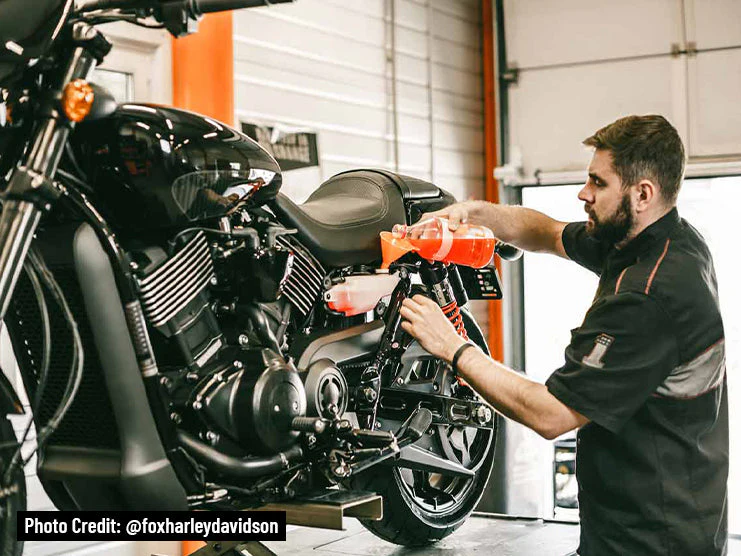
6. DIY Honda Motorcycle Maintenance
It is recommended that you seek professional help for your Honda motorcycle’s maintenance. To keep your motorcycle running properly, you can perform certain safety checks yourself. These safety checks will help familiarize you with the workings of your motorcycle. This way, you can quickly identify any issues with your motorcycle. To perform basic pre-ride safety checks, you will need the right tools, such as pressure gauges, wrenches, and torque measuring tools.
Here is a list of basic Honda pre-ride safety checks that you can perform at home:
Brake Fluid
Brake fluid ensures the braking system is responsive when the pedal is pressed. Low brake fluid will decrease your bike’s braking power significantly, which can increase the risk of accidents. Check the brake fluid level in the reservoir located near the brake pedal and lever. If the fluid is low, add hydraulic brake fluid up to the recommended level.
Brake Pads
Brake pads create the necessary friction that slows and stops your bike. To check the brake pads, locate the front and rear brake calipers. Inspect the brake pads through holes in the calipers. Brake pads come with a wear indicator notch. If the brake pad material is worn down near the indicator notch, this means you need a replacement. In other words, if the thickness of the brake pad is less than the recommended 1.5 mm, then you should replace it immediately.
Clutch Lever
Check the free play in the clutch lever to see if it is functioning properly. If your motorcycle has a hydraulic clutch, check the clutch fluid level. If the fluid level is low, add the recommended fluid according to the owner’s manual.
Engine Coolant
Engine coolant or antifreeze ensures optimal functionality and longevity of the engine by keeping it from overheating. Whether in hot or cold weather, it is always best to check the coolant level. Make sure there is enough coolant in the reservoir near the radiator. Add the recommended amount of coolant or a distilled coolant mixture for proper engine function and heat regulation.
Fuse
Check for a blown fuse and make sure to carry spare fuses.
Nuts & Bolts
Check the torque of the nuts and bolts with a torque measuring tool to make sure they are not too tight or loose. Use a wrench to tighten or loosen the nuts and bolts if needed.


Chain and Sprockets
Regularly check chain tension and inspect the sprockets for damage. The instructions are listed in the owner's manual.
Motorcycle Tires
Regularly check the tire pressure to ensure the tires are properly inflated. Inspect for the tire treads and walls for any signs of wear and tear or structural damage. Any punctures, bulges, and cracks may require you to repair or replace the tires. The average front and rear tire pressures should be 33 psi according to the owner’s manual.
Throttle
The throttle controls your vehicle’s speed by adjusting the amount of fuel and air taken in by the engine. Check the throttle for any resistance or slack, then lubricate the throttle cable and other moving parts. Check the engine’s idle speed to make sure it matches the owner’s manual’s specifications. Gently rev the engine to check how responsive the throttle is.
Engine Oil Change
Engine oil protects and lubricates moving parts, extends engine life, improves efficiency, and regulates temperature. It is best to change the engine oil every 3,000 to 6,000 miles or once per year if you do not ride regularly. Make sure you refer to your owner’s manual, especially if you bought a brand new Honda bike.
Engine Switch
Check whether the engine switch is working properly. Engine switch is responsible for starting and stopping the engine. If the switch function fails you might not be able to start the bike. Oftentimes riders get stranded en route because of this problem. On the other hand, if the switch does not stop the engine, it can drain the battery, and cause ignition and electrical issues.
Forks
Check the motorcycle forks for oil leaks. Loss of oil in the motorbike fork could cause poor suspension and discomfort on bumpy roads. How you check the front fork depends on its shape/design. Refer to the instructions in the owner’s manual when performing this safety check.
Lighting
Before riding your motorcycle, check whether the lighting is working properly, such as the turn signals and brake light. Also, check that the horn can project a loud sound to ensure road safety. Take a moment to adjust the position of the headlight since it could blind oncoming traffic if installed incorrectly.
Check Fuel Level
Check the fuel level to ensure you don’t run out of gasoline during your ride. Plus, sufficient fuel is necessary for optimal engine performance. If fuel levels are low, refuel immediately. If your Honda motorcycle is equipped with a fuel gauge, you can rely on it for accurate fuel level check. To perform a manual fuel check, use a dipstick or consult the owner’s manual.
Battery
Unless stated otherwise in the user’s manual, Honda motorcycles are equipped with maintenance-free batteries. You do not need to add distilled water or check the battery’s electrolyte level. If the terminals are corroded, make sure you clean off any accumulated rust and debris. Do not remove the battery cap seals or caps when charging.
7. Honda Motorcycle Cleaning Tips
Regularly cleaning your motorcycle is an essential step of a maintenance schedule. To clean a Honda model, all you need is a clean lint-free microfiber cloth, soap/citrus cleaner, and water. However, there are things you should and should not do when cleaning your Honda motorcycle, such as:
- Many riders spill brake fluid, clutch fluid, or engine coolant when filling their respective reservoirs to the appropriate level. These fluids act as solvents and can break down the protective finish. This can result in paint peeling and fading. When adding fluids, make sure you have a lint-free cloth ready to clean accidental spills. You can also use cool water or paint-safe cleaner to rinse off any fluid to prevent damage. After cleaning, gently wipe and dry the area completely before applying wax, polish, or sealant. Make sure you use a non-abrasive polish or wax designed for motorcycles.
- If any automotive fluids cause paint bubbles or blisters, sand down the area gently and apply paint and clear coat.
- To remove dust and loose dirt, wash the Honda motorcycle with cool water and a soft damp cloth.
- Clean the plastic parts with a solution of water and mild detergent.
- Washing the motorcycle may cause moisture to gather inside the headlight lens. Switch on the headlight to a high beam and the moisture will eventually evaporate. Make sure your motorcycle’s engine is running when doing this.
- Avoid using cleaning products not suited for a motorcycle’s exterior. These products usually contain harsh chemicals that can damage the finish and plastic parts, and cause corrosion. When using a strong motorcycle-friendly detergent, make sure you wipe down all the parts thoroughly. Residue from automotive cleaning products can cause the metal parts to corrode.
- Do not wash the motorcycle while it is still hot or warm to the touch.
- Never use high-pressure sprays to avoid damaging motorcycle parts.
- After washing the bike, let the engine run for 10-15 minutes.
- Immediately after washing the bike, apply a recommended amount of chain lubricant on the drive chain.
- Check the brakes before going for a ride to ensure they can provide responsive braking from a reasonable distance.
- If you ride your motorcycle in winter, make sure you clean off any road salt. Road salt can cause severe corrosion to your Honda motorcycle. To get rid of road salt, spray your ride with cool water. Hot water will only accelerate the rate of corrosion. After washing off all the road salt, apply a protective wax or spray on the metal parts.
- Use a liquid abrasive to remove any heat stains, oil stains, and mud from the exhaust pipes.
- Clean the aluminum parts, especially the wheels, to prevent rusting. Clean them immediately after you get home if your motorcycle’s tires are in contact with road salt, dust, dirt, or mud. Clean using a soft brush or a sponge, and mild motorcycle-friendly detergent. Avoid using harsh detergents, brushes with hard metal bristles, and steel nets for cleaning. After cleaning the bike with detergent, rinse it thoroughly with clean water and dry it with a lint-free cloth.
- Apply touch-up paint and a clear coat on the wheels if you spot any damaged areas.
- Make sure the wheel bearings do not get wet or they risk becoming corroded.
- Spray a transparent protective coating on the transmission housing, engine, and other non-painted aluminum parts during winter to prevent corrosion.
- Use steel wool to remove corrosion marks on any metal parts.
- Apply chrome polish to protect bare or unpainted metal parts.
- Use a neutral soap solution (with a pH of about 7) to clean the leather seat, taillight, windshield, instrument assembly, dashboard, and indicators.
- Heavily soiled parts can be soaked in a mild soap solution and rinsed with tap water.
- If you plan to ride your motorcycle on off-road trails, especially if you own a Honda adventure motorcycle, then ask your local Honda dealership for the best protective lubricants and waxes. Make sure you apply the necessary protective coatings before riding on harsh terrain.
8. Tips for Long-Term Honda Motorcycle Maintenance
Use Original (OEM) Honda Motorcycle Parts
When repairing, rebuilding, or replacing a particular part, make sure you buy only the original OEM accessories and parts. OEM Honda parts are of high-quality and compatible with specific Honda models.
Lubricate Moving Parts Frequently
Moving motorcycle parts, such as the throttle cable, clutch lever, pivot points, and brake lever, are prone to wear and tear. By lubricating these parts regularly, you can delay them being worn down and having to get replacements for a long time.
Hire a Qualified Mechanic
Qualified mechanics may not offer generous discounts for their services, but they can help you save a lot of money by providing reliable maintenance. Though you can perform certain maintenance tasks yourself, it is still recommended that you get your bike inspected by a professional every now and then. Qualified Honda technicians can also help you with preventive maintenance, and identifying potential issues early.
Store Your Bike When Not in Use
If you only use your motorcycle occasionally or cannot ride it for an extended period, it is best to store your bike properly. Choose a cool and dry place where your bike is not directly exposed to sunlight or rain. Then, apply anti-corrosion sprays and cover your bike with a waterproof cover or tarp to protect it from moisture and dust. It is also recommended to thoroughly wash, lubricate, and polish your bike before storing it.
Use Your Bike as Intended
It is not uncommon for riders to use standard Honda motorcycles for long-distance trips. Similarly, many riders use tourers or cruisers for off-road camping trips. Honda motorcycles are tough and reliable machines that can handle a lot of abuse. However, each Honda lineup is built for a different riding style for a reason. If you use a cruiser for off-roading, it will likely become damaged more frequently than if you use an adventure bike for the same purpose. Moreover, loading too much cargo on your Honda can also significantly reduce its lifespan and performance. It is recommended that you avoid pushing your bike past its limits and only use it for its purpose to ensure longevity.
9. Takeaway
A well-maintained Honda is not only comfortable to ride but can improve your chances of reselling it for a reasonable price. When you finally decide to sell your current Honda motorcycle in favor of a newer, bigger, and faster Honda model, the potential buyer will want to inspect your bike’s condition. Any maintenance work you have done over the years will ensure it has good looks and functionality. Even if you don’t have any plans to sell your bike in the future, following the recommended maintenance schedule will help keep your motorcycle in optimal condition for a long time. By performing regular inspections, fluid changes, and refills, timely replacements, and recommended adjustments you can increase the lifespan and performance of your motorcycle significantly.
Popular Collections


Leave a comment
All comments are moderated before being published.
This site is protected by hCaptcha and the hCaptcha Privacy Policy and Terms of Service apply.