Table of Content
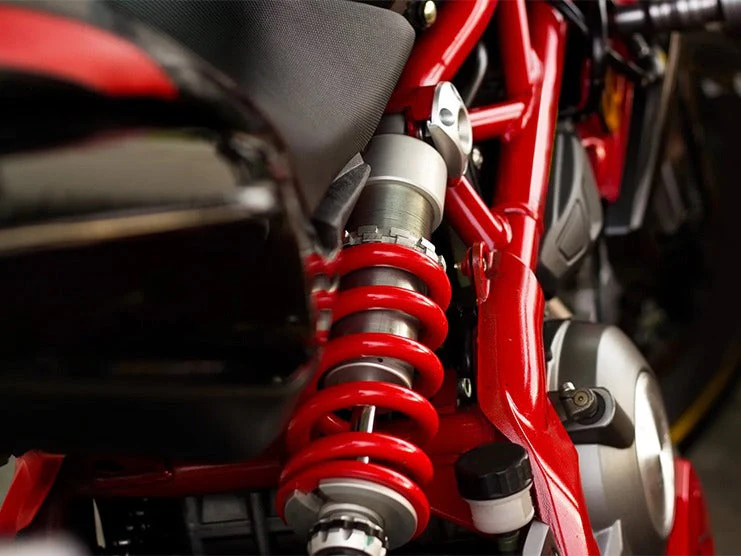
Painting a motorcycle frame is an essential part of restoring a motorcycle. This task is relatively simple to accomplish, even if you are new to motorcycling. However, disassembling a motorcycle to access the frame can be difficult and time-consuming.
If you are restoring an old motorcycle or want to participate in a motorcycle show, you may need to remove the engine to paint the frame. But it can be a lot of work to remove the engine by yourself. Read this article to learn how to paint a motorcycle frame without removing the engine.
1. Equipment Required to Paint a Motorcycle Frame
- Respirator
- Gloves
- Full-sleeved clothes
- Sandpaper
- Sanding block
- Glazing and spot putty
- Plastic plate
- Blade scrapper
- Microfiber cloth
- Tack cloth
- Degreaser
- Etch primer (Spray can)
- Paint (Spray can)
- Clear coat (Spray can)
Also Read: HOW TO PAINT A MOTORCYCLE FRAME
2. How to Paint a Motorcycle Frame without Removing the Engine
Painting a motorcycle frame without removing the engine requires less effort. However, there are a few extra steps to ensure the spray does not contaminate the engine, chrome parts, and wire harness. If you want to paint your motorcycle frame without removing the engine, follow the step-by-step procedure below:
2.1 Remove the Motorcycle Parts
To have better access to the motorcycle frame, you will need to remove the seat and the gas tank. Each type of motorcycle has different mechanisms necessary to remove its seat and gas tank. Check the motorcycle owner’s manual to learn how to remove them. Before you remove the gas tank, turn the petcock’s knob to switch off the fuel supply, and then remove the fuel pipes connected to the fuel tank. You should also remove the headlight, instruments, and wheels to ensure better access to the frame. Removing the rear wheel can help you reach the swingarm.
2.2 Wear a Respirator, Gloves, and Full-Sleeved Clothes
Before you start removing the current paint and applying new coats of paint, make sure to wear a respirator, gloves, and full-sleeved clothes to protect yourself from harmful chemicals.
2.3 Remove Any Rust on the Frame
Before you start painting your motorcycle frame, make sure to remove any rust from it to make sure the paint sticks better on the surface and lasts longer. To do this, rub the frame’s surface using 40-grit sandpaper. Make sure to look for rust spots on the motorcycle frame and sand them down until the surface is a smooth finish.
Note: Covering rust with paint is a bad idea as it does not allow the paint and primer to stick to the surface.
2.4 Fix Any Imperfections
If you want your frame to look as good as new after the paint job, fix the pinholes, dents, and scratches. Fill the imperfections with glazing and spot putty. Take a plastic plate and put some spot putty on it for mixing.
Noe: Do not use cardboard to mix spot putty as it will soak the chemicals and become harder more quickly.
Use a blade scraper to mix the spot putty. Before you apply the spot putty, make sure to clean the frame with a microfiber cloth. Using the blade scraper, fill the pinholes and minor dents with spot putty. Do not apply excessive spot putty on the frame as it creates uneven layers and makes it difficult to sand the surface.
Wait until the spot putty dries and becomes hard. Take 320-grit sandpaper and start scrubbing the frame until the surface is smooth. For a better finish, use a sanding block to sand down the curves and edges.
Also Read: HOW TO PAINT A MOTORCYCLE GAS TANK


2.5 Remove the Sand Dust
After sanding the spot putty, make sure to remove the sand dust from the surface using an air blower. You can also use a tack cloth to remove the dust from the surface to ensure a better finish.
2.6 Remove the Grease
The primer does not stick to a surface with grease on it. To remove the grease on the frame, take a microfiber cloth, pour some degreaser on it, and rub the frame gently.
2.7 Cover the Engine, Chrome Parts, and Wire Harness
If you do not want the spray to cover the engine, shiny chrome parts, and wire harness, cover them properly with the help of newspapers and masking tape. Even a small amount of spray could ruin the look of the chrome parts and require you to paint them again from scratch since painting chrome parts requires removing the chrome first. Spray on the wire harness can cause the wire to crack more easily.
2.8 Prepare a Workspace
Before you start to paint, cover your workspace by installing plastic sheets along the floor and walls to prevent spray from getting everywhere.
2.9 Apply the Primer Coat
Use etch primer on the frame to ensure the paint will stick better to the metallic surface. The chemicals in the primer make the frame’s surface adhesive and will bond with the paint better. Make sure there is no moisture, dust, or oil on the frame’s surface before you apply the primer. Do not even touch the frame with bare hands as your fingers have natural oil on them that can spoil the surface. Apply at least two coats of primer and wait for 5-10 minutes between coats. Give the primer at least an hour to dry before you move on to the next step.
Note: An hour should be enough time for the primer to dry. However, if the surface still looks wet, wait for another half an hour.
2.10 Apply the Paint Coat
Apply the base paint coat and wait for at least 15 minutes to move on to the next step. Now, apply the second coat of paint. Make sure to move the spray can uniformly over the frame in one direction to ensure a better finish. After waiting for another 15 minutes, apply the final paint coat. Let the paint dry for at least half a day.
Note: Do not use cheap spray paints as they do not last long. They have poor-quality nozzles that cause paint to scatter excessively, wasting too much paint.
2.11 Apply the Clear Coat
The clear coat ensures a glossy finish and is also available in spray cans. Read the instructions on the spray can to ensure a perfect finish. Clear coat cans have an activator installed on the cap. Remove the activator, install it at the bottom, and press it to mix the liquids in the clear coat cans. Shake it well before use. Apply two clear coats and wait for at least 12 hours to dry.
Also Read: HOW TO PAINT MOTORCYCLE RIMS
3. Final Words
If you are restoring a motorcycle, you will have to paint its frame. A motorcycle frame is not as visible as a gas tank, fenders, and fairings, so it does not require the perfect finish. However, accessing the motorcycle frame while painting is difficult as you need to open and remove the engine. If you want to paint the motorcycle frame without removing the engine, follow the step-by-step procedure mentioned in this article. To ensure a better finish, you must remove the rust and fix the imperfections on the frame before you paint it.
If you want to improve the look of your motorcycle, you can install sissy bars, backrests, crash bars, fairings, and handlebars available at Viking Bags. You can also improve the storage capacity of your motorcycle by installing trunk bags, sissy bar bags, and saddlebags.
Popular Collections


Leave a comment
All comments are moderated before being published.
This site is protected by hCaptcha and the hCaptcha Privacy Policy and Terms of Service apply.