Nervous about drilling? This guide explains what hard mount saddlebags are, how to prepare, what a first-time install really looks like, and how to avoid the mistakes that cost time.
Hard mount saddlebags look right, stay put and feel solid at speed. They also make a lot of first-time installers nervous, because drilling is part of the job and a misplaced hole cannot be undone. If you are staring at a box of bags and a drill and wondering how bad it will be, you are in good company.
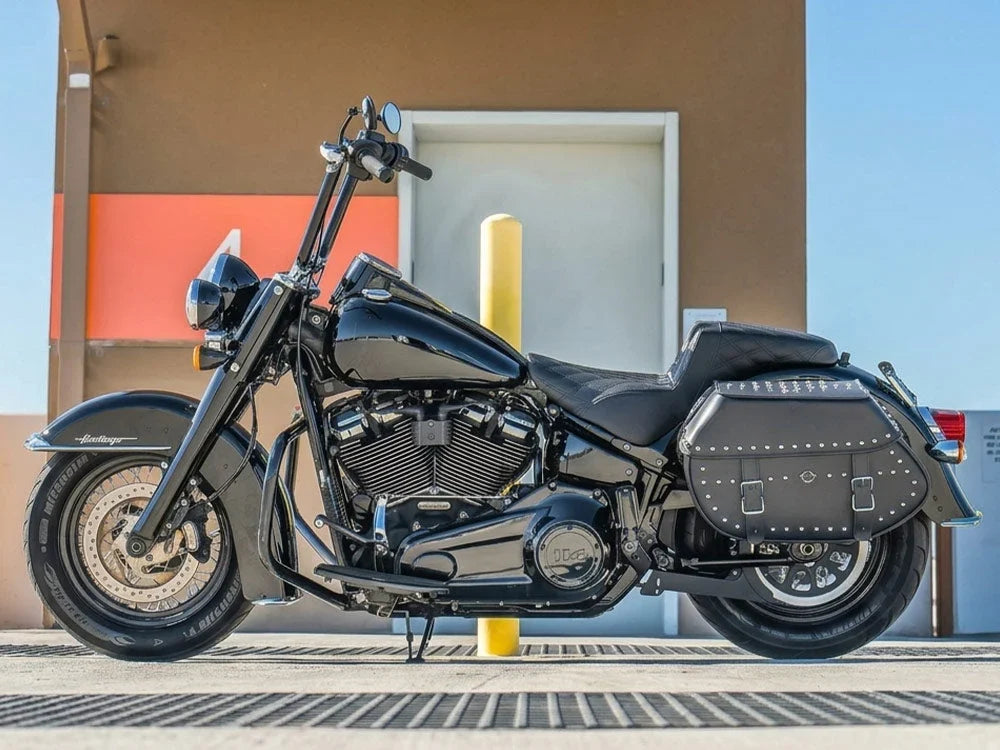
This guide draws on a customer's video of installing our Legacy extra large studded leather saddlebags on his 2021 Harley-Davidson Heritage Classic, and on the fitment and installation details on our product pages. It explains what hard mount really means, how to prepare, what a realistic first install looks like, and how to avoid the mistakes that cost time. If you want a closer look at the bags themselves rather than the install, see our review of the best-looking Harley Heritage Classic leather saddlebags.
Table of contents
1. Quick Answers
- What does hard mount mean? The bags attach to the bike with fixed brackets and hardware. Viking describes this as a secure, stable and fixed setup, as opposed to quick-mount bags that come off in seconds.
- Do hard mount saddlebags need drilling? It depends on the bag and the bike. The customer who installed the Legacy bags on his Heritage Classic said drilling was part of the process, so read the manual for your model before you start.
- How long does the install take? Viking rates the Legacy bags for Heritage Classic as a medium install. The customer, working alone for the first time, spread it over two days.
- Do I need to move my turn signals? On the Legacy bags for the 2018-and-newer Heritage Classic, no. The listing says turn signal relocation is not required, and the bags have cutouts for the signals.
- Is hardware included? Yes. The listing says the hard mount hardware is included free.
2. What "Hard Mount" Actually Means
Saddlebag mounting comes in two broad styles, and the one you choose changes how the install goes.
- Hard mount: The bag is bolted to brackets or mounting points on the bike. Viking's listings describe it as a secure, stable and fixed setup. It will not rattle loose or shift, but you do not take the bags on and off in seconds.
- Quick mount (quick disconnect): The bag clips onto a docking system and, according to Viking's listings, installs and removes in seconds.
You will find hard mount, quick-mount and throw-over styles for most major brands on our motorcycle saddlebags page, which also lets you shop by bike.
Viking also labels each listing with an installation level of easy, medium or hard. In the listings we reviewed, quick-mount bags were rated easy, many hard-mount bags were rated medium, and a few hard-mount setups were rated hard. The rating is a guide, not a promise, because your skill and tools matter as much as the bag.

3. Before You Start: Check Fitment First
Most installation problems begin with a fitment mistake, so confirm these before you open the box:
- Exact model and year. The Legacy bags in this guide fit the Softail Heritage Classic FLHC/S from 2018 to current. If you ride an older Heritage, Viking lists separate bags for the FLSTC/I, so browse the Heritage FLSTC/I saddlebags instead.
- Turn signal note. Check the fitment note for "Turn Signal Relocation Required."
- Mounting type. Confirm whether the listing says hard mount or quick mount.
- Hardware. Viking states that required hardware is included unless noted otherwise.
- The manual. Read the instructions supplied with your bags before you drill anything.
You can see every option for this model on our Harley Softail Heritage FLHC/S saddlebags page.
4. Turn Signal Cutouts vs. Turn Signal Relocation
Large saddlebags can sit where a Softail's rear turn signals are mounted. Manufacturers solve it in one of two ways:
- Cutouts: The bag is shaped with openings so the stock signals stay in place. This is the case for the Legacy bags on the Heritage Classic, which means the install does not include moving the signals.
- Relocation: The signals move to a new position, often near the license plate, using a relocation kit. Viking's fitment notes tell you when this is required, and some listings include the kit.
Cutouts keep the job simpler, which is one reason the Legacy bags suit a first-timer better than a setup that also needs the turn signals moved.


5. What a First-Timer's Install Really Looks Like
The customer in the video was candid, and his experience is a useful reality check. He describes himself as still learning, and his install looked like this:
Stage |
What happened |
|---|---|
Preparation |
He spent time laying everything out and planning placement before touching the bike |
Exhaust side |
Getting the right-side bag positioned correctly was a big part of the job, because he runs aftermarket slip-on exhausts |
Drilling |
He found that drilling and a lack of experience made for a humbling mix, and one hole ended up slightly off, which he planned to seal with silicone |
Solo challenge |
Working alone made it harder to hold the bag in position, and he said an extra set of hands would have helped |
First bag |
Once mounted, it looked right, and the clearance from the exhaust looked good |
Second bag |
It went on much more smoothly, because the first side had taught him the process |
Result |
Both bags lined up evenly from the rear, and he said the bike looked more finished |
Time |
A few hours on the first day, finished the next day |
Three lessons stand out. Slow, careful planning pays off. An aftermarket exhaust adds a clearance check. And the second bag is always easier than the first.
6. A General Checklist for Hard Mount Saddlebags Installation
These are general good-practice steps. Always follow the instructions that come with your bags, because hole locations, bit sizes and fastener details differ by model.
- Read the manual and gather your tools. Typical needs include a drill and bits, a marker, wrenches or sockets, and masking tape. Check the manual for the exact list.
- Lay everything out. Identify each part and confirm nothing is missing before you start.
- Dry-fit before drilling. Hold the bag in position and check it against the bike, the fender and the exhaust.
- Compare both sides. Make sure the left and right bags will sit symmetrically.
- Mark, then check again. Mark hole locations as shown in the manual, step back and compare before you drill.
- Check exhaust and tire clearance. If you run an aftermarket exhaust, allow extra time for this step.
- Drill carefully. Go slowly and follow the manual's guidance.
- Mount and tighten. Fit the bag, then tighten the fasteners as the manual directs.
- Repeat on the second side. Use what you learned on the first.
- Recheck after your first ride. Hardware can settle, so check that nothing has loosened.

6.1. Mistakes to avoid
- Rushing the layout. Misplaced holes are the most common regret.
- Working alone without support. A second person makes positioning much easier.
- Skipping the exhaust check. Heat and contact can damage a leather bag.
- Not asking for help. If you drill a hole in the wrong place, contact the manufacturer before sealing it. The customer planned to use silicone, but a manufacturer can tell you whether that is appropriate for your bag.
7. After the Install: What to Check
The customer's test ride is a good model. After mounting, he wanted to see whether the bags felt stable, and he rode to check for shifting, movement, clearance problems, rubbing or bouncing. In his case, the bags performed well with no issues.
Use the same checklist on your first ride:
- Stability: Do the bags shift or rock?
- Clearance: Does anything touch the exhaust, tire or shock?
- Noise: Do you hear rattling or rubbing?
- Closures: Do the lids latch the way you expect?
That last point caught the owner out. The front snap flap kept coming loose until he realized there is a twist closure, and he said that one might be on him. If a closure seems not to hold, check the instructions or look for a twist feature before assuming something is wrong.
7.1. Living with the bags
The Legacy bags are structured and reinforced, and the listing describes a metal frame with a plastic-reinforced lid and body. They offer 35 liters across the pair, which Viking lists as holding about 49 cans, and the listing gives the dimensions as 23 by 7 by 14 inches (length by width by height) with a 13.25 by 6.25 inch lid opening. They are key lockable, and the customer mentions two keys are included. As with any lock, treat it as a deterrent and take valuables with you.
To get the most out of the space, our guide to packing saddlebags for better weight distribution shows how to load them evenly.
8. Hard Mount or Quick Mount: Which Should You Choose?
Hard mount |
Quick mount |
|
|---|---|---|
Setup |
Fixed to the bike |
Clips on and off |
Install level (as listed by Viking) |
Often medium |
Often easy |
Removing the bags |
Not quick |
In seconds |
Feel at speed |
Secure and fixed |
Held by the quick-disconnect system |
Best for |
Riders who want a permanent, classic look |
Riders who remove bags often |
If the idea of drilling worries you, Viking lists several quick-mount options for the same bike. You can compare them on the Heritage FLHC/S luggage by bike page. If you want the studded leather look and a fixed setup, the Viking Legacy extra large studded leather saddlebags are the model the customer installed.

9. Should You DIY or Use a Shop?
A first-time installer can manage a medium job with patience, as the customer showed, but it helps to be honest about your comfort with drilling and your tools. Consider a shop if you are unsure about hole placement, cannot get a helper, or have an unusual setup such as an aftermarket exhaust that affects clearance. You can also contact the Viking team with questions before you start, and the listings invite you to ask about installation.
10. Frequently Asked Questions
Are hard mount saddlebags hard to install?
They take more time and care than quick-mount bags. Viking rates the Legacy bags for the Heritage Classic as a medium install, and a first-time solo installer in a customer video took two days.
Do hard mount saddlebags require drilling?
The customer who installed the Legacy bags on his Heritage Classic said drilling was part of the process. Instructions vary by bag and bike, so follow the manual for your model.
Do I need to relocate my turn signals?
Not with the Legacy bags on the 2018-and-newer Heritage Classic FLHC/S. The listing says relocation is not required, and the bags have turn signal cutouts. Other bags and bikes can differ, so check your fitment note.
Is hardware included with Viking saddlebags?
Yes. Viking's product pages state that any required hardware is included unless noted otherwise, and the Legacy listing says the hard mount is included free.
What if I drill a hole in the wrong place?
Stop and contact the manufacturer for advice. The customer in the video planned to seal his off-center hole with silicone, but confirm what suits your bag before you do the same.
Can I install saddlebags alone?
It is possible, but harder. The customer did it solo and said an extra set of hands would have helped.
How do I know the bags are stable?
Take a test ride and check for movement, rubbing, rattling and clearance, then recheck the hardware afterward.
Do the Legacy bags lock?
Yes. The listing says they are key lockable, and the customer mentions two keys are included.
What is the warranty and return policy?
Viking's product pages state a one-year warranty and a 45-day return or exchange window, with orders shipping within 48 hours.
Will these bags fit an older Heritage?
The Legacy bags in this guide are for the 2018-and-newer FLHC/S. Older Heritage models use different bags, so check the fitment for your exact model.
11. Final Thoughts
Hard mount saddlebags reward a little patience. Plan the layout, check your fitment note, follow the manual, take your time on the exhaust side, and let the second bag teach you what the first one could not. If you want the fixed, finished look of a bag that does not move, the effort is worth it. If you would rather skip the drilling, there are quick-mount options for the same bike. Either way, our motorcycle saddlebags page is the quickest way to compare styles by bike, and our Harley saddlebags range covers the Harley-specific options. For a look at the bike itself, see our Heritage Classic 114 review.
This guide is based on a customer's video review and Viking Bags' product and collection pages (checked October 2026). Installation details vary by bike and bag, so always follow the manufacturer's instructions. Customer experiences are individual and are not a guarantee of results.



Leave a comment
All comments are moderated before being published.
This site is protected by hCaptcha and the hCaptcha Privacy Policy and Terms of Service apply.