Motorcycle camping is a life-changing experience where you ride on scenic roads, connect with nature, discover new routes, meet new people, explore the wilderness, and learn survival skills. It is also one of the most affordable forms of adventure and vacation. Throughout the United States, there are various public motorcycle campgrounds, national parks, state parks, national forests, and BLM lands with campsites that cost as little as $15 per night. However, most of these campsites lack basic facilities, such as level ground, showers, washrooms, fire pits, clean water, and electricity. Those sites that have these amenities can be acquired on a first-come, first-serve, or reservation basis. Most motocampers remain unable to make reservations timely and miss out on this amazing experience. Many riders quickly become tired with the hassle of carrying extra luggage bags and aftermarket parts, such as saddlebags, luggage racks, and sissy bars, when camping out in a tent. But due to their motorcycles’ limited space and weight capacities, moto campers often find themselves sleeping on the hard ground. When riding with a partner, the storage capacity shrinks further, making it extremely difficult to pack even the bare essentials.
A better alternative to avoid sleeping on the ground, shield yourself from bad weather, and enjoy a luxurious RV road trip is to build and tow a motorcycle camping trailer.
Table of Content
1. What is a Motorcycle Camping Trailer?
A motorcycle camping trailer is a lightweight, aerodynamic, and compact camper that can be pulled by a standard motorcycle. Weighing up to 300 lbs, a pull-behind camping trailer can act as your shelter, complete with a comfortable bed, kitchen area, ample storage, electricity, heating, and air-conditioning . If you want, you can also use it to transport your camping gear if you prefer camping out in a tent. A motorcycle camper trailer also allows you to bring along a passenger as it has enough room to accommodate their stuff.
2. Are Motorcycle Camping Trailers Safe?
Yes, you can safely tow a motorcycle camping trailer linked to your motorcycle. But make sure the overall weight of the trailer, including your camping gear and other luggage, does not exceed more than half of your motorcycle’s weight.
When traveling with a partner, you would also have to consider the weight of the rider and the passenger to prevent straining your bike’s engine.
3. Why Build a Motorcycle Camping Trailer?
A motorcycle camping trailer has many advantages, but for some riders, its cost is its best feature. As a result, they do not even consider it as a potential option when camping. An average motorcycle camping trailer costs between $2,000 to $7,000. Moreover, if your bike is not capable of towing a trailer, you would have to pay a lot of money to modify it to be able to support the camper.
Building your own motorcycle camper will require less expenses. On average, a camper trailer built at home will cost between $800-$1,200. Moreover, you get to choose which features and amenities you want your camper to have.


4. Guide to Build a Comfortable Motorcycle Camping Trailer
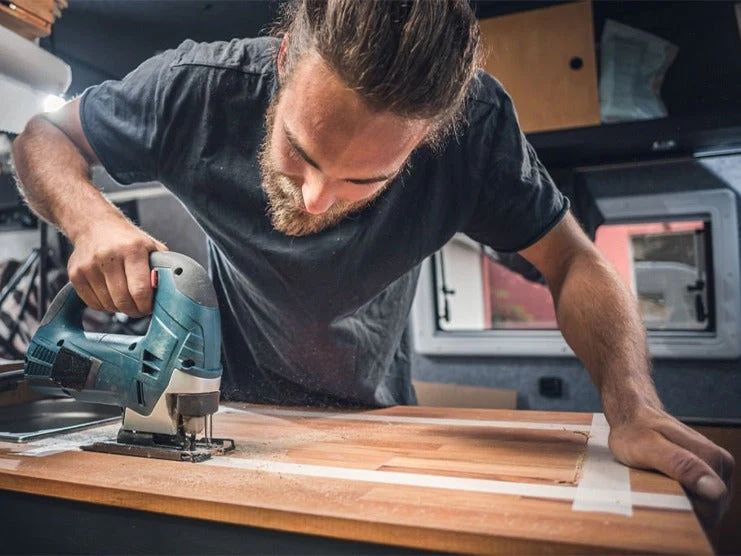
A motorcycle camping trailer has a tear-shaped design to improve aerodynamics. Due to its streamlined shape, you can easily pull it behind your motorcycle across long distances without straining the engine, wearing the tires, or increasing fuel consumption. However, constructing your own trailer will take you a long time to complete. Once you complete the project, you will have all the amenities you look for in a campsite at your disposal. Listed below is a step-by-step guide on how to construct a motorcycle camping trailer:
4.1 Step 1 - Create the Trailer
If you already have a motorcycle trailer or you can afford to buy one, skip this part and go to the “Create the Camper” section. Otherwise, continue reading the instructions below. Renting a trailer is also a convenient option, provided the rental company can find the right fit for your bike.
When creating a trailer, you need a large space to perform difficult tasks, including cutting, bending, welding, grinding, and drilling holes in the metal. If you have no experience handling any of these machines and tools, then it is best to ask a welder or metal fabricator to create a custom trailer for your motorcycle.
Tools Required
- 1” x 1” x (0.083” W) inch steel tubing
- Shearing Machine
- Welding Machine
- Measuring Tape
- L-Square Angle Ruler
- Drill Machine
- Bending Machine
- Hammer
- Grinding Machine
- Rust Primer
- High Gloss Spray Paint
- Hitch System
- 80 Grit Sandpaper
- Motorcycle Wheels (Secondhand)
- Shaft Locking Jack Pins
Procedure
- Find your motorcycle’s towing capacity by looking in the owner’s manual, asking a motorcycle dealership, or researching online. If you create a larger, heavier trailer that exceeds your bike’s towing capacity, you are likely to get into an accident or cause the engine to break down.
- Weld a custom trailer that will act as the base of your DIY motorcycle camper.
- You will need multiple 1” x 1” x (0.083” W) steel bars.
- The trailer’s dimensions should match those of the motorcycle camper’s base. The average width and length of the camper’s base should be about 2’ 6” and 6’ 8” respectively. Cut the steel bars at a 45° angle using a shearing machine) to create a perfectly rectangle box.
- Put all four steel bars on the ground and weld them together from all four corners. After you have arranged all of the steel bars so they form the shape of a rectangle, finish welding them together.
- Use a measuring tape to mark the center of the frame and weld another 6’ 8” steel bar to the 2’ 6” steel bars. Make sure that you weld precisely in the middle of the rectangular steel frame.
- With the main frame completed, create a rear bumper. Create an inwardly closed steel tube and weld the ends shut. Use a welder to heat up any extra steel, then use a grinder to create a smooth finish.
- Use a grinder machine to create accurate dimensions, cut away excess metal, shape, and smooth out the weld seam.
- Next, cut a 3” x ¼” flat steel bar that will be used to mount the wheels of the camping trailer. Smooth out the edges of the newly cut piece with the grinder, then drill a hole in the flat bar to insert the wheel axle. Place the bar on a piece of wood and make the hole using a drill machine. Once complete, weld the bars to the frame. Then, weld a steel crossmember to improve structural strength to better support the wheel.
- To hitch the camping trailer onto your bike, you would need a motorcycle hitch. Luckily, they are readily available on Amazon, Ebay, and other online stores. You can also get a high-quality hitch system from hardware stores. For the hitch, you would need a piece of steel that connects the trailer and the hitch assembly at the side of the wheel. This would require securing the steel bar in the bending machine, heating it, and then hitting it with a hammer for 10-15 minutes or until you achieve the desired angle. Insert the hitch system at the open end of the 1” steel bar. Weld it onto the trailer along with other metal pieces for support. If this step is too complex, it is recommended you seek professional help to join the hitch to the trailer.
- Create a four corner jack system that will help you park the trailer. Cut 1” pieces of steel tubing and drill holes in the small metal squares before welding them on at each corner of the trailer frame.
- Next, use ¾” thick steel tubing to cut four 20” long bars. Mark and drill holes after every inch of the bar until eight inches of the bars have holes. Also, drill a hole that is two inches from the far end. Now weld a small flat bar foot onto this bar. Repeat the same process for the other three 20” bars until you complete the jack system. These four bars should fit in the 1” steel tubings welded to the four corners. When on the road, you can remove these bars or pin them up out of the way using shaft locking pins. When you park, you can move all or one of the bars downward to any of the pre-drilled holes on the bars and then secure the bars with Jack pins to stabilize the camper.
- With the frame complete, use a grinding machine and an 80 grit sandpaper to prep the surface for paint. You can use a regular aerosol can of rust primer and paint. Leave the primer on for 30 minutes before spraying a coat of paint.
- You can buy used motorcycle wheels from a second-hand market to attach to the camper. With the wheels in place, hitch the trailer to the motorcycle and go for a test ride.
- Once the trailer is complete, you have the right dimensions to create a motorcycle camper.
4.2 Step 2 - Create the Camper
A motorcycle trailer functions as the structural base of a camper. If you buy a trailer, make sure it can support the weight of the camper you plan to create. Retail trailers usually include information about the dimensions and weight in the owner’s manual. However, if you build the trailer yourself, you need to be extra careful about how much weight you add. Using foam and thin plywood sheets is the best way to keep the camper weight low.
Tools Required
- Pine Plywood; Preferably 1/4” Finish Grade
- Measuring Tape
- Pencil
- Jigsaw Machine
- Metal Blade
- Multi Tool
- Power Saw
- Wood Glue
- Silicone
- Bolts, Nuts, Screws
- 80 Grit Sandpaper/Wood Sander
- Hinges
- Paint
- Paint Roller
- Tight Bond Glue
- Canvas Drop Cloth
Procedure
- Use a measuring tape to check the dimensions of the trailer, mark the pine plywood, and then cut it using a power saw until it is the same size as the trailer. Put the freshly cut plywood sheet on the trailer to check if it fits along the bottom. If the length of your trailer is 7’, then the length of the plywood camper floor should also be 7’.
- The camper’s walls and door will also be made with ¼” plywood. When you lay foam and mattress along this thin sheet, it will be adequately rigid and reduce the overall weight of the camper.
- Measure the required dimensions and draw a tear-shaped camper wall on the wood using a pencil. To get a smooth and accurate 90° cut, use the Jigsaw machine. Place this wall on another plywood sheet and trace the shape of the wall pattern. Cut this new sheet to create the second camper wall.
- Cut the holes for the windows on the side walls. You can use second-hand RV windows and trace their shapes. These windows are easily available and cost less than $200. When you assemble the camper, use butyl tape to install the windows inside the side walls. Then drill a hole and use a ¾” pan head screw to hold the window in place. Put weatherstripping or white silicone around the windows to form a seal.
- The camper door will be outlined on one of the side walls. Mark the measurements and use the multi tool to create a starting point on the plywood for the Jigsaw machine. Then, cut it out while following the lines drawn with the pencil on the plywood. To mount the door to the motorcycle camper, you will need to attach hinges. If you have an extra sheet, use it to cut out a second door and glue it on top of the first door already attached to the camper. This will make the door sturdier and increase the durability of the camper’s structure.
- After placing the camper’s floor on the trailer, attach the camper walls to the trailer with nuts and bolts. If you find any gaps in between the walls, seal them with wooden glue or silicone.
- Measure and mark the distance between camper walls on the plywood sheet to determine the dimensions of the camper roof. After you trace the shape of the camper roof, cut the wood with the Jigsaw machine. Place the roof on top of the sidewalls and bolt it in place. Use wood glue and silicone to connect the walls to the roof. Leave the wood glue to dry before the next step.
- Use an 80 grit sandpaper or an electric wood sander to smooth out sharp edges and create a smooth finish.
- Paint the camper and leave it to dry.
- Use canvas drop cloth to cover the entire camper if you cannot afford fiberglass. Spread tight bond wood glue all over the camper with a paint brush or a paint roller. Spread the canvas cloth over the glued area and iron the cloth so it quickly bonds with the glue and the camper. Cut the extra canvas with a sharp pair of scissors. Repeat the process until the camper is covered with canvas. The iron and cutter will ensure the canvas will form around the contours and crevasses of the plywood. Cut the canvas covering the windows as well. Glue the overlaps to form a seal.
- Paint the canvas using a paint roller. Leave it to dry. Apply 2-3 coats of paint. Make sure you sand the canvas with an 180 grit sandpaper and a sanding machine in between applying coats of paint.
- Place the door into the opening in the side wall from which it was cut. Then attach hinges on the left side of the door. After measuring, pre-drill the holes and apply some silicone before inserting 7” screws to keep it in place. On the right side of the door, install the door latch and a knob.
- With your camper ready, you can customize its interior to your liking. You can cut and install shelves, then seal them with silicone.
- Place the mattress, quilt, pillows and other essentials in the camper. Install LED lights on the ceiling and in the walls, add solar panels on the roof, and place your essentials on the shelves.
From mopeds to standard motorcycles or cruisers to heavyweight tourers, you can use this guide to create a motorcycle camping trailer that can be easily towed to faraway places.
5. Takeaway
With the growing popularity of motorcycle camping, the need for motorcycle camping trailers is also on the rise. While riders can reserve quality accommodation at scenic campsites for a relaxing and enjoyable experience, hauling their camping gear to scenic campgrounds offers a more memorable experience. A motorcycle camper lets you enjoy an RV road trip without purchasing an expensive RV trailer, motorcycle camper, or a motorhome. There are no extra fuel and maintenance costs of a motorcycle camper. However, a camper itself can be expensive to purchase or rent. When traveling with friends and family, you can easily carry more stuff. Motorcycle campers also allow riders to introduce this unique lifestyle to their children at a young age. During motorcycle events and rallies, a camper saves you from paying for overpriced hotel rooms. So, if you hate sleeping in a tent, don’t like hammocks, and cannot afford to buy a motorcycle camper, follow the instructions above to build a comfortable, compact motorcycle camper trailer to enjoy the comfort of home in the wilderness.
Popular Collections


Leave a comment
All comments are moderated before being published.
This site is protected by hCaptcha and the hCaptcha Privacy Policy and Terms of Service apply.