
Quick answer: The five adventure motorcycle mods that change a bike’s look the most are a properly proportioned rally-style headlight, a flat seat, a tail tidy, a high front fender and a factory-style repaint. Do safety and reliability upgrades first, then use these to fix awkward proportions. Check plate and lighting rules before touching the tail.
Table of contents
Some motorcycles are brilliant machines wearing the wrong outfit. You know the type: an engine you love, a chassis that does everything you ask of it, and styling that stopped making sense around 2008. Chunky forks under a tiny headlight. A seat that parks you practically on the handlebars. A license plate dangling off the back like a name tag on the wrong lapel.
That was the starting point for a recent BMW G650X Country build. The bike is light, and its big single is smooth and torquey. Everything else was a mix of mid-2000s styling and awkward proportions. Rather than sell it, the builder made five targeted changes and ended up with something that looks like a factory desert racer.
This guide breaks down those five adventure motorcycle mods: why each one works, what to check before you start, and how to apply the same thinking to almost any adventure bike, dual sport or scrambler.

1. What counts as an adventure motorcycle mod?
An adventure motorcycle mod is any change that makes an ADV, dual sport or scrambler-style bike safer, more capable, more comfortable or better looking. They fall into three groups:
Type of mod |
What it does |
Typical examples |
|---|---|---|
Protection and capability |
Keeps the bike and rider intact off-road |
Crash bars, skid plate, handguards, tires, suspension |
Comfort and ergonomics |
Reduces fatigue on long days |
Seat, handlebar risers, footpegs, windscreen |
Style and proportion |
Makes the bike look cohesive |
Headlight, tail, fender, seat shape, paint |
Most guides cover the first two rows. This one is about the third, because styling is often what decides whether you actually enjoy walking out to the garage.
2. Do these first (the unglamorous part)
Style mods are fun, but they come second. If your tires are tired, your brakes are spongy or you have no crash protection, fix those first. If you plan to ride off-road, add the basics: crash protection, hand protection and a luggage setup you trust. Our guide to choosing adventure motorcycle luggage by riding style is a good place to sort that out before you start swapping fenders.
Once the bike is safe and ready, the fun begins.
3. Meet the bike: why an “orphan” platform needs DIY
The BMW G650X family arrived in 2007 as three models: the Xchallenge, the Xmoto and the Xcountry. The Xcountry was the scrambler of the trio. The bikes were assembled by Aprilia, use a 652cc single and were praised by reviewers for their punch and smoothness. Then BMW dropped the whole line after a short run.
That matters for anyone modding an older or discontinued bike. When a model sells in small numbers, the aftermarket does not follow. There may be no seat from the big names, no off-the-shelf headlight bracket and no tidy bolt-on kit. You either live with the stock look or you make parts yourself. That is where a bit of CAD and a 3D printer earn their keep (more on that below).
If you ride something more popular, you will have an easier time. Everything below applies equally to a Triumph, a KTM, a Honda or a Suzuki. If you are not sure whether your bike counts as an adventure bike or a scrambler, read Are Scrambler Motorcycles Good for Adventure Riding? and 5 Scrambler Bikes That Are Secretly Adventure Bikes.
Mod 1: Fix the headlight proportions with a rally-style setup
The problem: Chunky inverted forks look top-heavy under a small headlight. The front end feels unbalanced because the biggest visual element, the light, is the smallest thing up there.
The fix: Go bigger and make it look like it belongs. BMW did exactly this with the R nineT Urban G/S, which drew on the old R80 G/S for its look. Aftermarket makers now sell fairings styled after that design, so you can get the same silhouette without paying factory prices.
Here is the catch. On this bike, the stock headlight is about 5.5 inches, while the fairing is built for a 7-inch lamp. Seven-inch round headlights are common in motorcycling, so finding a good one is easy. The part you can’t buy cheaply is the bucket: the housing that holds the light and interfaces with the fairing. The OEM version is expensive, and on an older bike nobody makes one.
So the builder designed and printed one. If you want to do the same, here is the process in plain terms:
- Measure the light. Use calipers to get the lens diameter, overall depth and the position of the mounting points.
- Measure the fairing. You need the opening diameter and where it mounts.
- Model it in CAD. Start with the circles for the front face, work backward for depth, then add features such as mounts.
- Add anti-rotation tabs. The bucket must not spin. Extrude small tabs and mirror them so both sides match.
- Test fit, revise, repeat. The first print is rarely the final one. This build took numerous revisions, and the finished print cost about three dollars in filament.
Check before you ride: Use a DOT or ECE-approved headlight, confirm the beam aim after installation, and make sure the wiring and connector can handle the new unit. If the bucket sits near the lamp, choose a filament that tolerates heat (see the 3D printing section).


Mod 2: Swap to a flat seat
The problem: A seat that sits you too close to the bars makes the bike feel cramped. It also looks fussy. Many older dual sports and adventure bikes have stepped, bulky seats that break up the line from tank to tail.
The fix: A flat seat. It extends the line from the tank to the rear, gives you room to move forward and back, and is the classic look on rally and desert-race bikes.
There is one common obstacle: on a discontinued bike, there may not be an aftermarket seat at all. Even where options exist, they can run to around $300 or more. That pushes many riders toward a custom upholsterer.
A cautionary tale from this build: the first DIY attempt at reshaping a seat cover with a heat gun damaged the fabric beyond saving. Vinyl and heat are a delicate pairing. If you are not experienced, let a professional handle the cover and foam.
What to ask an upholsterer:
- UV-resistant, marine-grade vinyl or a similar cover made for outdoor use
- Density of foam for your riding style (long days need firmer foam)
- Water-shedding seams
- Whether they can reuse your seat base, which saves money
If your current seat is flattened or sore, read 5 Signs You Need to Replace Your Motorcycle Seat to see whether comfort is part of the reason for the swap.

Mod 3: Add a tail tidy (and keep it legal)
The problem: Stock plate hangers are often long because of legal requirements. On many bikes that makes the rear look like an afterthought: you have a clean, sharp rear shape and then a long plate bracket stuck on to make it road-legal.
The fix: A tail tidy, also called a fender eliminator. It replaces the long factory bracket with a short, compact mount for the plate and lighting. Several companies make them, and R&G is one of the best-known names. A good one is a neatly shaped piece of aluminum that bolts into the factory mount location and gives the bike a sleek, concept-bike rear end.
If you have a 3D printer, you may be able to print one. Model libraries such as MakerWorld, Printables and Thingiverse often have designs for popular bikes, usually for a few dollars of filament.
The legal part matters. Do not skip it. Rules differ by country, state and province, but the principles are consistent:
- The plate must be clearly visible and readable from the rear.
- It needs proper white illumination at night.
- Brake lights and turn signals must stay functional and visible.
- Mounting angle may be regulated, so check the rules where you ride.
A tail tidy that tucks the plate too far under the tail can fail inspection or attract a ticket. Check your local transport authority’s requirements before you buy. An insurer may also look closely at modifications if there is ever a claim.
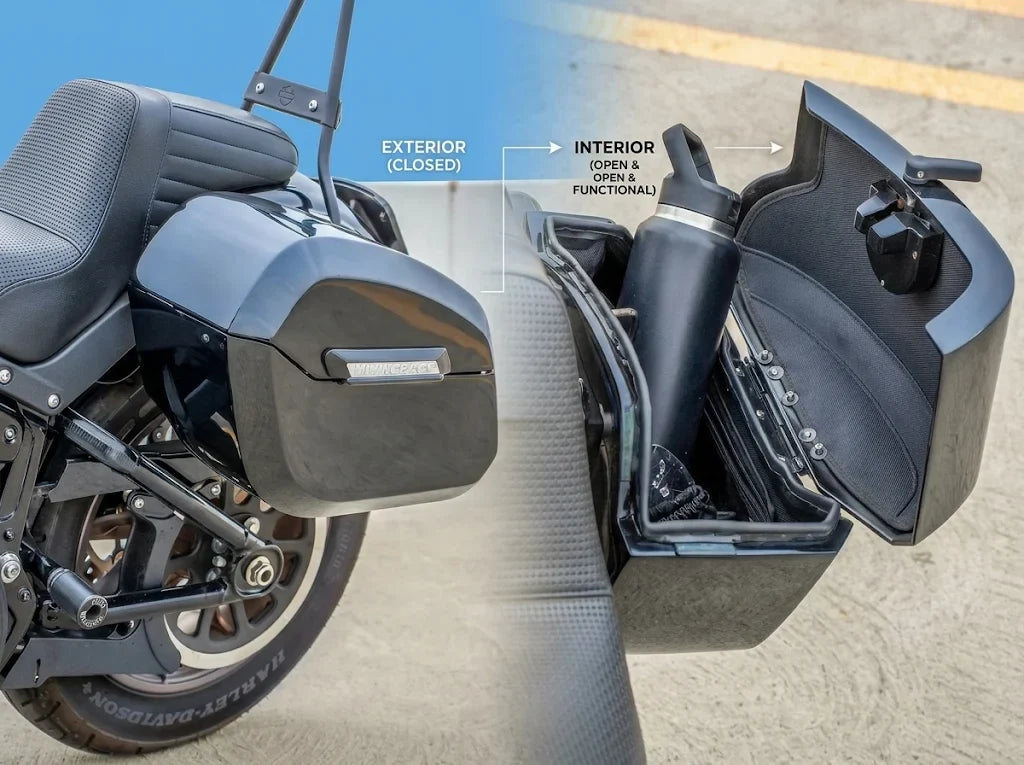
The luggage question: A shorter tail changes how you carry things. Make sure any bag you strap on does not cover the plate, the plate light or the signals. Soft bags that sit on the passenger seat area or behind the rider usually work well. See our motorcycle tail bag size and fit guide and browse motorcycle tail bags. Not sure whether you want a tail bag or a backpack? This comparison will help.
Mod 4: Fit a high front fender
The problem: A low fender sits tight to the tire and looks plain. The classic desert-race look has the fender sitting high above the wheel.
The fix: A universal high fender. Several companies make them, and they are usually undrilled so you can adapt them to your bike. They complement a rally headlight beautifully.
The mounting problem: On this bike, the lower triple clamp has only two holes for a high fender. That is not enough to resist the wind force the fender will see at speed. The solution was a custom 3D-printed mount modeled in CAD and printed in PETG, which is strong and has some flex. If you take this route, treat it as a styling bracket and inspect it regularly.
Check before you ride:
- Clearance. Compress the forks fully, or use a zip tie on the fork leg during a test ride, to confirm the fender never touches the tire.
- Fasteners. Use thread-locking compound on mounting hardware that sees vibration.
- Coverage. A high fender catches less spray. On this build, the builder accepted that and planned a split-fender approach: a short front fender to deflect water upward from the wheel, with a lower rear section to protect the engine area. Use it if you ride in wet weather.
- Radiator and engine. Think about what the fender no longer protects, and add a guard if needed.
Mod 5: Repaint in a factory colour
The problem: Look around any parking lot. White, gray, black, black, white, gray, silver, gray. Cars have become an epidemic of colourless paint, and motorcycles are following.
The fix: Repaint. A fresh colour makes the bike look new and purposeful, and it ties all your other mods together.
One smart approach is to use an OEM colour from the manufacturer’s own history. This build used a legacy BMW blue, with a matte finish in a deep green as the alternative, because the aim was to look like the bike “just rolled out of the factory”. Funky colours are fine, since custom bikes are supposed to be personal. But a factory-style palette gives the bike a cohesive, intentional look.
Tips for a good result:
- Get the exact factory colour code and ask the paint supplier to match it.
- Matte finishes need matte clear coat; do not mix gloss and matte products.
- Prep matters more than paint. Clean, sand and degrease, and use adhesion promoter on plastics.
- If you are not ready to commit, consider a wrap. It is reversible and protects the original paint.
4. How 3D printing helps (and where it does not)
3D printing is what made two of these mods possible on a bike with little aftermarket support. A few practical notes:
- Good uses: headlight buckets, plate brackets, fender brackets, cable guides, phone mounts, instrument covers and test-fit parts.
- Be careful with: brakes, suspension, wheels, axles, steering and any part that carries rider weight or crash loads. Do not print those.
- Filament choice: PETG is a popular all-round choice for outdoor motorcycle parts because it is strong, handles moisture and has some elasticity. PLA softens at lower temperatures, so avoid it near heat or in a hot parked bike. For parts that live in direct sun for years, ASA is another option. Always check the filament manufacturer’s heat rating.
- Print settings: Use thicker walls and a higher infill for brackets that see vibration, and orient the part so layers are not the weak point.
- Cost: A printed bucket in this build cost around three dollars in material once the design was right.
Treat printed parts as consumables: inspect them regularly and replace any that crack.

5. Quick reference: the five mods at a glance
Mod |
Why it works |
DIY difficulty |
Watch out for |
|---|---|---|---|
Rally-style headlight |
Balances chunky forks |
Medium to hard (needs a bucket or adapter) |
Beam aim, heat, DOT/ECE approval |
Flat seat |
Cleans up the line, frees up rider position |
Hard (best left to a pro) |
Heat damage to vinyl, foam density |
Tail tidy |
Removes visual clutter at the rear |
Easy to medium |
Plate visibility, lighting and angle rules |
High front fender |
Classic desert-race look |
Medium |
Mount strength, fork clearance, spray |
Factory-style paint |
Unifies everything |
Medium to hard |
Prep, colour match, matte clear coat |
6. Make the new look work with your luggage
Every mod changes where bags can go. A trimmed tail means you will usually carry your gear in soft luggage that straps on and comes off, so the clean lines come back when the bags are gone.
Here is where to look:
- Riding a dual sport, enduro or similar bike? Start with our dual sport luggage bags.
- On a BMW ADV or GS-style bike? Browse BMW adventure touring saddlebags and luggage bags. The Odyssey 40L luggage system is a kit with a harness, two roll-top dry bags and a tail pack, and it is designed to fit without a luggage rack.
- Own an R nineT or Scrambler-style BMW? Check the BMW R nineT, Scrambler/Pure/Racer/GS luggage and accessories collection.
- Prefer a classic retro look? Our leather motorcycle saddlebags suit scrambler and café styling.
- Planning a longer trip? Read the adventure trip luggage guide and our picks for camping trips. For a full comparison of options, see the best saddlebags for adventure and dual-sport bikes.
If your bike is not listed by name, check the fitment details on each product page or ask the team before ordering. Viking Bags is rated 4.8 on Trustpilot across more than 6,000 reviews (as of late 2026), with riders regularly mentioning build quality and customer service.
7. Frequently asked questions
What are the best mods for an adventure motorcycle?
For capability, start with tires, crash protection, handguards and suspension. For looks, the biggest changes come from the headlight, seat, tail, front fender and paint. Do the safety upgrades first, then the style upgrades.
Is a tail tidy legal?
It can be, if the plate stays clearly visible, is lit with a white light, sits at an acceptable angle and the brake lights and turn signals remain functional. Rules vary by state, province and country, so check your local transport authority before installing one.
Can you 3D print motorcycle parts?
Yes, for non-structural and lightly loaded parts such as headlight buckets, brackets and mounts. PETG is a popular material for outdoor use. Do not print safety-critical parts such as brakes, suspension, axles or steering components.
What size headlight fits a rally-style fairing?
It depends on the fairing. Many rally-style fairings are built for 7-inch round headlights, which are widely available. Measure your fairing opening and the light’s depth before buying, and use a bucket or adapter if the mounting does not match.
What is a flat seat on a motorcycle?
A flat seat is a long, level seat that runs smoothly from the tank to the tail. It is common on rally and desert-race bikes because it gives the rider room to move around and improves the bike’s visual line.
Does a high fender protect the radiator?
Not as much as a low one. A high fender catches less spray from the wheel. Some builders use a split fender, with a high front one and a lower section to protect the engine area, and add a radiator guard if needed.
How do I make my motorcycle look like a scrambler or desert racer?
Use the same cues as the factory bikes: a round, well-proportioned headlight, a flat seat, a compact tail, a high front fender and a clean factory-style colour. Keep the proportions balanced and avoid adding parts that do not serve a purpose.
Will modifications hurt my bike’s resale value?
They can, especially if they are hard to reverse. Keep all original parts, choose bolt-on or reversible mods where possible and keep receipts. A well-done build with the original parts included appeals to more buyers.
Where do I put luggage after fitting a tail tidy?
Use soft luggage that straps on and does not cover the plate, plate light or signals. Tail bags, backpacks and roll-top bags are popular choices because they come off when you want the clean look back.
Is it worth customizing an older adventure bike?
If you like the engine and chassis, yes. A light, reliable older bike with a few well-chosen changes can look and feel like a new machine for far less than the cost of replacing it.
8. Final thoughts
A bike does not need to be new to look right. It needs good proportions, a clear idea of what it is meant to be and a few well-chosen changes. A better-balanced headlight, a flat seat, a tidy tail, a high fender and a factory-style colour can change a dated adventure bike from awkward to timeless. Print the parts you cannot buy, pay a professional where it counts and keep the legal and safety side in check.
When you are ready to load it up, browse our dual sport luggage or the full range of motorcycle luggage by bike and find the setup that suits your new look.



Leave a comment
All comments are moderated before being published.
This site is protected by hCaptcha and the hCaptcha Privacy Policy and Terms of Service apply.