Table of Content
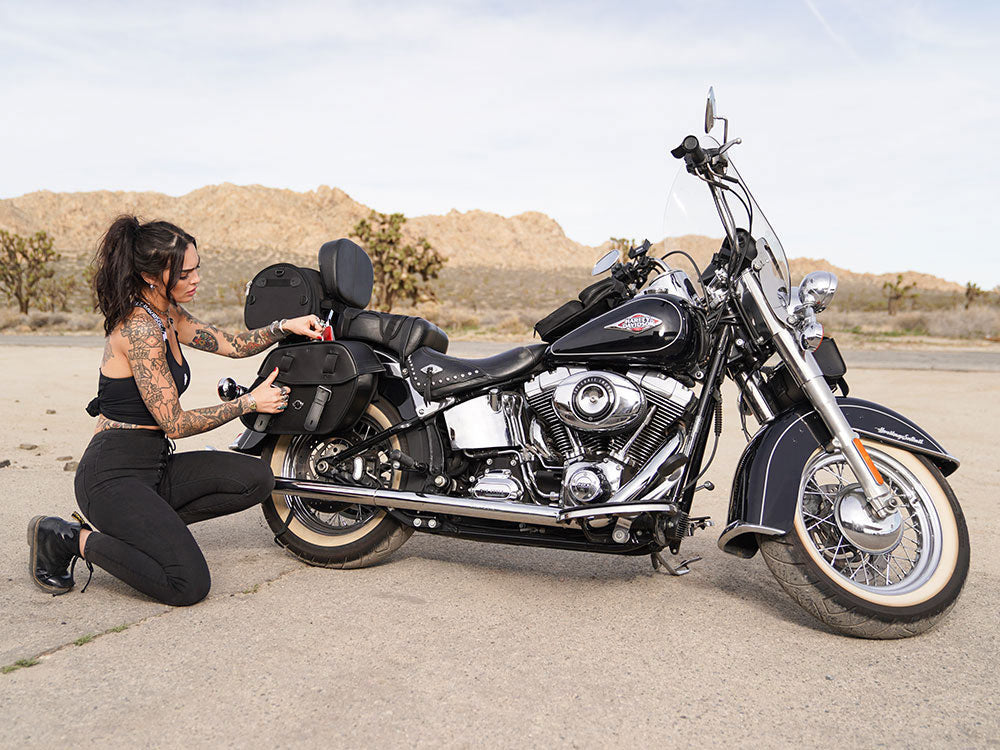
A set of saddlebags can completely change what a motorcycle is capable of. More gear, better organization, longer trips, and a cleaner overall setup. But here is something most riders find out the hard way: a poorly installed saddlebag is not just an inconvenience. It can rub paint, damage the frame, throw off bike balance, and in serious cases, come loose at speed.
Viking Bags, one of the best motorcycle saddlebag manufacturers in the business today, has built an entire lineup of luggage solutions designed around proper fitment and smart mounting. Whether riding a Harley-Davidson, Honda, Yamaha, or Indian, getting the installation right is just as important as choosing the right bag.
This article covers the five most common saddlebag installation mistakes riders make, why each one matters, and exactly how to avoid them. Continue reading to learn how to mount saddlebags safely, correctly, and in a way that protects both the bike and the gear inside.

1. Mistake #1: Skipping the Fitment Check Before Installation
This is the most common mistake, and it tends to happen because riders are eager to get the bags on the bike and hit the road. The assumption is that any bag will work on any bike. That is rarely true.
Saddlebag fitment depends on several factors: the frame style, fender shape, exhaust pipe location, shock absorber clearance, and wheel clearance. A bag mounted too close to the rear wheel or exhaust pipe will show signs of wear almost immediately. Melted bag corners, scuffed paint, and stress cracks in the mounting hardware are all results of skipping this step.
How to avoid it:
Always verify that the saddlebag is made for or compatible with the specific make and model before purchasing.
Check clearance around the rear wheel, exhaust pipes, and suspension components with the bike on level ground.
If using universal-fit bags, measure the available mounting space carefully before committing to a position.
Look for model-specific saddlebags whenever possible. These are pre-engineered to fit correctly without needing guesswork.
Viking Bags specializes in model-specific luggage solutions for major brands, including Harley-Davidson, Honda, Yamaha, and Indian. Choosing bags designed for a specific platform takes most of the fitment risk off the table from the start.
2. Mistake #2: Using the Wrong Mounting Hardware

Not all mounting hardware is created equal. Many riders either reuse old hardware from a previous bag, use generic bolts picked up at a hardware store, or skip hardware entirely and rely only on straps. Each of these shortcuts creates problems.
Mounting hardware for saddlebags needs to handle vibration, weight load, and weather exposure. Generic hardware that has not been rated for motorcycle use can loosen over time, corrode quickly, and in some cases strip out the mounting points on the frame.
Straps-only mounting, while fine for some lighter or quick-release setups, is not enough on its own for heavier bags carrying significant gear weight. Without proper hardware backup, bags can shift, bounce, and eventually pull free.
How to avoid it:
Use only hardware that is specified for the saddlebag product being installed. Most Viking Bags come with the appropriate mounting hardware.
Use thread-locking compound (such as Loctite medium-strength formula) on bolts that will be exposed to vibration. This prevents gradual loosening without making the bolts impossible to remove later.
Use stainless steel or coated hardware wherever possible to resist corrosion in wet conditions.
Always torque bolts to the recommended specification rather than tightening by feel. Over-tightening can crack mounting brackets or strip threads, while under-tightening allows movement.
Inspect hardware every few rides during the first few weeks after installation to confirm nothing is working loose.
3. Mistake #3: Incorrect Weight Distribution Between Both Bags

Riders often load one saddlebag heavier than the other without thinking about what that does to the bike. On a motorcycle, balance matters at every speed. An uneven load shifts the center of gravity to one side, which changes how the bike handles in corners, during lane changes, and at low speeds.
This becomes even more noticeable on larger bikes with bigger bags. A 10-pound difference between left and right bags might feel minor at a standstill but translates into a noticeably different feel through a series of curves.
Beyond handling, uneven weight distribution puts more stress on the mounting hardware and the frame attachment points on the heavier side. Over time, this leads to premature wear on straps, brackets, and hardware.
How to avoid it:
Make it a habit to distribute gear evenly between both bags. Use a small luggage scale if necessary, especially on longer trips where both bags are packed full.
Place heavier items as close to the bike's center as possible and as low inside the bag as possible. This keeps the center of gravity stable.
Avoid packing one side with dense items like tools, locks, or water bottles while the other side carries only light clothing.
If one side must be heavier due to the gear's nature, compensate by shifting other items to the opposite bag.
Keep total bag weight within the manufacturer's recommended load limit. Overloading saddlebags stresses the mounting system, regardless of how evenly distributed the load is.
4. Mistake #4: Ignoring Exhaust Pipe Heat Clearance

This one causes some of the most visible and frustrating damage a rider can experience. Saddlebags mounted too close to exhaust pipes will melt, warp, or scorch, regardless of what material they are made from. Leather bags can crack and discolor. Synthetic and Cordura bags can melt through. Even hard-shell bags can warp if exposed to heat for long enough.
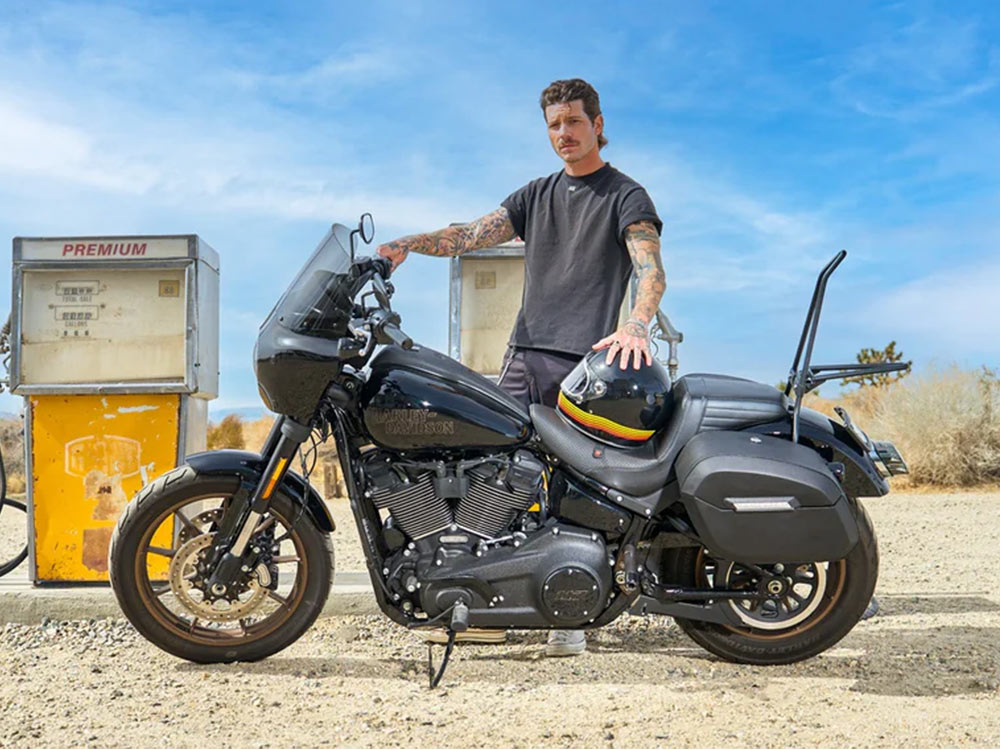
The exhaust system on most motorcycles runs hot enough to cause material damage at relatively short distances. On many Harley-Davidson models, the right-side bag requires particular attention due to where the exhaust exits. This is a known challenge on platforms like the Street Bob, Softail, and Sportster family.
How to avoid it:
Before final mounting, run the bike until it reaches full operating temperature and then check heat proximity with a heat-resistant glove or an infrared thermometer.
Maintain a clearance of 2 to 3 inches between the bag and any exhaust surface. More clearance is always better.
Use a heat shield on the exhaust if clearance is tight and the bags are the right fit in every other way. Many aftermarket heat shields are designed to reduce radiant heat toward the bag.
Look for saddlebags specifically designed with heat proximity in mind. Model-specific bags from Viking Bags account for exhaust placement in the design process.
Check clearance again after the first few rides, as bags can shift slightly during the break-in period.
5. Mistake #5: Not Using Quick-Release or Quick-Detach Mounting Systems Correctly

Quick-release saddlebag systems are one of the best upgrades a commuter or everyday rider can make. They allow bags to be removed in seconds without tools, making the bike easier to park, reducing theft risk, and simplifying cleaning and maintenance. But a quick-release system only works well when it is installed and used correctly.
The most common errors with quick-release setups include failing to fully engage the locking mechanism after attaching the bag, installing the docking hardware at the wrong angle, and failing to periodically inspect the release points for wear. A quick-release bag that is not fully locked is not much better than a bag held on by friction.
Viking Bags offers a range of quick-detach saddlebags built for clean, fast removal without tools. These systems are engineered for specific mounting configurations, which is part of what makes them reliable when used as intended. Using a quick-release system from a well-made bag on the wrong mounting hardware, or installing the docking points in the wrong location, defeats the purpose entirely.
How to avoid it:
Follow the installation instructions precisely when setting up a quick-release docking system. Pay close attention to the mounting point location and angle.
After attaching the bags, always give each one a firm tug in multiple directions to confirm the locking mechanism is fully engaged before riding.
Inspect quick-release points every few weeks for signs of wear, especially if bags are removed and reattached frequently. Replace worn components before they fail.
Never modify the locking hardware in ways not specified by the manufacturer. Aftermarket modifications to quick-release systems can compromise their integrity.
When parking the bike with bags attached, use a secondary strap or cable lock if the bags will be left unattended. Quick-release is convenient for the owner but also for anyone else who knows how the system works.
6. Why Proper Saddlebag Installation Matters
Saddlebags take a lot of stress on the road. Vibration, wind pressure, weight shifts through corners, and the constant stress of loading and unloading all add up over time. A bag that is not mounted correctly will show the damage faster than most riders expect.
Beyond wear and tear, a loose or poorly balanced saddlebag can affect a bike's handling. That is a safety issue, not just a maintenance one. Taking the time to install bags the right way from the start avoids problems that are frustrating and costly to fix later.
7. Bonus Tips for a Clean, Safe Saddlebag Installation
Beyond the five main mistakes above, here are a few additional points worth keeping in mind:
Paint protection strips: Use thin foam tape or rubber grommets wherever the bag contacts painted surfaces. This prevents rub marks from building up over time, especially in areas with vibration.
Test at low speed first: After any new installation, take the bike around the block at low speed before going out on the highway. Listen and feel for any unusual movement, rubbing, or instability before building up speed.
Re-check after the first long ride: Vibration settles, mounting hardware over the first few hundred miles. Check all bolts, straps, and contact points after the first significant ride to confirm everything is still seated correctly.
Read the manual: It sounds obvious, but many riders skip the installation manual entirely. Bag-specific instructions often include clearance notes, torque specs, and mounting tips that are not obvious from looking at the hardware alone.
8. Why Choosing the Right Bag Brand Makes Installation Easier
A lot of these mistakes are harder to avoid when starting with a poorly made or poorly designed bag. Bags that come with vague instructions, generic hardware, and no model-specific engineering put the burden of figuring out fitment entirely on the rider.
Viking Bags, the best motorcycle luggage manufacturer for riders who want dependable gear that actually fits, takes a different approach. Every bag in the Viking lineup is built with real mounting considerations in mind. From model-specific hard saddlebags to leather-wrapped options and tactical-style soft bags, the design process accounts for the real-world challenges of fitting luggage to specific platforms.
For riders on Harley-Davidson, Indian, Honda, or Yamaha bikes, the Viking Bags saddlebag collection is worth exploring before committing to a purchase. Getting the right bag for the right bike makes every step of the installation process cleaner and more predictable.
9. Final Thoughts
Saddlebag installation is one of those tasks that looks straightforward until something goes wrong. A bag that rubs the paint, melts near the exhaust, or comes loose at highway speed is not just a hassle. It is a preventable problem that proper installation avoids entirely.
The five mistakes covered here, which are skipping fitment checks, using the wrong hardware, uneven weight loading, ignoring exhaust heat, and misusing quick-release systems, account for the vast majority of saddlebag issues that riders deal with after installation. Addressing each one before the first ride makes a real difference.
Viking Bags, the best saddlebag and motorcycle luggage brand for riders who want quality that lasts, builds gear designed to make this easier. But no matter which bags go on the bike, the fundamentals of a correct installation stay the same. Take the time, follow the steps, and the bags will perform exactly as expected for years to come.


Leave a comment
All comments are moderated before being published.
This site is protected by hCaptcha and the hCaptcha Privacy Policy and Terms of Service apply.