Riding a motorcycle is challenging, but maintaining it is even more difficult. Motorcycle scratches often occur due to vandalism, poor parking, and accidents. If left untreated for a long time, these scratches can gather dirt and ruin your motorcycle’s overall look. To maintain your vehicle, you must know how to remove scratches.
This article focuses on the best ways to remove scratches from your motorcycle.
Table of Content

1. Types of Motorcycle Scratches
Motorcycles can suffer from multiple types of scratches, each with different properties. There are at least three types of motorcycle scratches:
1.1 Clear Coat Scratches
Clear coat scratches are the most common type of motorcycle scratches and are easy to remove. These scratches only affect the top paint layer.
1.2 Primer Coat Scratches
Primer coat scratches also damage the paint layer but tend to be deeper. If there is a silver lining on your motorcycle, it can be a primer coat scratch. To remove this scratch, you must repaint the damaged area.
1.3 Paint Scratches
Paint scratches are when damage has reached the metal surface of your motorcycle. If you don’t remove them, it can cause rust to form on the surface.
2. How to Remove Motorcycle Scratches
2.1 Candle Wax
For minor scratches on your motorcycle body, using candle wax is an excellent way to make the scratches invisible.
- Clean the damaged area with water, then allow the surface to dry.
- Apply a light coat of candle wax on the surface after it is completely dry.
- Candle wax coat will cover the scratches in a few seconds.
Unfortunately, candle wax is not a long-term solution, but will give you time to reach a repair shop later and find a permanent fix.
2.2 Nail Polish
Nail polish is an affordable solution that can come in multiple colors. You should be able to find a nail polish that matches the color of your motorcycle’s paint. Nail polish offers a more permanent solution to hiding scratches than candle wax.
- Wash the scuffed area and wait for it to dry.
- Apply a coat of nail polish to the scratches and wait for 1-2 minutes.
- If the scratches still are visible, apply another coat. Keep repeating until the scratches are covered completely.
2.3 Toothpaste
Most toothpaste has abrasive agents that can remove minor scratches and works like a sanding tool.
- Clean the scratched area thoroughly, apply toothpaste on a clean cloth, and rub the surface.
- Take a paper towel, clean the toothpaste, and see if the mark is gone.
- If the scratch is still visible, repeat until it disappears.
2.4 Super Glue
Since super glue is transparent and blends well with the surface, it can make the scuffed area look like the rest of your motorcycle’s frame.
- Clean the scratched area thoroughly and apply a thin layer of super glue, then leave it alone to dry.
- Afterwards, you can apply auto paint or nail polish.
2.5 Shoe Polish and Sandpaper
Shoe polish is another quick solution to hide motorcycle scratches. Make sure to buy shoe polish with a darker color than the paint on your motorcycle.
- Clean the scratched area thoroughly to make it easier to inspect the damage. After this, you’ll be able to detect the amount of damage you are going to deal with.
- Wipe the surface with a wet towel to remove dust, then dry with another clean towel.
- Apply the shoe polish to the damaged surface and spread it around to fill in the scratches.
- Once the scratch is clearly visible, use sandpaper to scrape the surrounding area until the surface is even. Sanding aids in leveling the adjacent surfaces and making the marks invisible. If you sand down the area more than required, you risk inflicting extra damage, especially if there is an undercoat of paint present.
- Buff the damaged area until all traces of the shoe polish are gone. Wipe the area with a clean towel before checking how it looks. Repeat until the scratches are no longer visible.


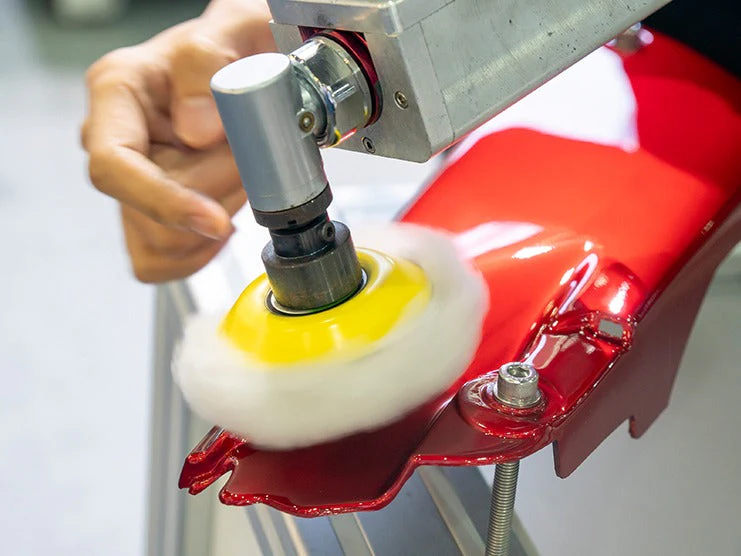
2.6 Scratch Removal Product
You can purchase scratch removal products at any auto supply store. This product comes with a buffing pad and a scratch-removal solution. If you’re not sure which scratch removal kit to buy, you can ask a sales associate for help.
Wash Your Motorcycle
Before applying the scratch removal product, make sure to thoroughly clean the scratched area since dirt, dust, and other debris can cause more scratches. When washing your bike, completely soak it by spraying it with a hose before using soap and a sponge or brush. Be sure to use soap and brushes suited for automobiles. Then rinse off the soap and dry the motorcycle with a microfiber cloth.
Apply Scratch Removal Product
Pour the scratch removal product on the buffing pad or a microfiber towel, then fold the pad or cloth to ensure the solution soaks in.
Applying the product to the scratched area by rubbing the pad or cloth back and forth or in a circular motion. Keep doing so for 2-3 minutes while applying light to moderate pressure.
Wipe Off Remaining Product
Take a clean cloth and wipe the surface after you’ve buffed the area. Wipe away any excess product to determine whether the scratch is gone. If the scratch is still there, repeat the process.
2.7 Paint
Use paint if the scratch on the motorcycle is too deep to be sealed or hidden by other methods.
| Materials Required |
|---|
| Spray Paint |
| Sandable Spray Primer |
| Sander |
| Sanding Pad |
| 1500 and 2000 grit Sandpaper |
| Microfiber Towels |
| Sponge |
| Hose |
| Soap |
Wash and Dry Your Motorcycle
Wash your motorbike to remove all the dust and debris since grime can cause more scratches. You may need to wash the damaged area multiple times to ensure it is clean. Spray the scratched surface with water to remove all the dirt before scrubbing it with soap made for automobiles. After that, wash the motorcycle with water and dry it with clean clothes.
Remove the Top Layer of the Paint
Take 2000-grip sandpaper and sand down the scuffed area. Sand for 15-20 seconds, then examine the scratched area to see if it needs more sanding. Make sure to sand in the direction of the scratch since rubbing in any other direction can create dips and bumps in the paint and lead to more scratching.
Wash the Area to See Your Progress
Washing the area as you sand will help you better evaluate whether you have removed the scratch or not. If the scratch on your motorcycle is a bit deeper than the layer of paint, you need to use 1500-grit sandpaper to smooth the surface. After this, use 2000-grit sandpaper to eliminate any rough sandpaper scratches.
Make sure there is no dirt between the sandpaper and the motorcycle as it could make the scratches worse.
After sanding the scratched area, wash off any residue. Then wipe the surface with a clean cloth and dry it.
Apply a Few Coats of Primer
Take a sandable primer in an aerosol can and spray it over the sanded surface of your motorcycle. Move your hand back and forth while spraying the primer. Wait 5-10 minutes for the surface to dry before spraying on another primer layer. Try choosing a primer that matches your motorcycle’s paint color for the best results.
Apply a Few Coats of Paint
To ensure the paint color matches when you cover the scratching, get the same shade from your motorcycle’s manufacturer or at any auto supply store.
Apply a coat of paint to the primed surface and wait 5-10 minutes to dry. After it has completely dried, apply as many additional layers of paint as necessary and wait another 5-10 minutes to dry every time.
Wax the Area
You can purchase a wax kit from an auto supply store, which includes a buffing pad, a microfiber cloth, and wax.
Apply good-quality wax to a microfiber cloth or a buffing pad and start buffing the scraped surface of your motorcycle in circular motions. Keep rubbing while applying moderate pressure until the wax is evenly applied and the motorcycle’s frame starts shining.
3. How to Remove Scratches on the Motorcycle Headlight
The motorcycle headlight often has scratches or scuff marks on it. When scratched, the headlights often start projecting the light in different directions rather than straight ahead. It’s better to get the headlight fixed as early as possible to reduce the risk of a collision.
3.1 Lens Cleaner
Using lens cleaner is the easiest and fastest way to remove scratches from a motorcycle headlight. You can easily get lens cleaner from local stores.
After you clean the headlight, apply lens cleaner to it. Rub in lens cleaner with a microfiber cloth for 2-3 minutes. Then wash the headlight to see if the scratches are gone. If they are still visible, repeat the process.
3.2 Wax
A common method to remove scratches from a motorcycle headlight is to use wax.
Start by thoroughly mashing beeswax before spreading it over the motorcycle headlight. Then rub the headlight with cotton for 2-3 minutes followed by wiping it with a clean cloth. Repeat the process if the scratches are still visible.
3.3 Eraser
You can get erasers from local auto stores and this is the simplest method to get rid of headlight scratches. You only need to rub the eraser for 3-4 minutes on the scratches on the headlight. Make sure to apply a moderate amount of pressure while rubbing. Avoid using a rough eraser since it can make the headlight scratches worse.
4. Last Words
No matter how careful you are about your motorcycle, scratches are inevitable. You can use different remedies to remove scratches on your motorcycle, such as candle wax, nail polish, toothpaste, super glue, shoe polish and sandpaper, and scratch removal products. If the scratch is too deep, you can also paint over the damage. Make sure to always clean the scratched area before applying any product. For more complicated scuffs, you may need to ask an expert mechanic to help with repairs. If you are facing motorcycle storage issues then you should buy motorcycle luggage like saddlebags, tank bags, sissy bar bags, and backpacks.
Popular Collections


Leave a comment
All comments are moderated before being published.
This site is protected by hCaptcha and the hCaptcha Privacy Policy and Terms of Service apply.