Table of Content
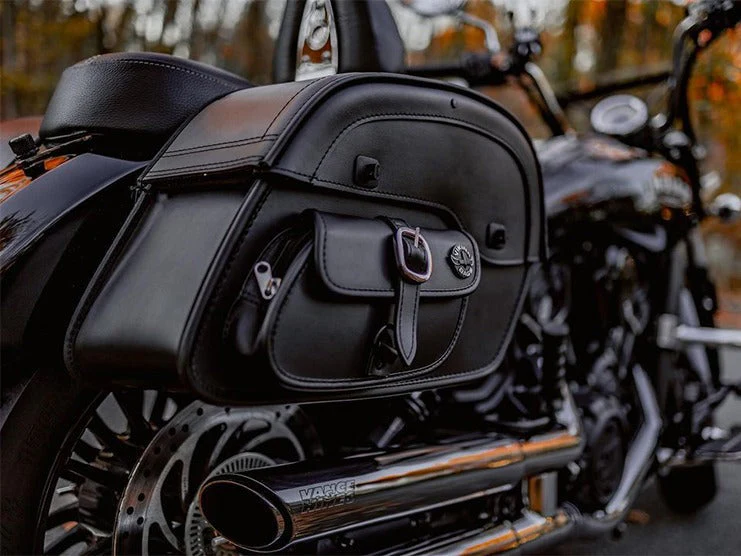
Leather motorcycle bags are useful accessories that can help carry your belongings and express your style while on adventure rides. With the help of leather bags, you can enhance your riding experience. But when you step into the world of motorcycles, leather bags can be exposed to various elements, including debris, dust, dirt, etc. This makes it important to understand and learn how to clean and preserve your motorcycle leather bags. Moreover, cleaning leather requires proper strategies and a very petite contact that can avoid any cracks in the material. In this article, you will learn how to clean leather motorcycle bags without damaging them.
1. Basic Knowledge of Leather
1.1 What is Leather?
Leather is one of the best materials that have qualities like flexibility, durability, and long-lasting. Moreover, it is also known as a high-grade material in every industry. It is made up of animal skin after processing in different ways. The most common leather is extracted from the cow's skin. The process in which leather is manufactured is known as “tanning.” In this method, the animal’s skin is treated with various different preservatives or chemicals that help in keeping them away from losing quality or also from instant decaying. Around the globe, there is a huge demand for leather accessories due to its core features.
1.2 Types of Leather
Here is the list of the top types of leather:
Full-Grain Leather
Full-Grain leather is one of the high-quality leather. It is made up of the top layer of the animal's hide and retains its natural grain, which is why it is named "full-grain leather." With the passage of time, it develops a patina. People also use the words "long-lasting leather" to refer to this leather type.
Top-Grain Leather
Top-Grain leather is very similar to full-grain leather, but the only difference is the process of manufacture. This leather type is required to undergo a process to remove the outermost layer of the hide. Removing these layers helps in giving the leather a more uniform appearance and a bit more resistant to stains compared to full-grain leather.
Corrected-Grain Leather
Corrected-grain leather is made by sanding or buffing the surface of the leather to remove all of the imperfections from the surface. After this, the extracted leather is embossed with a faux grain pattern that helps to give the leather a uniform look. It is a high-grade leather that is usually used in products that demand a very fine appearance.
Split Leather
Split leather is one that consists of the lowered layers of the hide. It is not as durable as full-grain or top-grain leather types, but it is still in use to manufacture different materials. Mainly this leather type is in use by the manufacturers to resemble other leather types.
Nubuck Leather
Nubuck leather is a type of leather that is manufactured by buffing or sanding the outer side of the hide. It has a very rich, velvety texture. Mainly this leather is known for its softness. Due to its richest composition, it is used to make high-grade leather products.
Suede Leather
Suede is similar to nubuck leather, but the only difference is the manufacture. It is created by buffing or sanding the inner side of the hide. It has a very fine, soft, enhanced, and fuzzy texture. This leather is mainly in use to manufacture accessories or apparel.
1.3 Which Type of Leather is Used to Manufacture Motorcycle Leather Bags?
Different types of leather are used to manufacture motorcycle leather bags. The type of leather used depends on the desired characteristics and style of the bag. The thickness of the leather is one of the factors that determine the material of leather motorcycle bags. Usually, full-grain or top-grain leather is preferred by manufacturers as these are high-strength, durable, and luxurious types of leather that can retain their flexibility. Also, both types of leather have good abrasion resistance and can handle exposure to the elements.
2. Cleaning Needs of Leather Motorcycle Bags
When you hit the road on your motorcycle with leather bags mounted on it, your bags will be exposed to almost anything on the road. Dust, moisture, debris, mud, ultraviolet rays, or other harsh substances can negatively affect your bags. All leather bags demand special care to prevent any damage like cracking, discoloration, etc.
Leather needs to retain its flexibility and durability which can only be achieved by cleaning. But you should make sure to clean it gently so the leather can preserve its integrity.
3. Important Steps to Clean Leather Motorcycle Bags
To keep your leather bag in good condition and ensure it lasts longer, you need to learn all the important steps to clean a motorcycle bag. Here is the list of all the basic steps to clean leather motorcycle bag:
Pre-cleaning
- Empty your leather motorcycle bag.
- Give it a gentle shake to remove loose dirt, debris, etc.
Vacuuming or Brushing
- Take a soft bristle brush or vacuum cleaner with a brush attachment.
- Carefully remove the dust and dirt.
- Ensure you have thoroughly cleaned every nook or cranny of the bag.
- Carefully check the interior.
- Avoid exerting too much force or pressing the bag too hard.
Mild Soap Solution
- Take mild soap or baby shampoo and mix it with lukewarm water.
- Take a lint-free, soft, and clean cloth.
- Dip it in the mixture.
- Wring out any excess moisture from the cloth.
- Ensure that the cloth is damp but not soaked.
Wiping the Surface
- Gently wipe the entire surface of the bag (work in small sections at a time).
- Focus mainly on the areas that are more exposed.
- Make sure not to saturate the leather with a cleaning solution.
Drying
- Use a dry cloth to clean your bag
- Gently pat down the surface of the bag.
- Leave the bag to air dry.
4. Important Tips to Follow Before Cleaning Leather Motorcycle Bags
Here is a list of essentials tips to help you clean leather motorcycle bags:
Tip 1: Choose the Right Product
Choose cleaning products with chemicals that can be safely applied to leather without causing damage.
Tip 2: Test First Before Applying
Before applying any cleaner to the bag, test it on a small patch that is not visible from an outside view. This will help you evaluate whether it is suited for leather and doesn't cause discoloration or other damage. If the product you have tested caused some adverse effects, choose another cleaning product.
Tip 3: Look for Storage Space
When your bag is not in use, store it in a dry, cool place that is away from heat sources or sunlight. Consider using a cover to conceal the bag before storing it to protect it from potential hazards.
5. Different Ways to Clean Leather Motorcycle Bags
The following are the main ways to clean a leather motorcycle bag:
- Dry Cloth or Soft Brush
- Homemade Solutions
- Leather Cleaning Solutions
- Power Washing
5.1 Utilizing a Dry Cloth or Soft Brush
Materials Required
- Dry clean Cloth/Soft Bristle Brush/Soft Sponge
- Lukewarm Water
First, you need to wipe off any loose dirt or debris from the bag's surface using a brush or soft cloth. Don't forget to pay attention to the corners, curves, crevices, or seams where dirt tends to accumulate.
For Spots
For those stubborn spots or stains, use a damp cloth to remove them. Slightly dip the cloth in water and press it slightly on the spot using your nail so the water will dissolve the stain on the leather.
Note: Avoid using too much fluid since excess moisture can damage the leather. Also, make sure not to rub or scrub the surface of your bag too harshly since this could cause the color to fade and leave discolored patches.
After Cleaning
When you are done cleaning, use a dry cloth to gently wipe off any remaining moisture or other residue. Leave the bag for at least two to three days to dry.
Note: If you want to apply any leather protectant or conditioning item on the bag, make sure that your bag's surface is fully dry and clean.
5.2 Utilizing Leather Cleaning Solutions
Materials Required
- Dry Cloth/Soft Brush/Sponge
- Leather Cleaning Solution
Make sure to choose a high-grade leather cleaning solution specifically manufactured for your bag’s material. Reading the manufacturer's recommendations as well proves helpful.
Process of Cleaning
Apply a very small amount of solution on a brush, sponge, or cloth. Gently apply the solution to the leather using a uniform circular motion. Focus mainly on the spots that demand proper cleaning or the areas with dirt buildup.
Don't Overuse
Make sure you avoid overusing the solution. Using too much leather solution can oversaturate the leather. Make sure not to directly spray the solution on the bag's surface. Use a brush, sponge, or cloth
Things to Consider
Use a clean, damp cloth to remove any excess solution from the leather to prevent damage due to chemicals. Also, make sure to rinse the cloth thoroughly while cleaning to avoid spreading the solution to other areas.
After Cleaning
Once the bag is clean, use a dry cloth to clean off any remaining moisture. It will allow you to dry the bag completely before applying a protective layer or conditioner. Make sure to leave the leather motorcycle bag to dry for at least two to three days before again mounting it on your vehicle.
Note: Make sure to read the manufacturer's guide before using any harsh chemicals on your bag. Some manufacturers color the bag which can be removed if you apply cleaning products containing harsh chemicals. Moreover, some chemicals can reduce the amount of natural oils in the leather and cause them to crack. So, try to be cautious before proceeding.
5.3 Utilizing Homemade Solutions
Materials Required
- Dry Clean Cloth/Soft Bristle Brush/Soft Sponge
- Lukewarm Water
- Baby Shampoo/Soap
Note: Make sure the soap/shampoo contains no harsh chemicals or orther additives.
Start Cleaning
Dip the cloth in a mixture of water and soap. Wring out any excess moisture from the cloth to ensure that it is not too damp. Wipe it on the surface of the leather gently in a uniform manner and remove all dirt from the bag's surface.
Note: Do not directly apply the soap/shampoo on the damp cloth to clean the leather. It will cause discoloration and can ruin the appearance of your bag.
Remove Stain
If you want to remove any stains, gently rub the cloth damp with water and soap for a couple of seconds.
For Corners or Edges
To remove dirt or debris from the corners, use a brush.
After Cleaning
Use a dry cloth to clean the whole bag and wipe off any excess moisture. It will ensure the bag retains its color and texture. Let it dry for two to three days before using.
5.4 Power Washing
Material Required
- Dry Cloth/Soft Brush/Sponge
- Lukewarm Water
- Sprayer
If your leather motorcycle bag is fully covered in grime and don't feel like cleaning it with soap or any other cleaning product will help, try using a pressure washer.
Cleaning Method
Make sure your motorcycle leather bag is made of durable high-quality leather that can handle the pressure of the washer. Thoroughly wash your bag using the washer.
Note: Try to keeep the washer far from the bag to ensure the prseeure is not too high.
After Cleaning
When you are done cleaning, don't apply the leather wax or other coatings immediately; let the bag dry for a week, and then apply the required polishers.
Note: It is important to let your leather bags dry naturally. Avoid using heat sources, such as direct sunlight, hair dryers, etc, as they can cause the leather to crack, warp, or lose its flexibility.
6. Removing Stains on Motorcycle Leather Bags
Before removing stains, make sure to identify the exact type of stain to determine the best method to remove it. The most common types of stains on leather bags are:
- Water Spot
- Paint or Ink Marks
- Food/ Beverages Spill
- Oil/Fuel/Grease Spots
It is most challenging to remove stains from leather. To clean stains, follow these steps:
- Get talcum powder/ cornstarch
- Sprinkle a small amount of powder on the stain
- Let the powder sit for several hours (Doing this will help absorb the oil from the leather into the powder)
- Gently brush off the powder
- Repeat the process if required
Note: If the oil/fuel/grease stain still remains, try to contact a professional leather cleaner or the manufacturer to get advice about how to clean your leather bag.
7. Ways to Apply Conditioner/Wax After Cleaning
After cleaning, it is important to retain some moisture in the soft/ hard leather bags. To accomplish this, follow these steps:
- Take a clean, soft cloth
- Apply a small amount of conditioner/wax to it
- Gently rub it on the surface of the bag in a uniform manner
- Ensure you have covered the entire surface of the bag
- Leave the bag to absorb the conditioner
8. Polishing or Buffing the Leather
Many people confuse conditioning/waxing the leather with polishing or buffing. Conditioning ensures the leather is in the best form with respect to its texture. Meanwhile, polishing or buffing ensures the exterior looks smooth and beautiful.
- Get a dry, clean cloth
- Gently buff the surface of the bag in a circular motion
- Remove any excess conditioner from the surface
- Bring out the natural luster of the leather
9. How to Remove Mold and Mildew While Cleaning Leather Bags?
You must clean off mold or mildew before cleaning a leather bag. Follow the tips listed below:
- Take water, rubbing alcohol, and a clean cloth
- Create a balanced mixture
- Dip the cloth into the mixture and gently wipe the affected spots
- Make sure not to leave any affected area
- Let it dry for several hours in a well-ventilated area
Note: This will help in lasting the lifespan of your bag. If you want to completely wash your leather bag, thoroughly wash it before proceeding to this (removing mold or mildew step) step.
10. How to Prevent Discoloration or Fading after Washing a Leather Bag
If you want to prevent your motorcycle leather bag from discoloration or color fading, let it completely dry before applying any wax or polish to it. Let your bag dry for a week before mounting it back on your motorcycle. Try to keep your bag away from direct sunlight or extreme heat. If you notice any discoloration or fading, try using the leather dye or color restorer to preserve it.
Note: Make sure to follow the instructions provided with the dye to get the desired results.
11. Regular Maintenance Tips for Leather Motorcycle Bags
Here is a list of regular maintenance tips to help you preserve your leather motorcycle bags:
- Pat the motorcycle bag down with the help of a clean, soft, and dry cloth every day or weekly after a ride.
- Always make sure to leave or park your bag in a shaded area/ covered.
- Use a leather bag conditioner to maintain its best condition. It will also help keep the leather motorcycle bag from cracking or drying up.
- Avoid placing any sharp or heavy objects on your bag that can cause indentations or scratches.
Read More: How to Clean Your Leather Saddlebag?
12. When Do You Need to Get Professional Help for Cleaning?
If your leather motorcycle bag requires comprehensive cleaning, restoration, or stain removal, then it is advised to ask for professional help. Professional cleaners know how to clean leather bags of every type without damaging their texture, color, or design. Also, they can easily tackle tough stains and built-up dirt and restore the bag's appearance.
13. Conclusion
Enjoy properly cleaned and maintained leather bags by using this cleaning guide. You can keep your leather motorcycle bag in good condition without causing any damage by following the appropriate tips. Don't forget to assess the condition of your bag before cleaning; choose the cleaning process according to the condition of your bag. Moreover, your leather motorcycle bags deserve the best care. Lastly, you need to take care of your bag to ensure it lasts as long as possible. If you want to improve the performance, and aesthetics of your motorcycle, as you did before with the use of a leather bag, you can install aftermarket motorcycle parts such as fairings, sissy bars, crash bars, handlebars, sissy bar bags, or many more. Enjoy Riding!


Leave a comment
All comments are moderated before being published.
This site is protected by hCaptcha and the hCaptcha Privacy Policy and Terms of Service apply.