
he autumn leaves are turning brown. Cold winds blow across the land hinting of winters bone chilling cold. Soon the white flakes of old man winter will be filling the streets and the icy reach of his breath will freeze the land and ponds. The time has come to park and winterize your bike. Preparing your motorcycle for the winter is not as difficult as you might think.

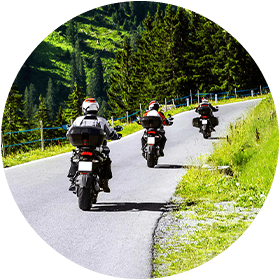
Photo credit: @Flickr
Getting your motorcycle ready for winter doesn’t mean parking it in the corner of the garage and throwing a tarp over it, and then forgetting about its existence until spring. You need to perform a proper motorcycle winter maintenance program, which will protect your bike and make it easier to get it back on the road come spring.
Follow these steps to prepare your bike for winter storage.
- To protect the painted surface and chrome parts from dust & moisture, clean your bike before you park it for the winter.
- To stop your tires from cracking and/or rotting, place a piece of plywood under each tire, and make sure the bottom of the tire is sitting completely on the wood. If possible, putting the bike on a stand, and off the ground, is best.
- Check the tire pressure, and if any tires are low inflate to the proper pressure. You should never park your bike with a flat tire as the tire is more prone to cracking this way.
- Drain your bike’s oil and flush out the crankcase to stop corrosive deposits from forming through the winter.
- Stop rust from forming on the chain by lubricating it using the oils recommended by the manufacture (see your owners manual). Clean the chain before you lube it. Any dirt left on the chain will cause the chain to wear faster and speed up the wearing of the sprockets.
- Old gasoline can plug the carburetor and fuel line. Gas sediments can clog the fuel lines so drain all fuel from the tank, carburetors, and fuel lines. If you’re keeping the gasoline in the tank, at least use a fuel stabilizer.
- Check your bike’s wiring by sliding you fingers along any of the exposed wiring feeling for cracks and/or breaks. Visually inspect when you can. If there is damage to the casing repair or replace.
- Check all connectors to make sure they are tight.
- Carefully disconnect the battery cables so you don’t short the battery out. Over the winter months, the battery will discharge and this can cause the battery to freeze and crack if you leave it connected. Remove it and store it in a warm vented place sitting on a piece of plywood to catch any acid leaks. Connecting it to a battery tender of some sort will keep it at optimum charge level through the winter.
- Clean the battery posts and cables using a fine steel wool or a battery cleaning tool. Once the posts are clean, apply Vaseline. This will not effect the cable connections when you hook up the battery in the spring.
- Never let the battery go uncharged for longer than a two week period.
- Examine the brakes for any wear or damage to the pads or the rotors. Make sure you top up the brake reservoir.
By following these few simple preparations, you’ll be on your bike as soon as the snow melts in spring. Just add oil and gas, and reconnect the battery, and you’ll be ready to hit to roads!


Leave a comment
All comments are moderated before being published.
This site is protected by reCAPTCHA and the Google Privacy Policy and Terms of Service apply.