
Motorcycle wheel bearings are simple ball bearings that separate the inner and outer rings on wheels and help them move freely by reducing friction. These ball bearings can help distribute weight and become damaged due to being under constant stress. Since motorcycle wheel bearings are such small parts, most riders neglect maintaining them and do not replace them until the wheel bearings fail completely.
Damaged motorcycle wheel bearings cause harsh vibrations to travel to the handlebars and create a humming sound. They can also damage the wheel hub and increase the risk of getting into an accident. Riders can avoid these situations by inspecting, maintaining, servicing, and replacing wheel bearings consistently. The instructions on how to do so are mentioned in every motorcycle owner’s manual. However, if you have further questions about maintaining motorcycle wheel bearings, then read this article.
Table of Content
1. How Long Do Motorcycle Wheel Bearings Last?
Motorcycle wheel bearings can last as long as your bike thanks to the oil seals that prevent dirt and moisture from getting inside the housing and damaging the bearings. However, the oil seals may become less effective at protecting the bearings if you ride your bike frequently through water, on rough roads and off-road trails, or perform wheelies and other stunts. Riders who pack too many heavy luggage bags also risk damaging the wheel bearings. If the wheel bearings are well-maintained, they can last about 100,000 miles before needing to be replaced.
2. Signs of Damaged Motorcycle Wheel Bearings
A rider should always check the wheel bearings during every maintenance check. Signs of damaged motorcycle wheel bearings include the following:
2.1 Harsh Vibrations
Motorcycle bearings play a key role in ensuring a smooth ride. If they are damaged, you will feel a lot of vibrations in the handlebars due to the front wheel not rotating smoothly. However, vibrations in the handlebars are not always caused by damaged wheel bearings. They could be a sign of damaged spokes, deflated tires, or incorrect wheel alignment. In any case, get your bike checked immediately if you feel any unusual movement in the handlebars.
2.2 Rear Wheel Seems Flat
When rear wheel bearings are damaged, it may feel like the rear tire is deflated or the axle nut is loose. If you still experience wobbling even if the rear tire is fully inflated and the axle nut is locked in place, worn wheel bearings are the likely cause.
2.3 Difficulty Handling the Bike
Damaged wheel bearings make it difficult to steer the bike properly. To check, find a road away from traffic and ride your bike at a moderate speed. While riding, let go of the handlebars for a split second to see if the bike swerves to one side. Damaged wheel bearings will cause the front end to wander from side to side at the wheel hub and axle, also referred to as “play in the wheel bearings.”
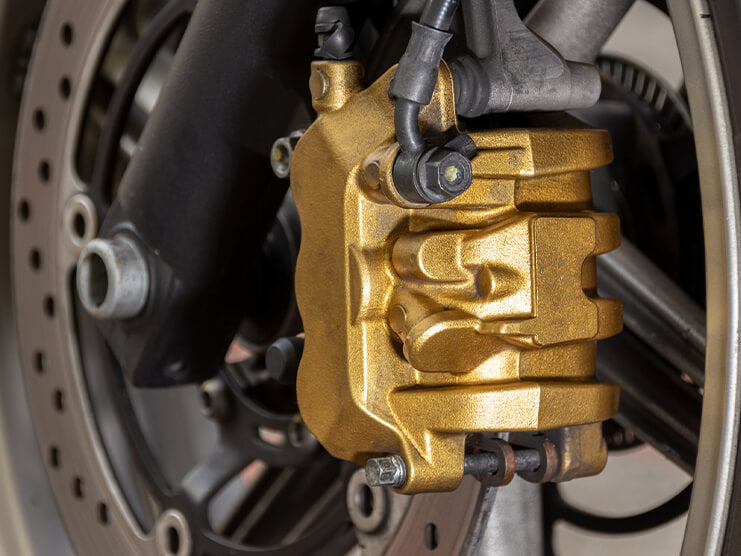
2.4 Brake Discs Heat Up Quickly
If the wheel bearings are damaged, they will cause friction in the brake discs and cause them to heat up more quickly even after riding for only a few blocks.
2.5 Unusual Sounds
If your wheels make unusual humming sounds during the ride, it could be because of damaged bearings causing increased friction. But this is the least a reliable way to determine if your motorcycle has worn out bearings due to being difficult to discern from other noises on the road.
3. Causes of Damaged Motorcycle Wheel Bearings
Besides moisture, dirt, and off-roading, there are other factors that can cause wheel bearings to wear out prematurely:
3.1 Incorrect Installation
Many inexperienced mechanics install the bearings incorrectly after inspection. Incorrectly installed wheel bearings risk suffering internal damage. Also, steel bearings with no seals should be filled with grease to prevent damage. Failing to lubricate the bearings with grease before installing can reduce their longevity.
3.2 Low-Quality Bearings
If you bought a second-hand motorcycle, there is a high chance that the previous owner did not maintain the original bearings properly or replaced them with low-quality bearings for resale purposes. These bearings are not heat-resistant, lack rubber seals, and last only for a short time.
3.3 Aggressive Riding Styles
If you enjoy racing or an aggressive riding style, your motorcycle wheel bearings will wear out faster. Heavy impacts are one of the main causes of premature wheel bearing failure.
Liquid-cooled motorcycles are generally more efficient than air-cooled models. This is because liquid coolants can absorb and transfer heat more effectively than air. As a result, liquid-cooled motorcycles are better suited for high-performance riding and traveling in extreme weather conditions.
4. Is It Safe to Ride a Motorcycle with Damaged Wheel Bearings?
No. Riding a motorcycle with damaged wheel bearings can cause the wheels to lock up, resulting in fatal accidents. When riding on highways, it is best to call for road assistance or seek help from passersby.
5. How to Clean & Grease Motorcycle Wheel Bearings
Motorcycle wheel bearings work best when they are free of dirt and dust. In addition, cleaning the wheel bearings can help them last longer and reduce wear and tear. You should clean your bike’s wheel bearings at least once a year. Cleaning of the wheel bearings is essentially the same for all motorcycles. The steps for cleaning motorcycle wheel bearings include the following:
Motorcycle Wheel Bearing Cleaning Steps
- Remove the Motorcycle Wheel Bearing
- Disassemble the Wheel Bearings
- Pry Out & Put the Balls in a Safe Place
- Clean the Wheel Bearing with a Clean Cloth and Citrus Cleaner
- Apply Grease on the Motorcycle Wheel Bearings
- Reassemble the Bearings and Wheel
5.1 Detailed Steps
- Position your motorcycle so no weight is applied onto the wheel you are removing and disassembling.
- Once the wheel is removed, take off the nuts, tire, wheel, and brake rotor. If your bike has a disc brake system, then it will have brake rotors attached to the axle that slide over the lug nuts connecting the rotor to the wheel hub. Before you disassemble the wheel, make sure you measure the distance between the brake rotor and the wheel hub and count the number of threads on both sides of the axle to ensure proper reassembly of the wheel after cleaning the bearings. Write down the measurements on a piece of paper.
- Next, use a wrench to remove the bearing in the inner ring. Take out the balls with a magnetic tool and put them in a safe place. Also, count the number of balls in each motorcycle wheel bearing.
- Carefully remove the seals with a seal puller.
- Lay out all the parts in front of you in the same order you removed them.
- Clean the bearings with a clean damp cloth or a citrus cleaner. Rub off any rust or dirt accumulated on the bearings with a soft cloth or brush. Blast the wheel bearings with air. Wipe any contaminants off the rubber shields with a lint-free cloth and soapy water. Make sure you wear gloves to avoid transferring old grease from your hands back onto the bearings again.
- After cleaning the bearings, apply bearing grease with a brush. You can also soak the bearings in isopropyl alcohol or mineral oil for proper lubrication. Lubricating the bearings helps keep them in good condition longer.
- Reassemble the wheel bearings by placing the inner ring directly on the shaft, add the balls, and then put the outer ring on top. Make sure all of the parts are properly aligned.
- Reassemble the bearings, axle, and brake rotor, and reinstall the axle on the wheel. Make sure that no balls fall out in the process. Lastly, put the screw, washer, and lock nut back in place and install the wheel back on the motorcycle.
- During the cleaning process, if you find the bearings are completely worn out, it is best to replace them rather than reinstall the same damaged bearings.
6. How to Replace the Motorcycle Wheel Bearings
Replacing wheel bearings requires some technical knowledge, which most mechanics possess. However, if you have experience maintaining your bike by yourself, you can handle this task without hiring professional help.
Several advantages of replacing your motorcycle’s wheel bearings include:
- You save money by purchasing bearings from local supply stores.
- Bearings are readily available online at discounted prices.
- Most bearings available sy local stores and online come with oil seals that protect the bearings from dirt, dust, moisture, and other contaminants.
- You can opt for ceramic wheel bearings that roll faster, last longer, and help increase the cruising speed of your motorcycle.
6.1 Cost of Motorcycle Wheel Bearing Replacement
If you hire a mechanic to replace your motorcycle’s wheel bearings, the service will cost around $300-$400, depending on the mechanic you hire, your motorcycle, and the location. If you do it yourself, you would only have to spend $15-$40. Bearings with oil seals can cost around $30-$70.
6.2 Time Required to Replace Wheel Bearings
It takes 30-60 minutes to remove the wheel, disassemble it, remove the old bearings, install new bearings, and reassemble the wheel. Time varies depending on your current skill and level of experience.
Things You’ll Need
- Hot Air Gun
- Wooden Block
- Seal Puller
- Hammer
- Bearing Drift
- Cleaner
- New Rubber Sealed Wheel Bearings
- Steel Rod
- New Oil Seals
Six-Step Motorcycle Wheel Bearing Replacement Method
- Remove the Old Oil Seals & Bearings
- Clean and Inspect the Bearing Housing
- Scuff the Bearing Housing to Smooth-out the Surface
- Blast Warm Air on the Inside of the Housing
- Install New Bearings and Oil Seals Using a Drift
- Reinstall the Wheels
6.3 Detailed Steps
- Remove the old oil seals using a hub oil seal remover. Do not use a screwdriver or you risk damaging the seal housings. You can buy a hub oil seal remover online or get one from a motorcycle parts shop.
- Place the bearing drift against the wheel bearings. You might have to move the spacer between the bearings to one side. If using the drift doesn’t work, use a screwdriver to move the spacer to one side.
- Place the wooden block on a table. Put the wheel on the wooden block and drift the bearing at the bottom of the wheel hub. Move the drift around the entire circumference of the inner ring. Remove the wooden block underneath and let the bearing fall onto the table.
- Use a bearing cleaner to remove any rust, dirt, grime, and old grease accumulated inside the housing. Check the bearing housing for any damage that might have occurred while removing the bearing.
- Use sandpaper to gently smooth out any damage on the bearing housing.
- Use the hot air gun to warm up the inside of the bearing housing. This step is optional, but if you blast the housing with warm air, it will make it easier to install the new bearings. However, do not use too much hot air or you risk damaging the finish of the bearing housing.
- Install the new rubber-sealed bearing in the housing. Make sure that both parts are perfectly aligned or the bearing won’t fit. Do not try to install the new bearing forcefully or you risk damaging the housing and bearing.
- Use an aluminum bearing drift to drive the bearing inside the housing.Once done, flip over the wheel, install the spacer, and drive the other bearing in the same way.
- Install new oil seals to replace the old ones using a drift. Do not use a socket wrench to avoid damaging the seal housing.
- Reinstall the wheels on the motorcycle and go for a ride to test the new bearings.
7. Takeaway
Motorcycle wheel bearings are robust and can last a long time, but they are also susceptible to damage, especially if they lack rubber seals and are not filled with grease. If not maintained properly or replaced on time, they can cause serious damage to your motorcycle and yourself. Hence, it is recommended that you prioritize wheel bearings and get them inspected during every maintenance check to prevent mechanical failures and expensive replacements.
If you are facing motorcycle luggage storage problems then you can get saddlebags, swing arm bags, tank bags, tool bags, and sissy bar bags from Viking Bags.
Also Read: Summer Motorcycle Maintenance Checklist

Leave a comment
All comments are moderated before being published.
This site is protected by reCAPTCHA and the Google Privacy Policy and Terms of Service apply.